
Creating a Monitor Group

Individual Teachers, campus-level administrators, and district-level administrators can create Monitor Groups.
When a Monitor Group of target students is created at the campus or district level, the teachers who have students in the group can automatically view their students in the Monitor Group. They will only be able to see the students they teach, not all students in the group.
Teachers and staff Members with approved access to students can create their own Monitor Group.
Step 1: Select Aware > click on the Students-Profile tab>
Step 2: Click on Monitor Groups > Select Create a Monitor Group
Step 4: In the pop-up window enter Group Title (title should be distinctive & Description is optional)>Select the Level by clicking on the downward carrot>Select the Campus by clicking on the downward carrot>click Continue on the bottom left
Administrators who create the Monitor Group must set the Levels to one of the following:
District- Anyone in the district with access to students in the Monitor Group can view the Group. Users will only see the students they have access to.
Campus-Anyone on the campus with access to students in the Monitor Group can view the group. Users will only see students they have access to.
Personal- Only the creator of the Monitor Group can access and edit the group. Teachers will have the Personal level assigned by default.
Step 5: Add students to your monitor Group, by selecting Select Students from Table >click Continue
Step 6: In the new popup window, filter down your list of students by Grade, Teacher, Programs. You can add entire classes or individual students. Once you have selected students click on Apply & Create to finish.
Once your Monitor Group is created, your monitor group will display as shown below:
You can now view and analyze data for your Monitor Group in students profile
Managing Students , Editing Group, and Deleting Group
You can also Manage Students, Edit Group and Delete Group from the Manage My Monitor Group screen by clicking on the three dot icon
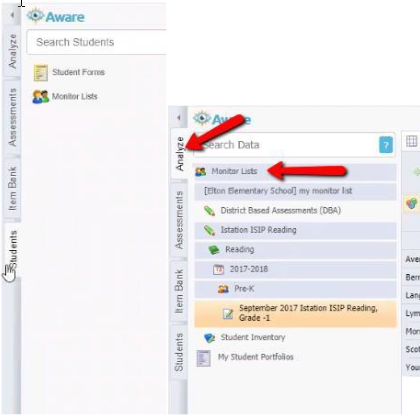
Once your Monitor Group is created, you will now see the Analyze and the Assessments tab in Aware. You can now view and analyze data for your Monitor Group.
Thank you for visiting! If you have any questions or issues, please submit a helpdesk ticket in Eduphoria. Here are the steps to complete your helpdesk ticket: How to Report A Problem in Eduphoria