
Adding an Approved Chrome Extension
Follow this guide to learn how to add an allow listed Chromebook Extension.
Allow Listed Chromebook Extensions are extensions that student and staff users have the option to add to their school google accounts.
When a student or staff user installs an allow listed Chromebook Extension to their school google account, the extension is then available on any Chromebook they sign into.
Chromebook Extensions are user based so they are not directly installed on Chromebooks and instead are installed by a user to their school google account.
Only Allow Listed Chromebook Extensions that have been approved can be installed for staff or student users. Follow the How to get a Google App or Extension approved steps to request that an app or extension get approved.
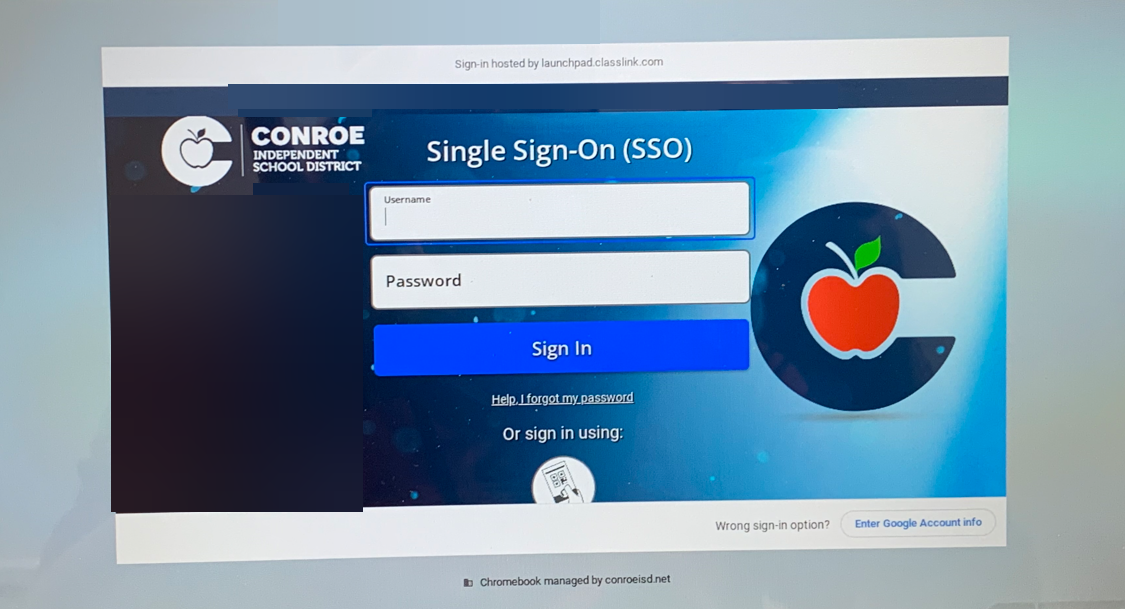
To start the process of installing an Allow Listed Chromebook Extension login to the Chromebook.
If you are a teacher that wants your students to add an extension you will need to have them sign into the Chromebook so the extension is installed on their school google account.
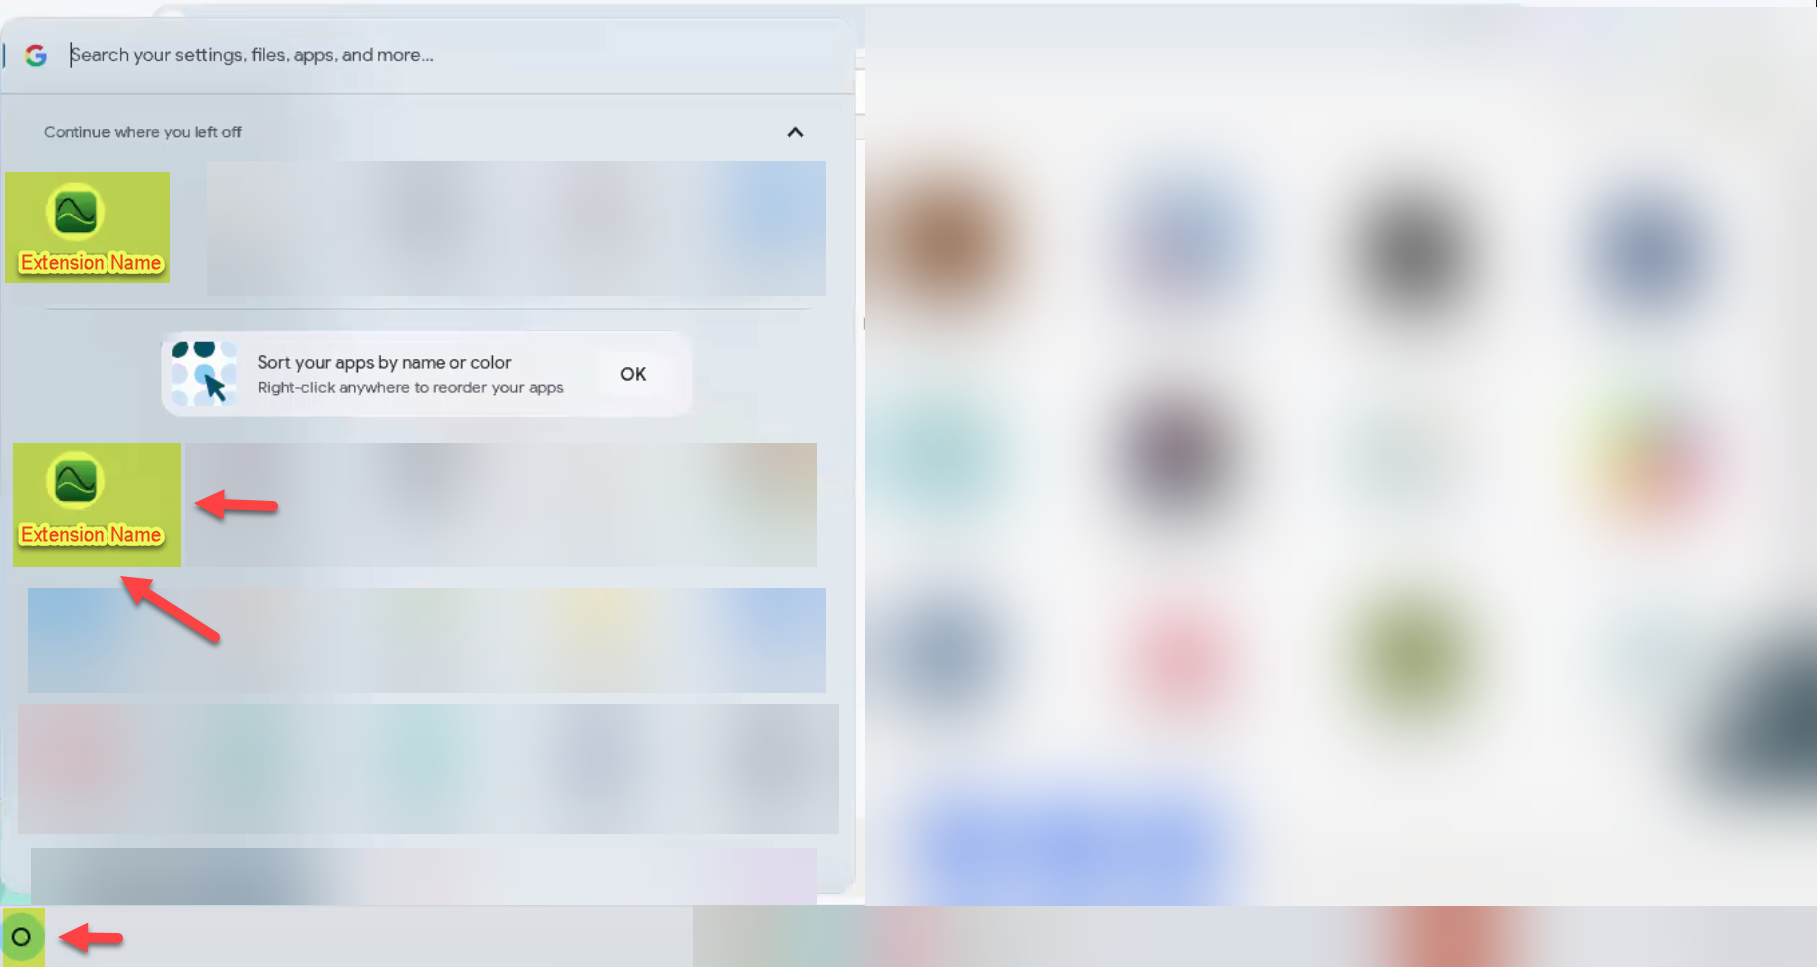
Once the user is logged into the Chromebook, click on the small circle in the bottom left corner of the screen to open up the Chromebook Apps Menu.
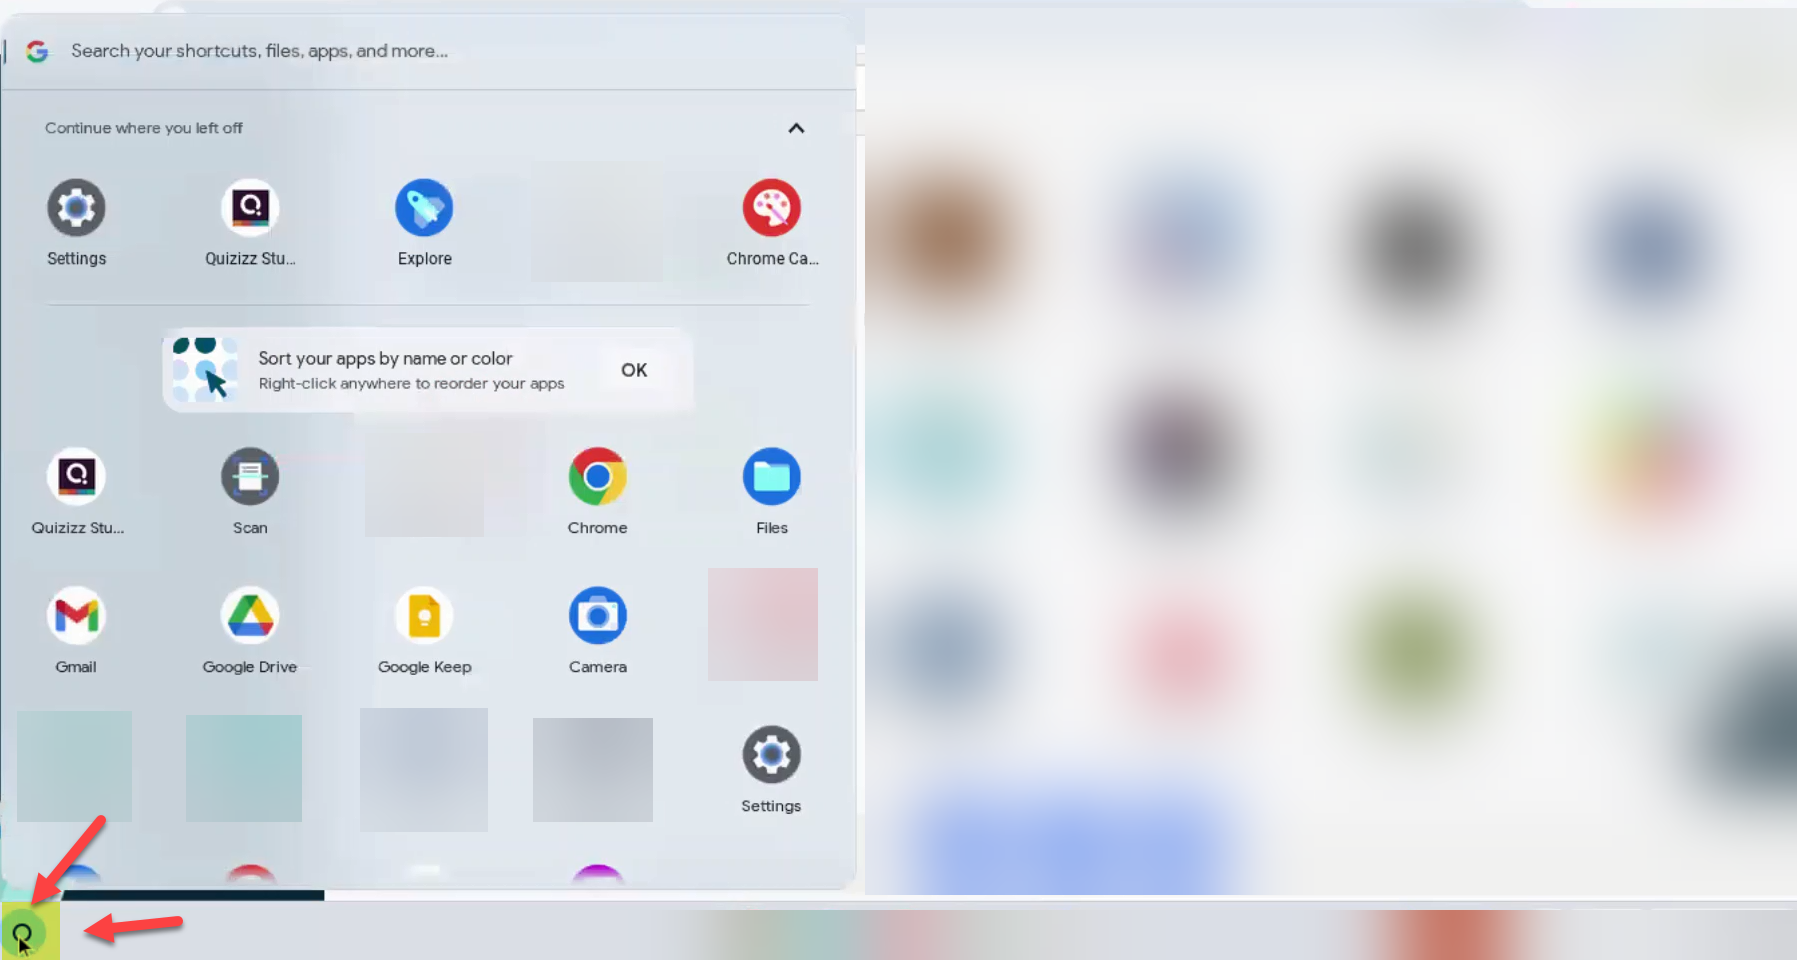
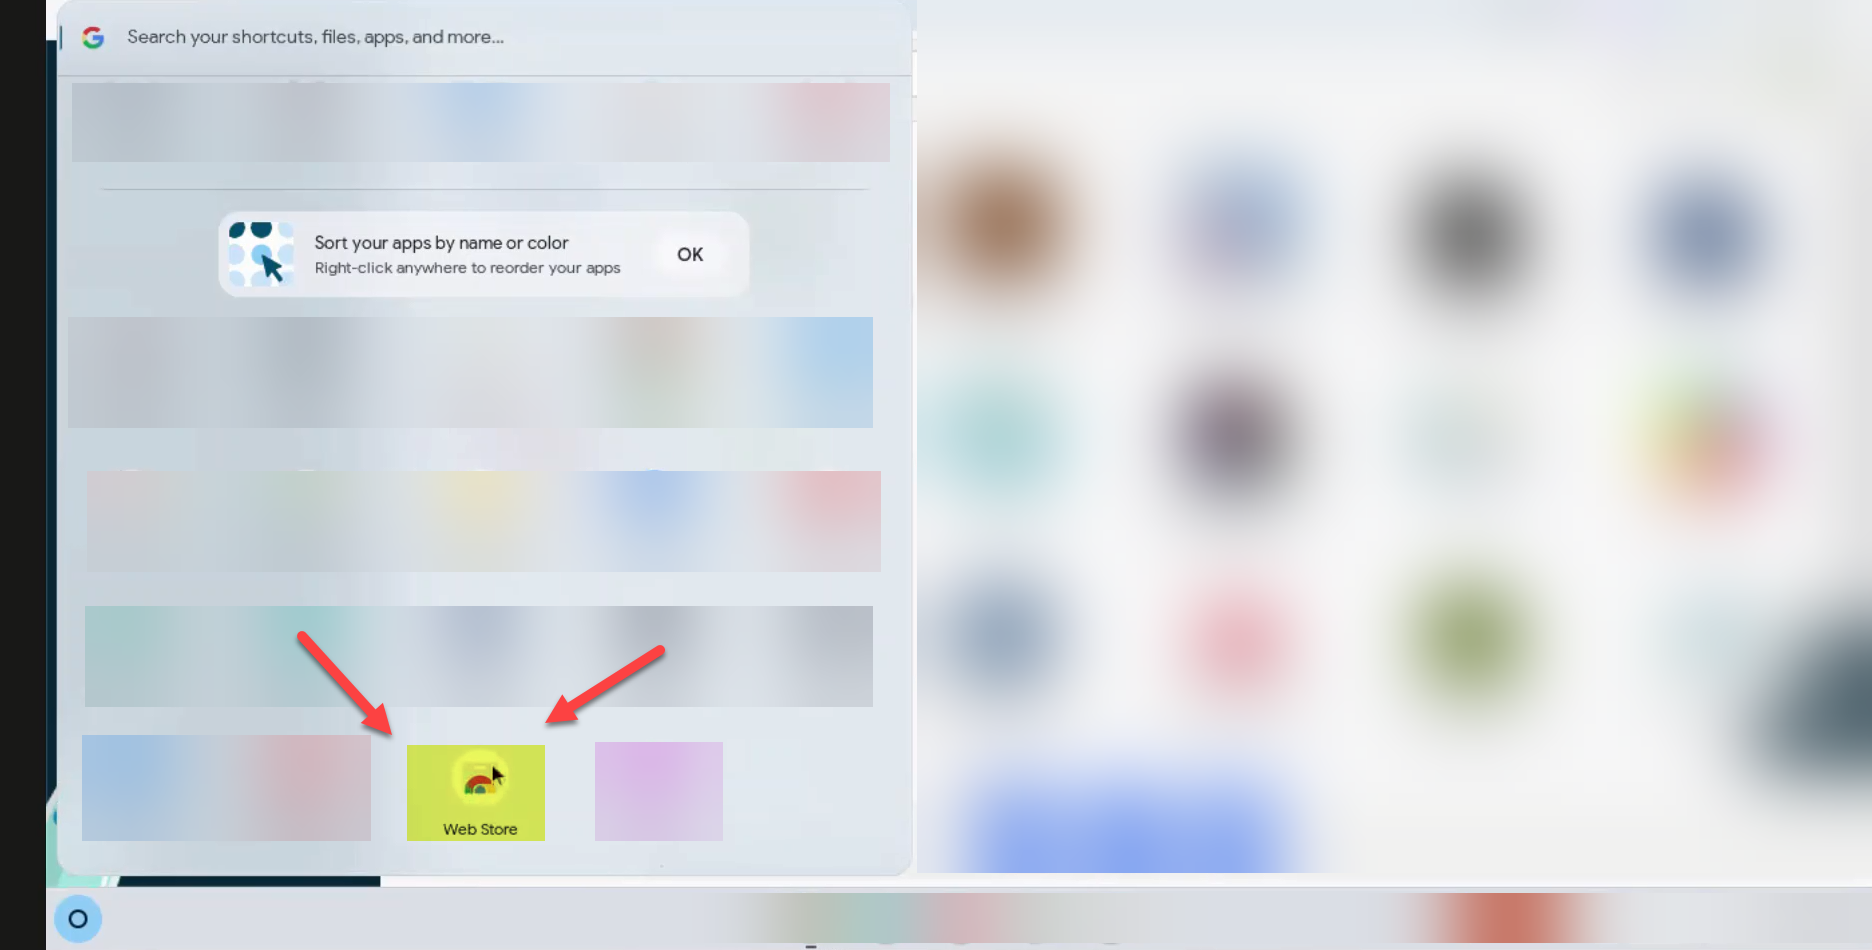
Find and open the Chrome Web Store App.
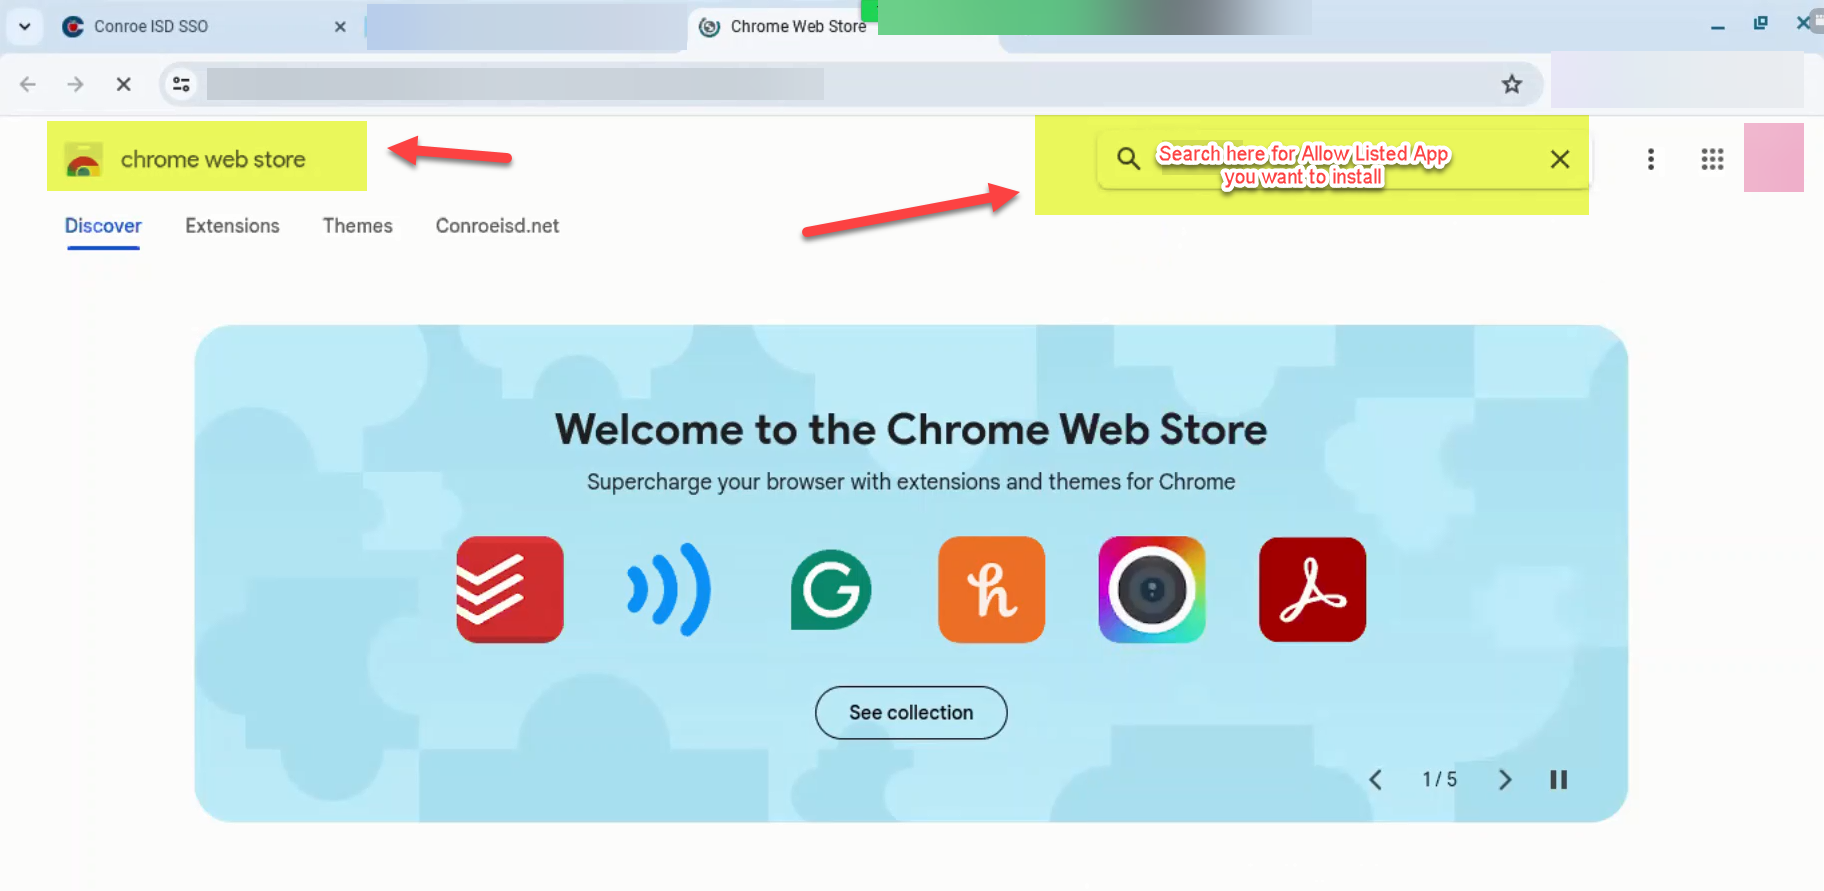
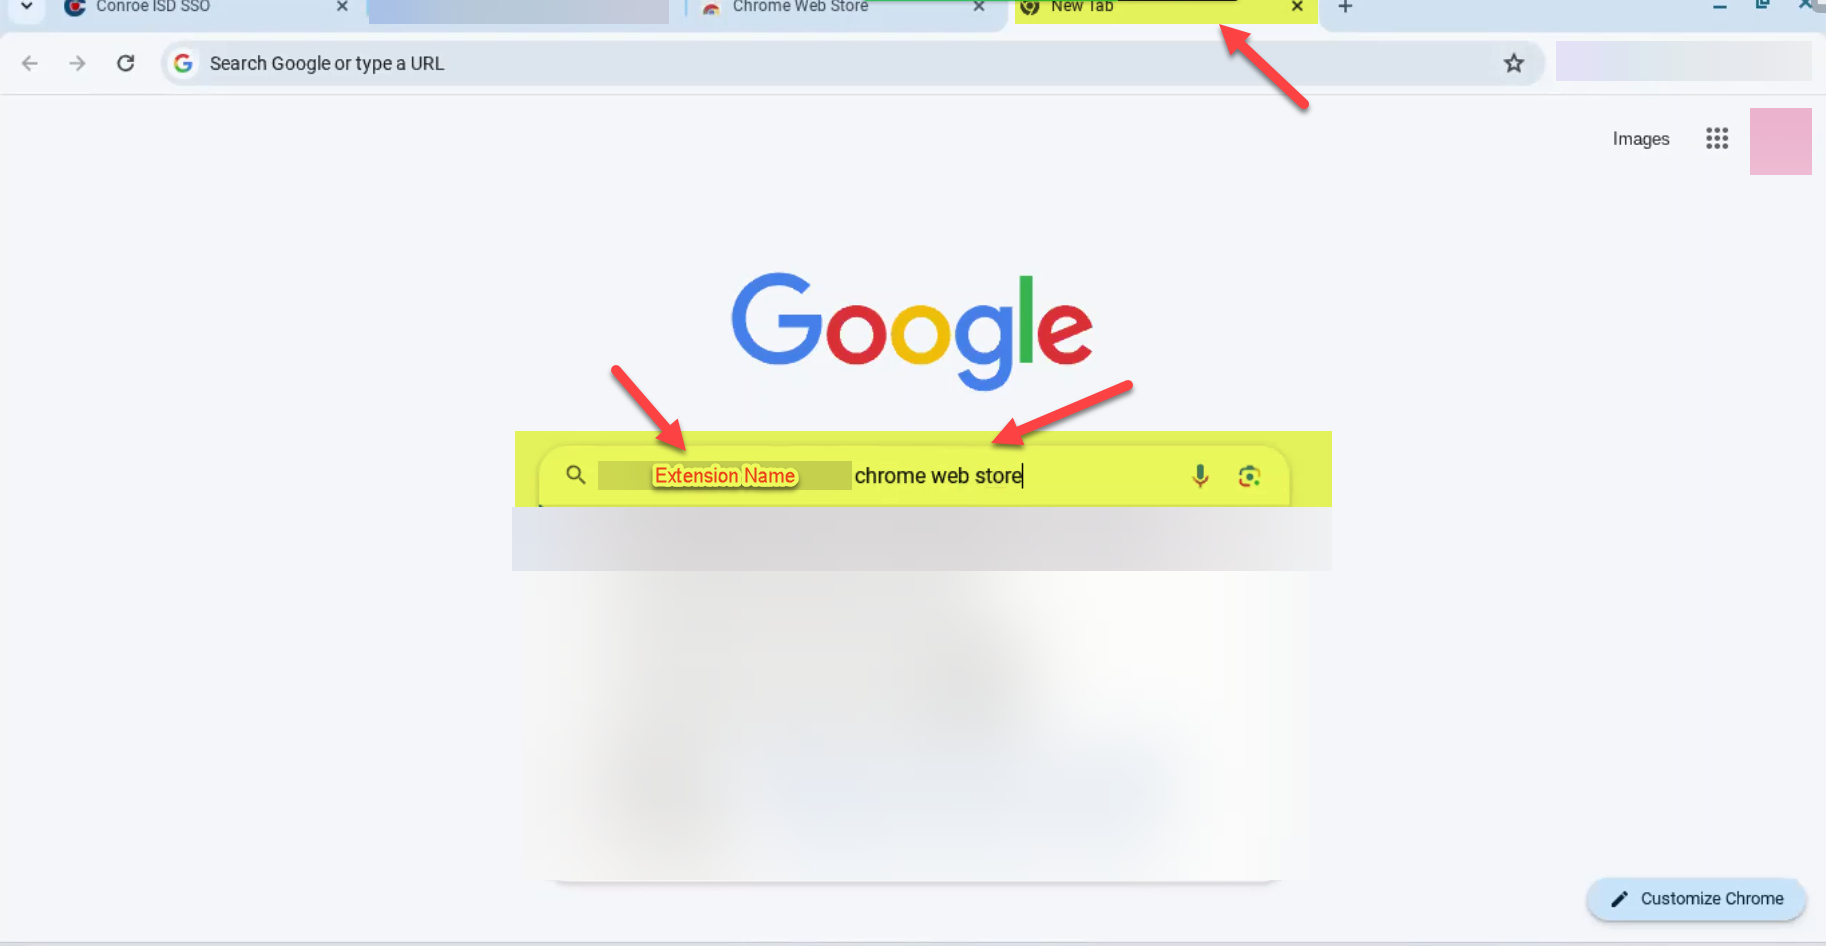
A new tab will open to the Chrome Web Store in your Chrome Browser. Use the search bar to search for the Allow Listed Extension you want to install.
If you have trouble finding the Allow Listed Extension using the Chrome Webstore Search Bar you can then open a new browser window and search for the title of the Allow Listed Extension you want to install adding the words Chrome Web Store after the name of the Allow Listed Extension.
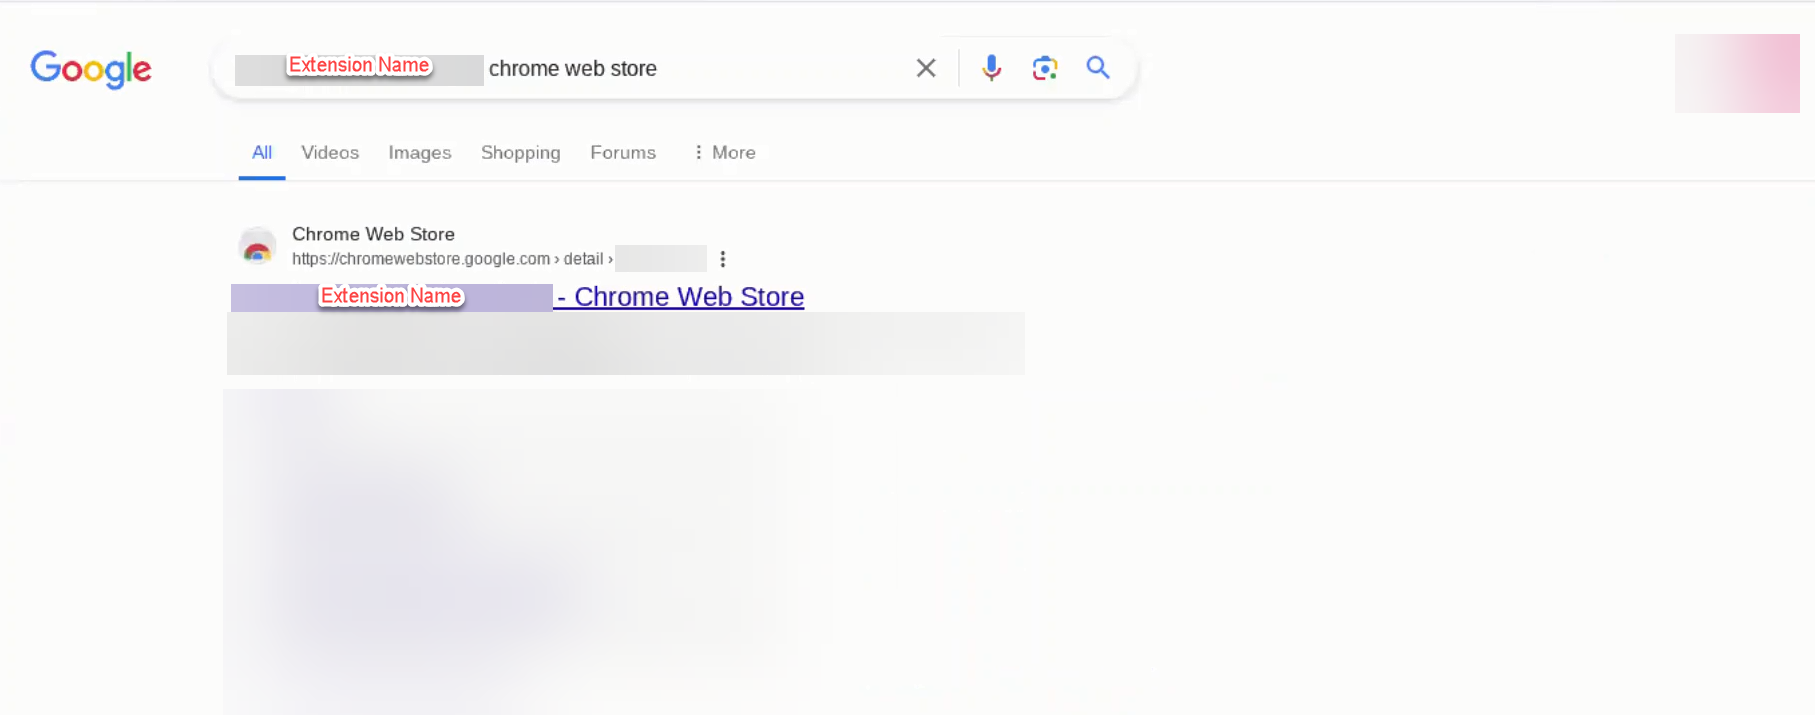
Click on the link that shows the name of your extension followed by the words Chrome Web Store. It is usually the first link on the list.
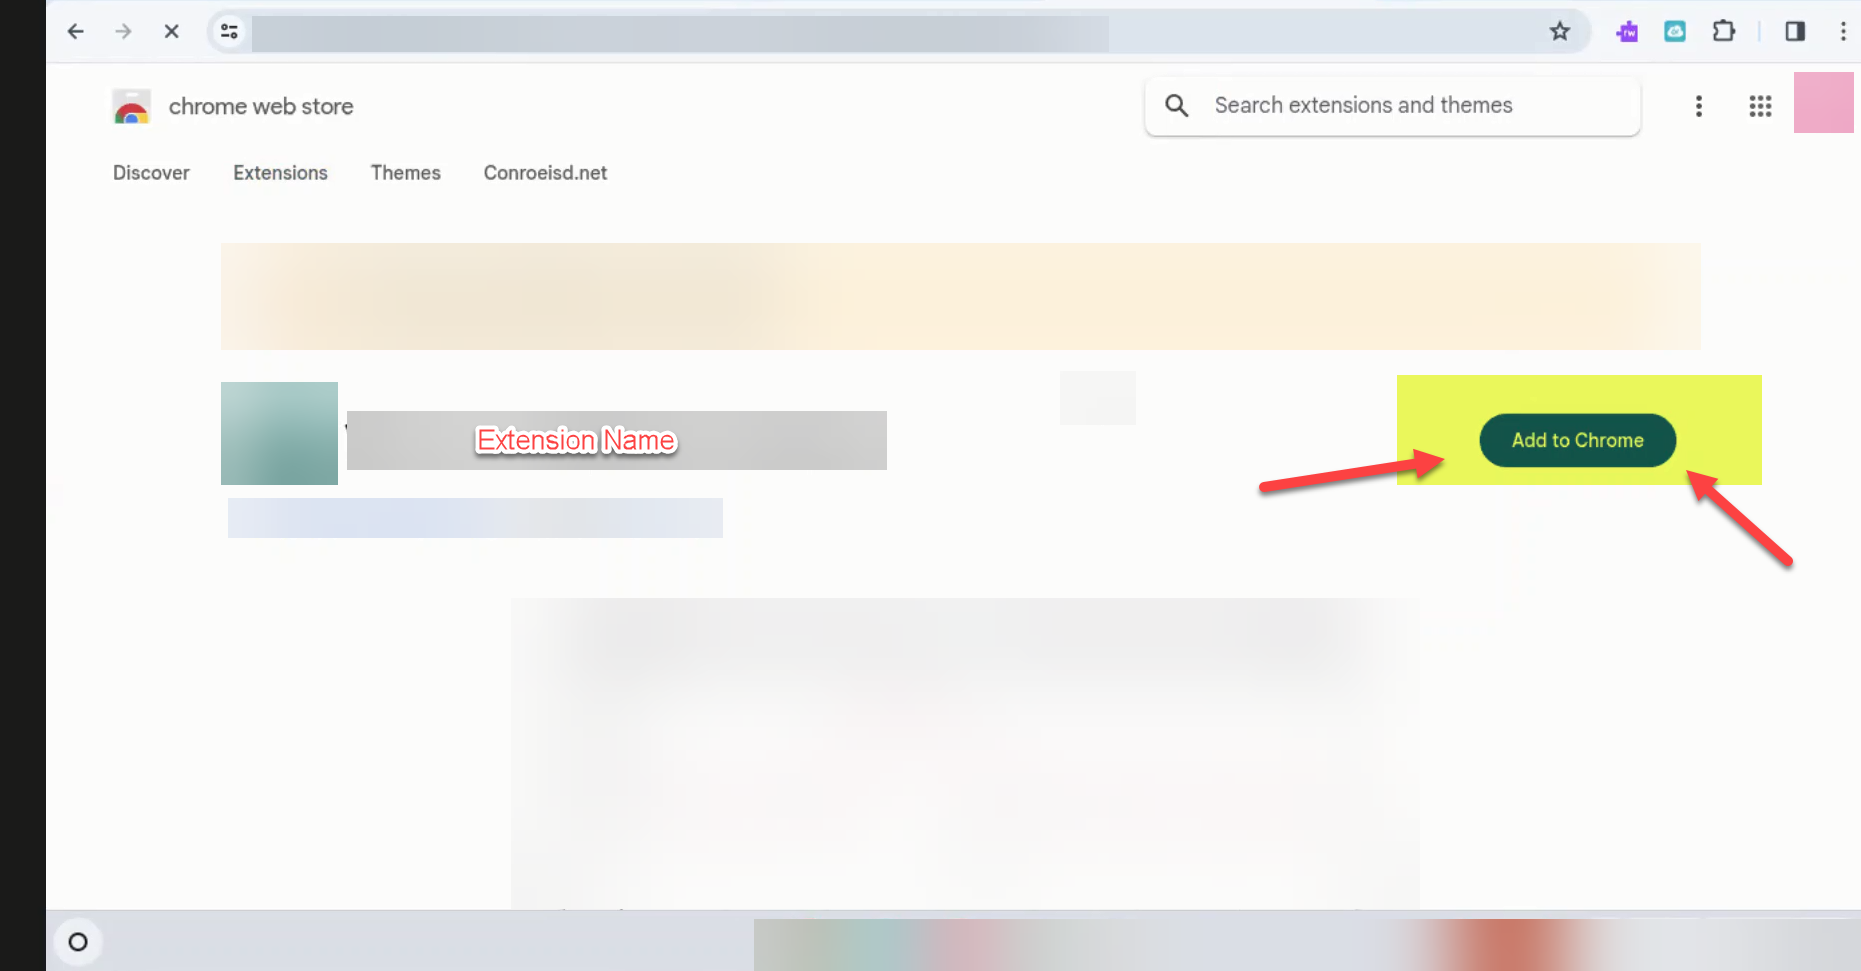
Once you are on the Chromebook Extension page in the Chrome Web Store for the Allow Listed Extension. Click on Add to Chrome to install the extension to your School Google Account.
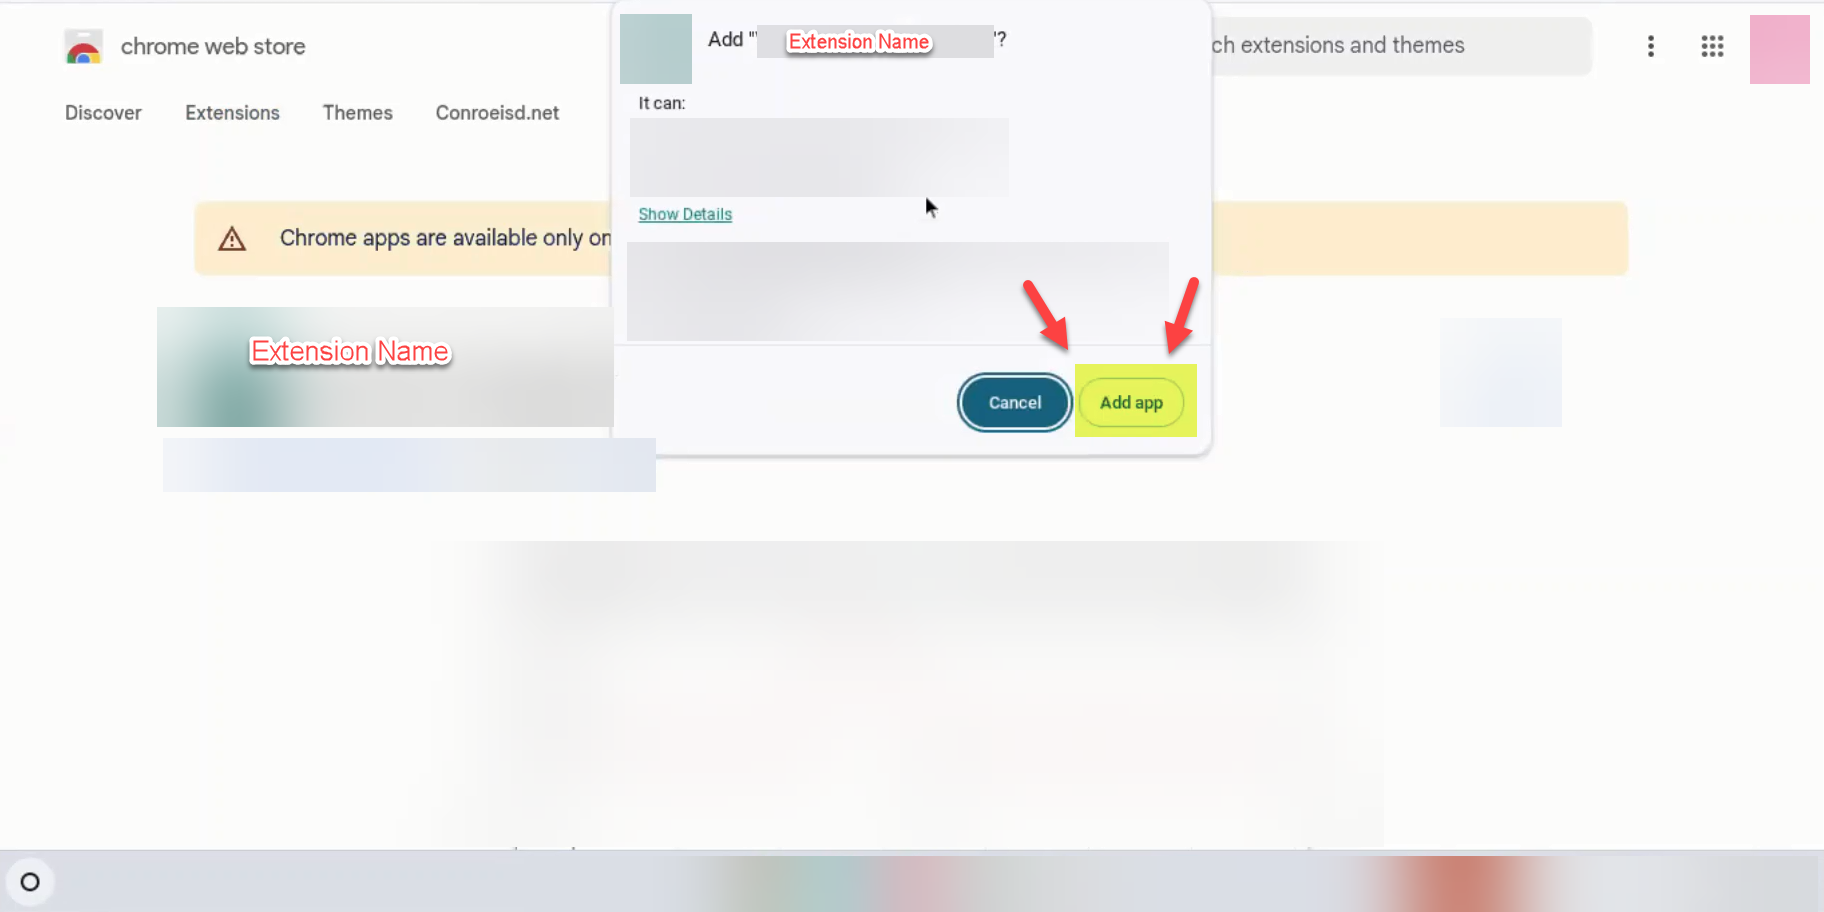
A pop up message box will appear. Click Add app to add the Allow Listed Chrome Extension to your School Google Account.
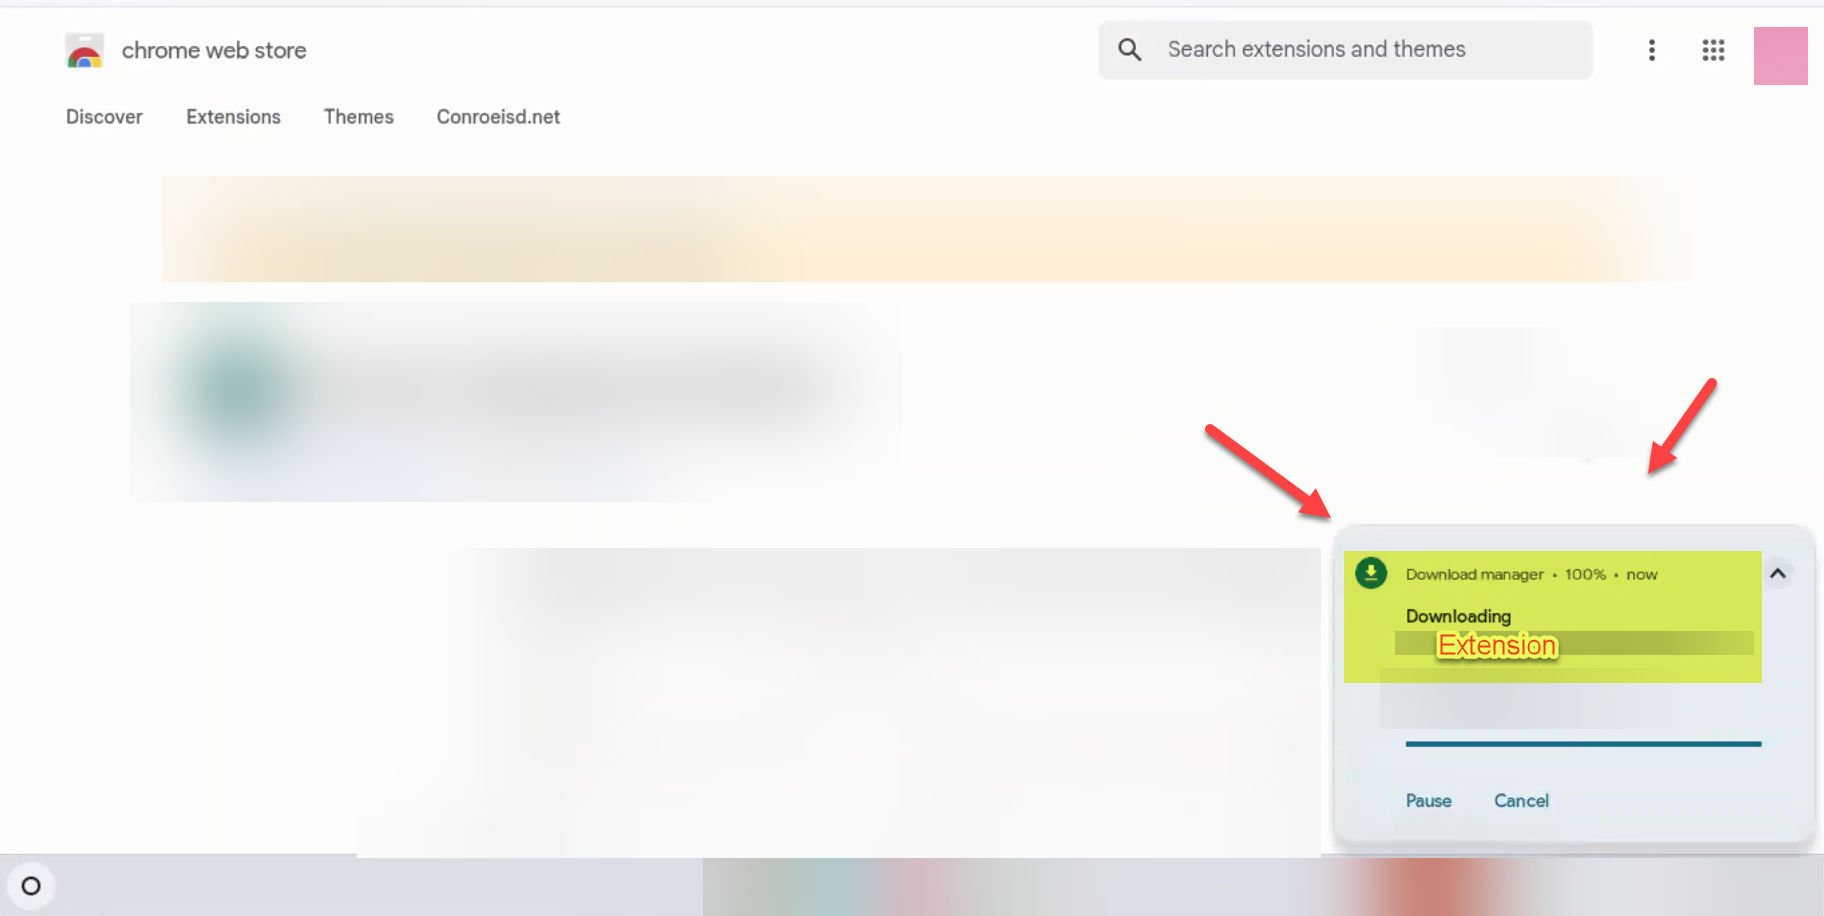
A pop up message will appear in the bottom right corner of the Chromebook screen that shows the Allow Listed Extension is being downloaded and installed.
To check that the Allow Listed Extension was added correctly after the download is complete, click on the small circle in the bottom left corner of the Chromebook screen again. If you see the Allow Listed extension you installed listed there then the Allow Listed Extension has been successfully added to your School Google Account.
Check out these other great Chromebook Tips and Tricks.