
This guide explains how to set up an Apple TV using the remote after it has been wiped. This process connects the device to the network so it can receive the correct district profile.
Ensure your Bluetooth is turned on for your iPhone or iPad before starting, as you will need it to verify the Wi-Fi connection.
Prerequisite: Verify the Wipe
-
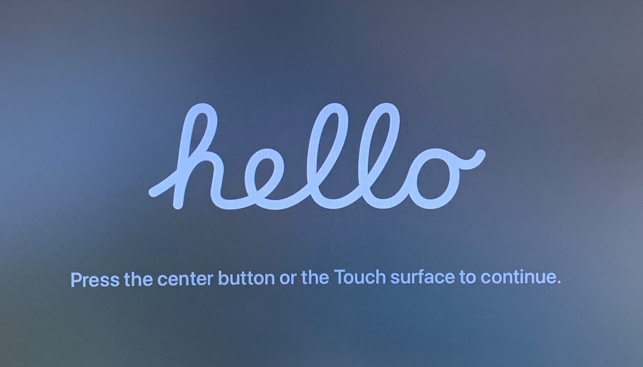
Before starting, ensure you see the "Hello" screen. If you do not see this screen, the wipe was not successful.
Setup Steps
-
Click the remote to view the language options and select English.
-
Select United States.
-
Select Continue on the Data & Privacy screen.
-
Select Set Up Manually.
-
Select Don’t Use Siri.
-
Select the CISD-Guest Wi-Fi network.
-
Select "Continue on iPhone or iPad" to authenticate the Guest Wi-Fi connection.
-
A prompt will appear on your nearby iPhone or iPad. Tap Continue on your device.
10. A 4-digit code will appear on the Apple TV screen.
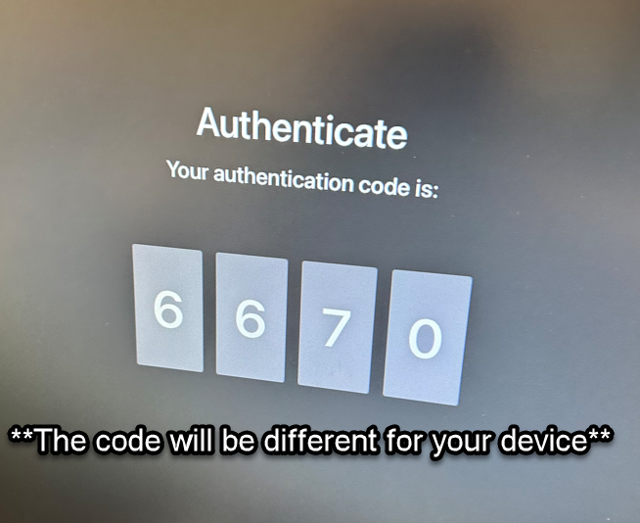
11. Enter the 4-digit code into the prompt on your iPhone or iPad.
12. The CISD Guest Wi-Fi login page will open on your phone or iPad. Tap Accept.

13. Wait for the Apple TV to connect to the network.
14. The Apple TV will automatically begin the Activation process. Wait for this to complete.
Verifying Success
The Apple TV should automatically enter Conference Mode. You will see the AirPlay instructions and the device name in the bottom left corner.
The Apple TV will initially remain on CISD-Guest, but it will eventually switch over to CISD-EDU automatically once the profile updates.
15. Check the name. It should follow the format: School Name_#.
Need additional help? Click here for further assistance.