
Follow this guide to learn how to create a "Managed View" in Incident IQ (IIQ). This feature allows you to filter the system and see a complete list of all assets assigned to a specific room.
How to Create a Room View
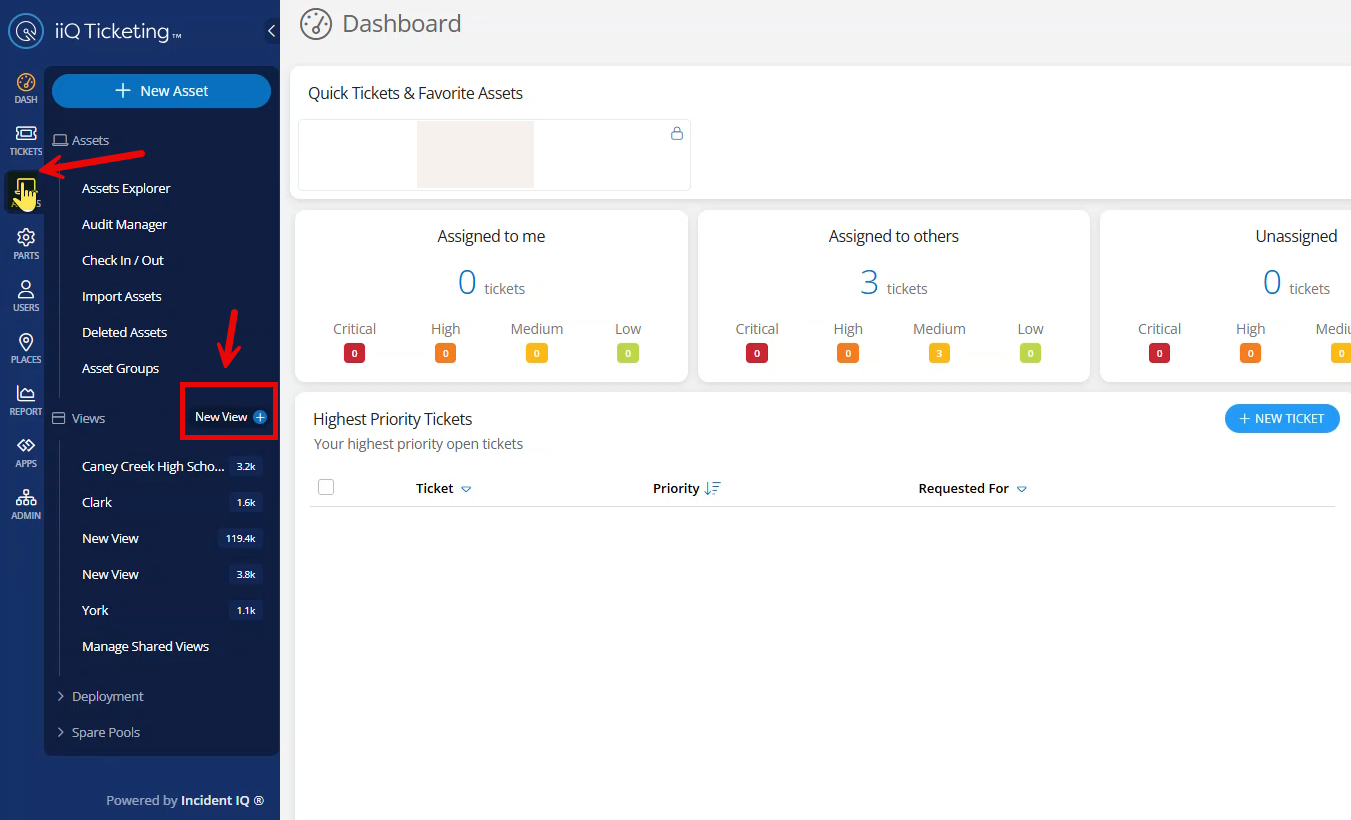
Step 1: Navigate to New View
Log into Incident IQ. On the main navigation menu, hover your mouse over Assets and click on New View from the drop-down menu.
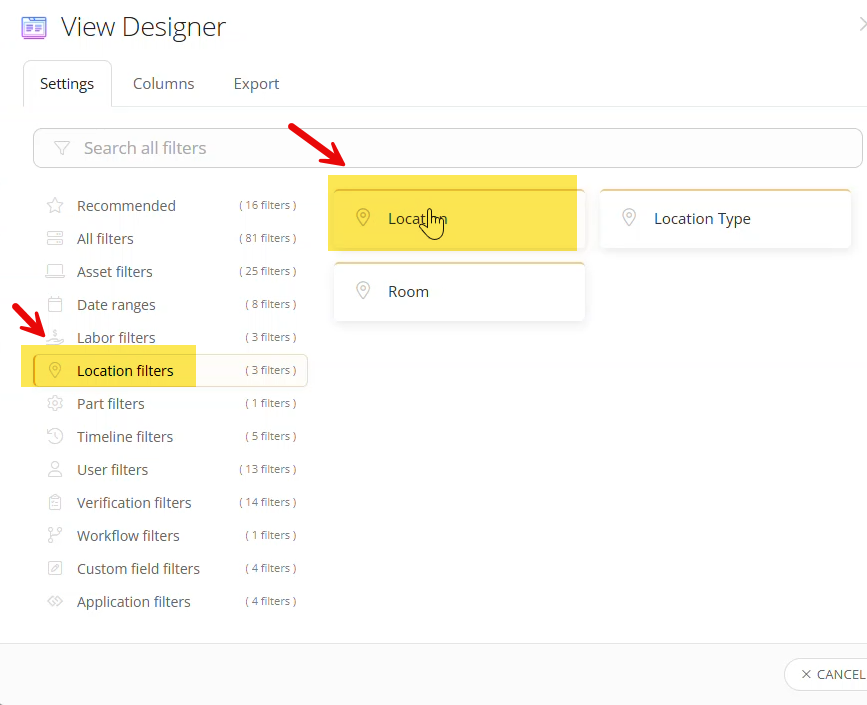
Step 2: Add a Location Filter
In the "New View" window that pops up, click on Location Filters, and then select Location.
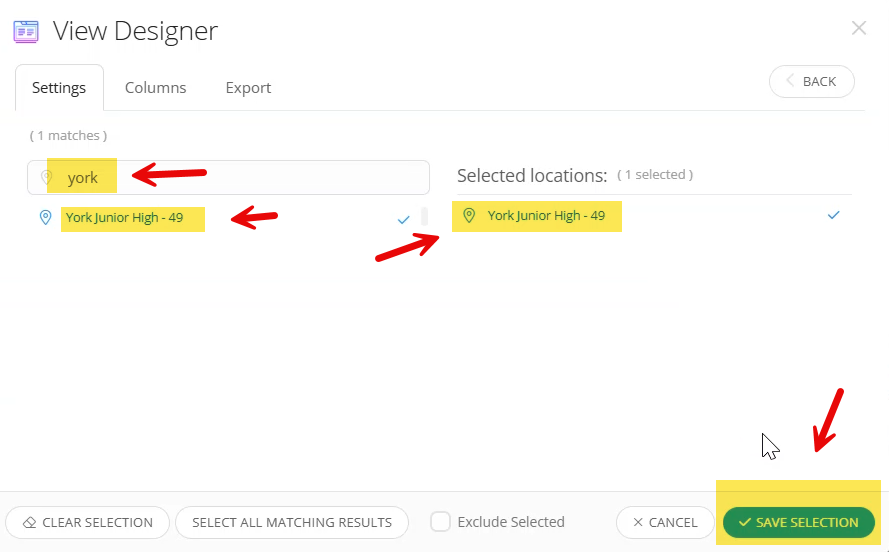
Step 3: Select Your Campus
Search for your specific campus. Once you find it, click on it to move it to the Locations Selected area. Then, click Save Selection.
Step 4: Add a Room Filter
Now that your campus is set, you need to narrow it down to a specific room. Click Add Filter to add an additional filter to your view, and this time select the Room filter.

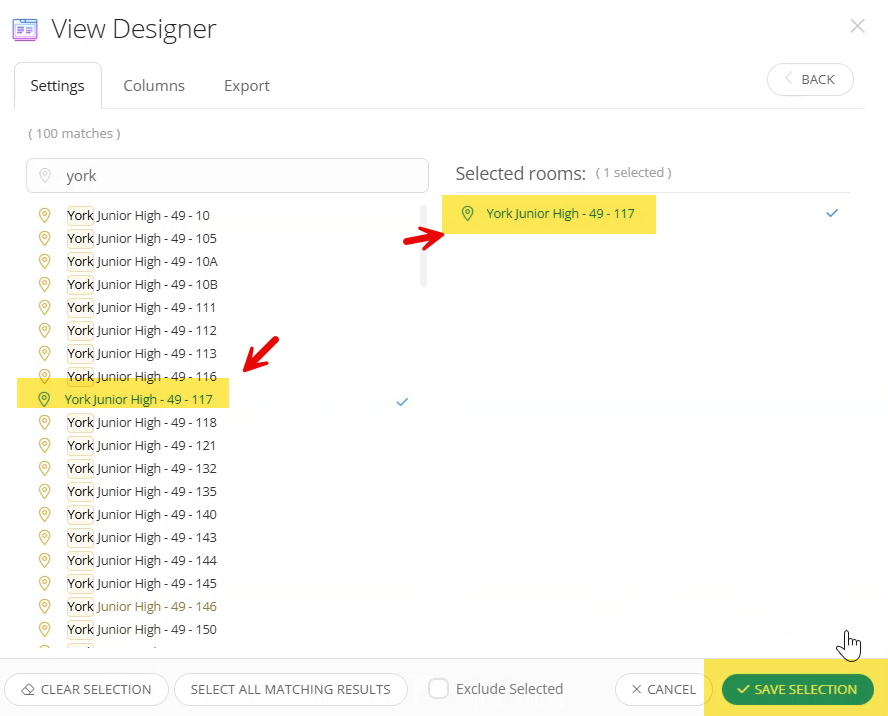
Step 5: Select Your Room
Search for your campus again, find the specific room you want to view, and click on it. Once the room is selected, click Save Selection.
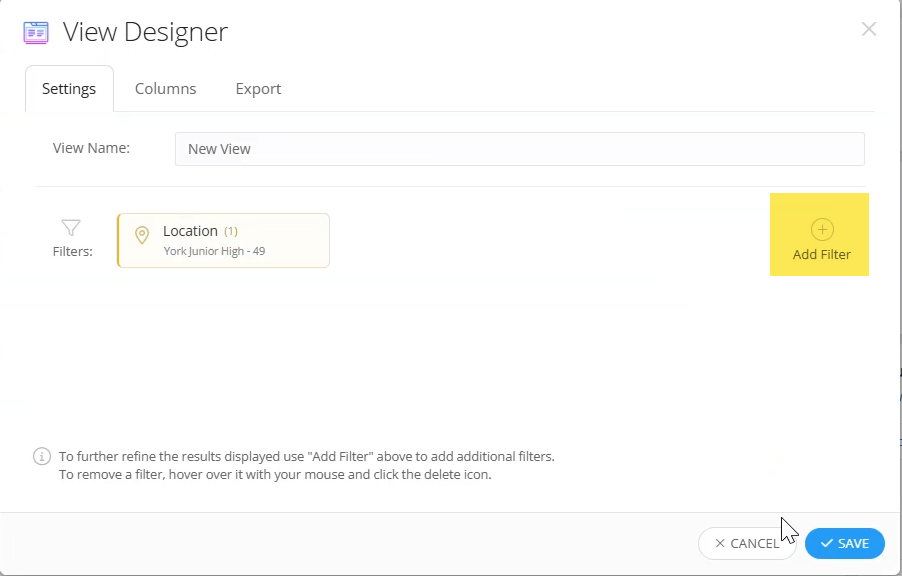
Step 6: Save and View Your Assets
Double-check that both your Location and Room filters are correct at the top of the window. Once verified, click Save.

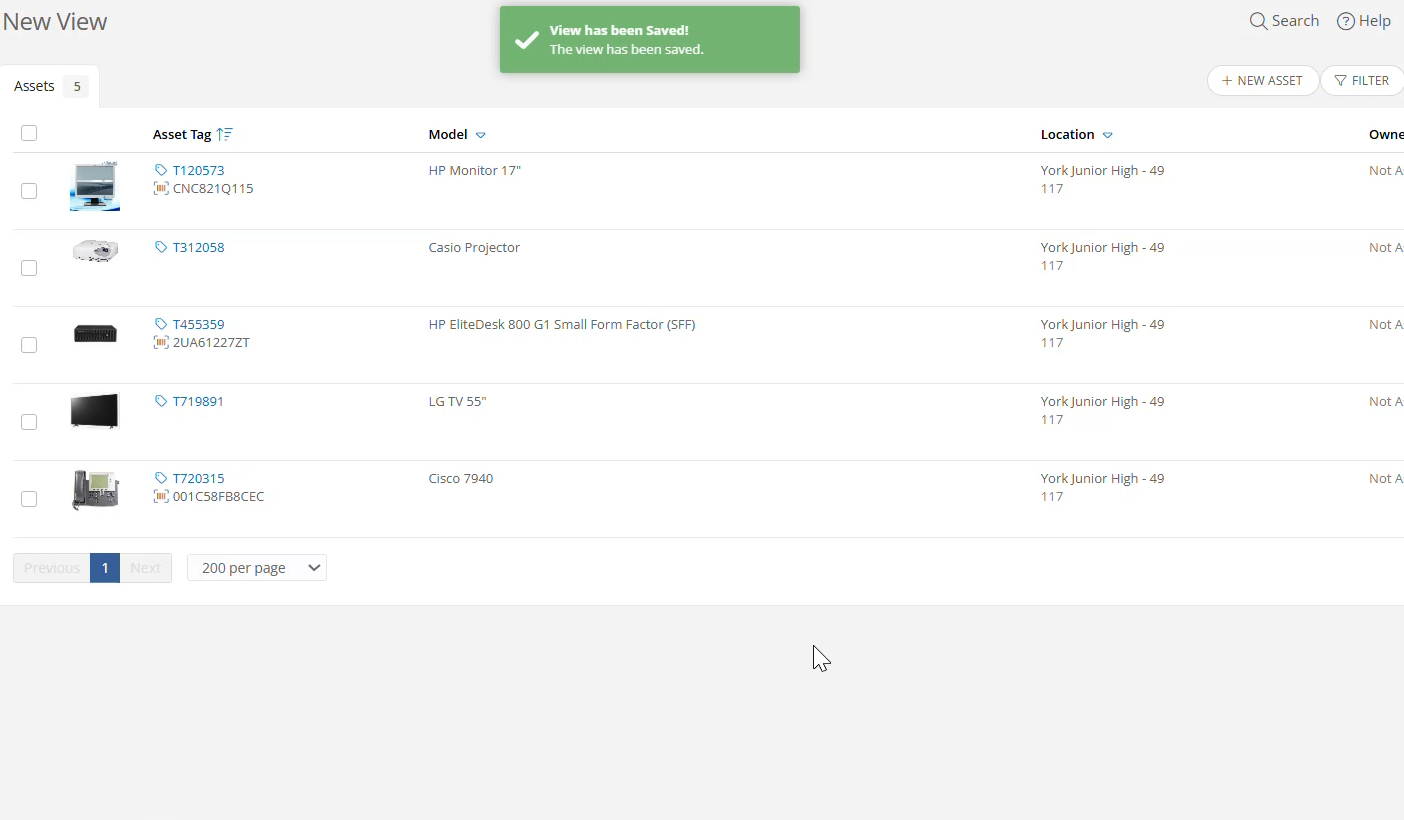
Success!
You will now see a customized Managed View displaying a list of all the assets currently assigned to the specific room and location you selected.
Still have questions? Visit the Additional Help section for further assistance.