
If a ticket is not meant for you or outside your area of responsibility, reassign it to the appropriate team. This ensures the issue is routed to the right people and avoids tickets becoming stuck or unresolved—especially if an individual leaves.
Please note that this option is only available to users with the appropriate permissions. If you are unable to access it, this is likely the reason.
Many items can be routed by changing the selected issue type or by applying the “Escalated to District Network Tech” status, which will automatically route the ticket to the appropriate team.
For additional guidance, please refer to this page: Workflow Rules That Apply to All Tickets
Why This Matters
-
When you assign or reassign a ticket to a team, our system:
-
Unassigns you as the current agent
-
Updates the ticket status to:
Forwarded Ticket
➤ This informs the requestor that the ticket has been passed to another group for resolution.
-
✅ Forwarding to a team keeps ticket ownership clear and manageable. It’s much easier to maintain team memberships than to track individual ticket assignments.
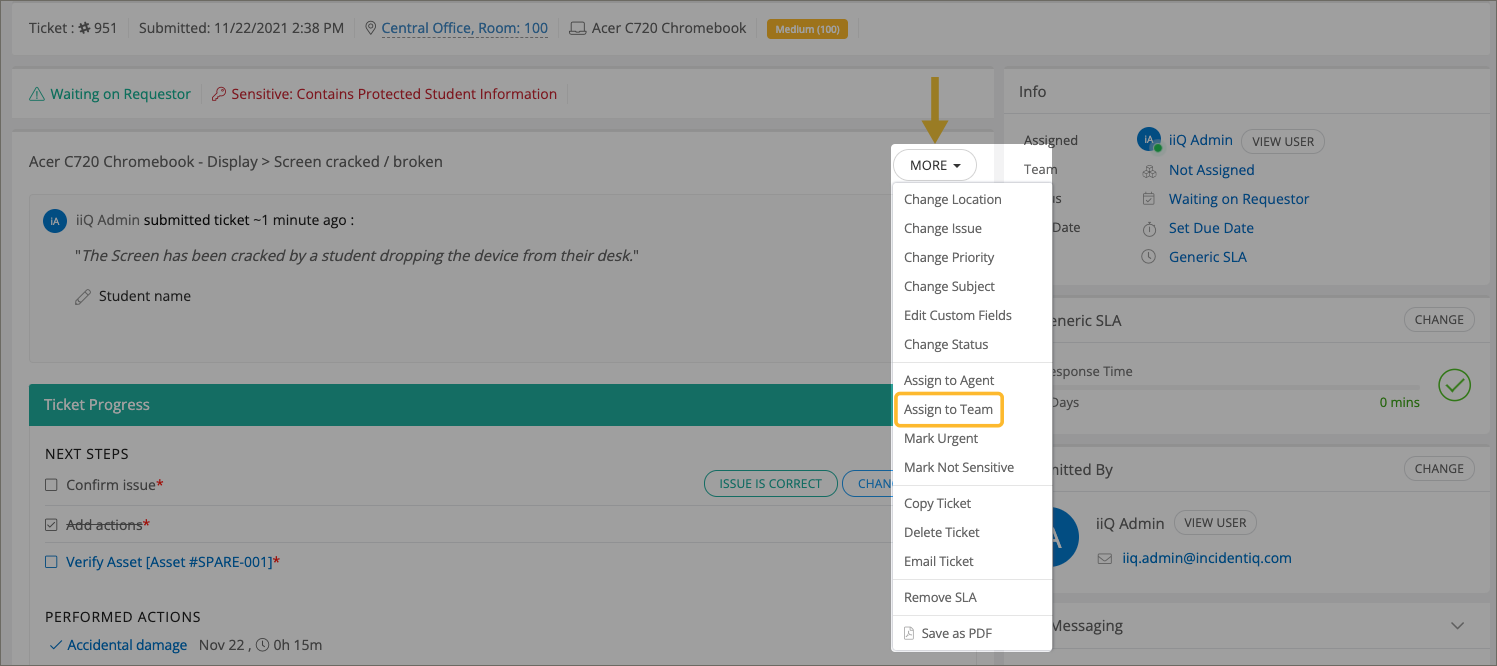
How to Assign a Ticket to a Team
-
Open the ticket
-
Click More (three-dot menu at the top of the ticket)
-
Select Assign to Team
-
In the pop-up window:
-
Use the dropdown to search/select the appropriate team
-
Click the ➕ icon to assign the team
-
-
The ticket will now:
-
Show no individual agent assigned
-
Update its status to Forwarded Ticket
-
Reassigning to a Different Team
If a ticket is already assigned but still not in the right place:
-
Repeat the above steps to reassign it to the correct team
-
The system will still update the status and unassign any individual agents
Best Practice
Always reassign to a team rather than a person if:
-
You’re not the right person to handle it
-
You're unsure who exactly should take it
-
You're going to be out of office for an extended time
Still have questions? Visit the Additional Help section for further assistance.