
Create the EOY Campus Audit Report with Last Verification Date
Follow this guide to build, format, and download your End of Year (EOY) Campus Audit Report in Incident IQ once your audit is completed.
If you have any questions, please reach out to Shane Mitchell.
Phase 1: Creating the Custom View
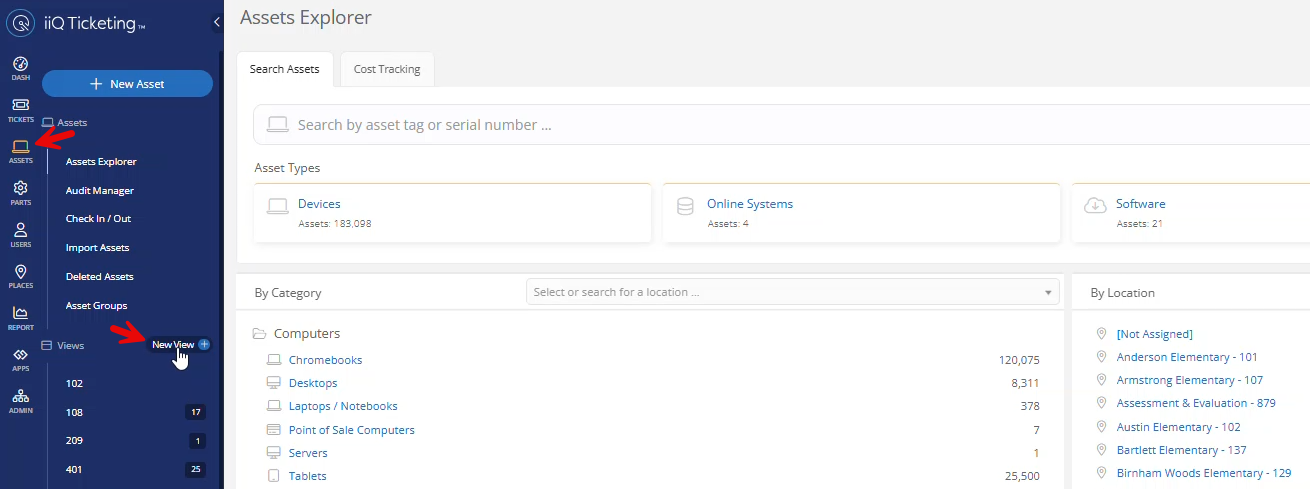
Step 1: Navigate to New View
Log into Incident IQ. On the main menu, click on the Assets tab, and then click on New View.
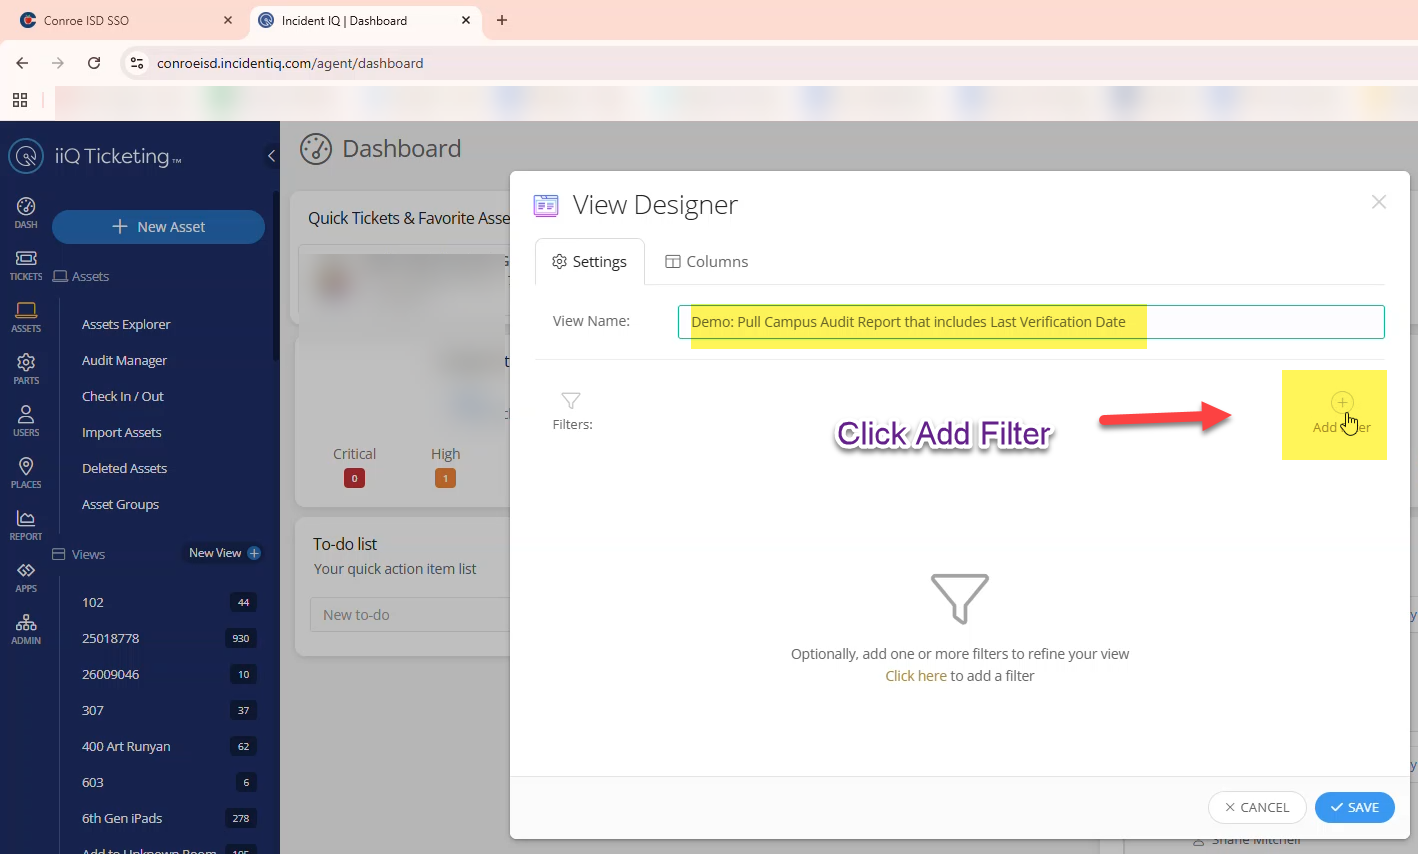
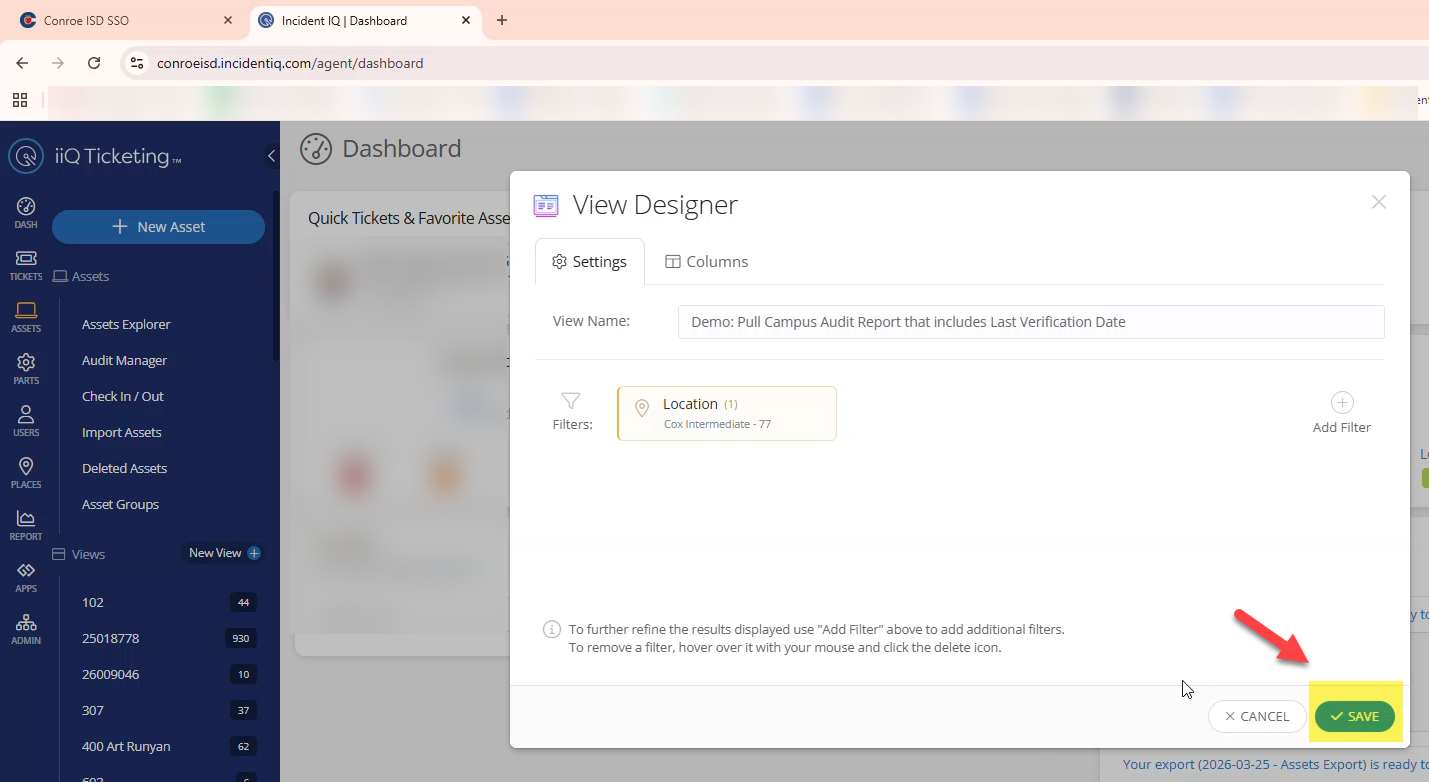
Step 2: Name the View and Add Filter
Change the name of the Custom View to: "[Your Campus] EOY Campus Audit Report" (e.g., Conroe High School EOY Campus Audit Report).
Click the Add Filter button.
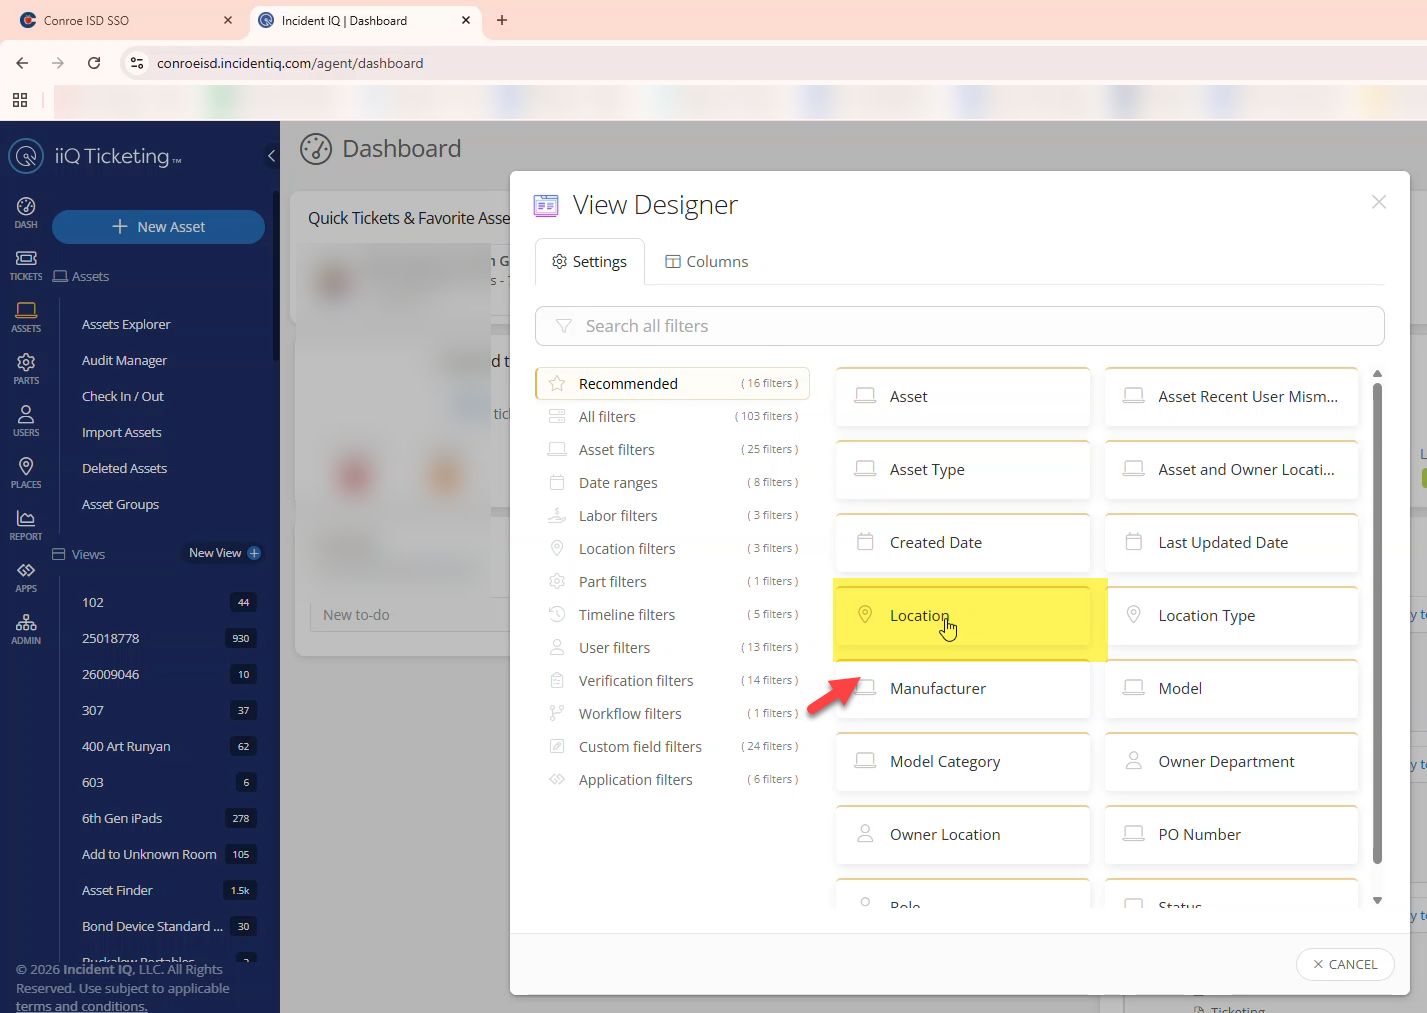
Step 3: Filter by Location
Click on Location Filters, and then select Location. Add your campus name in the search bar, click on your campus when it appears, and click Save Selection.
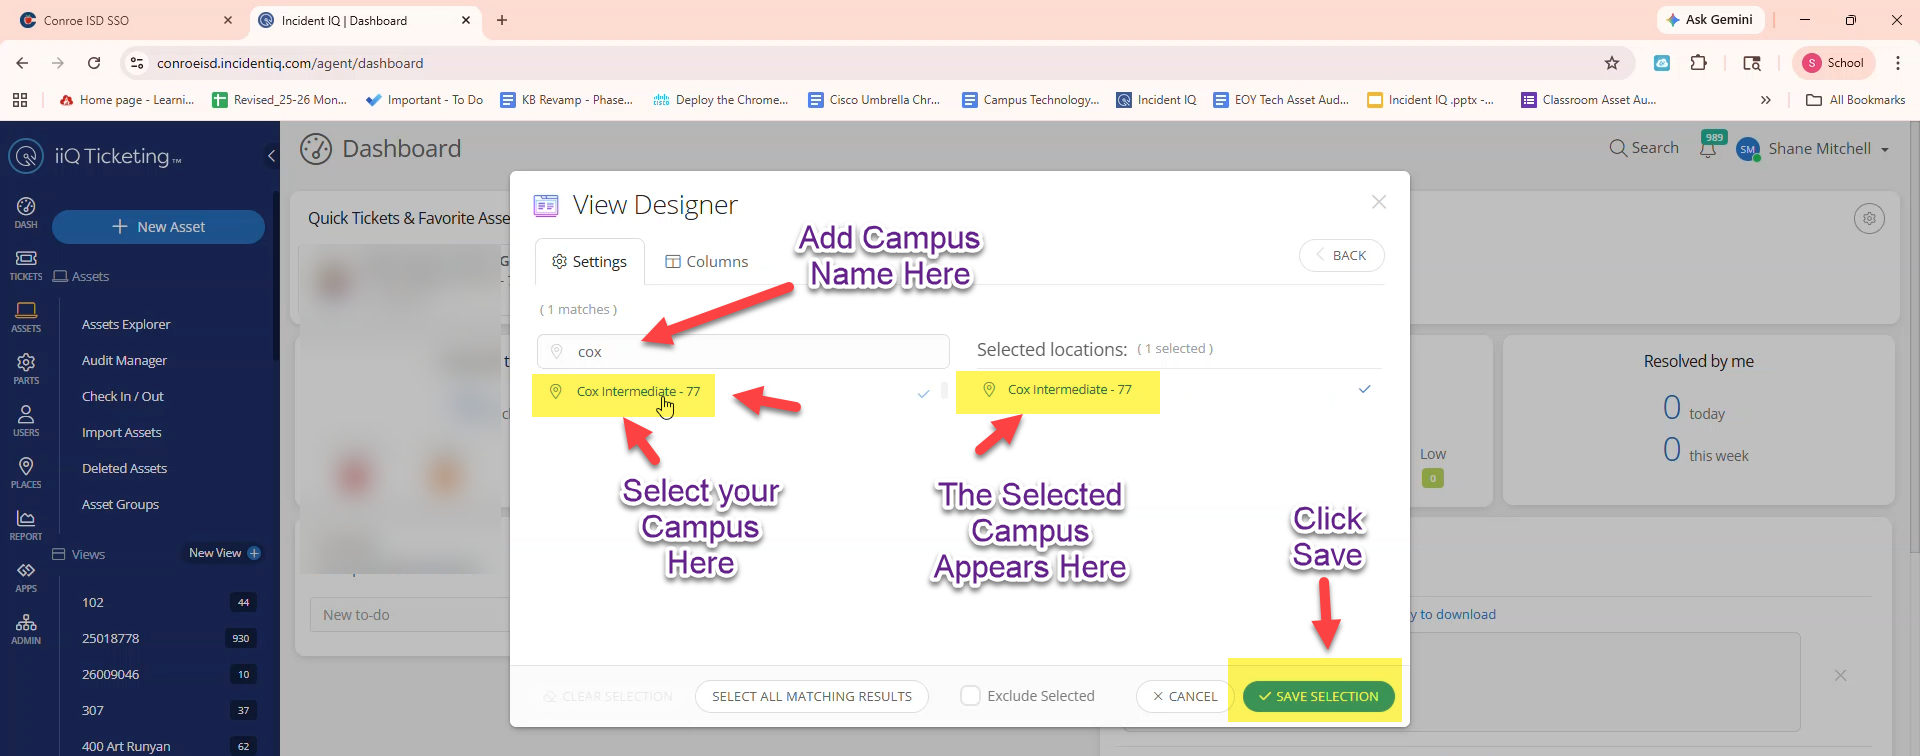
Step 4: Verify and Save
Double-check the top of the window to ensure your custom view has the correct campus selected, and then click Save. This will generate your Custom View.
Phase 2: Formatting the Report
Now that the view is created, you must add specific data columns so your report has the correct information.
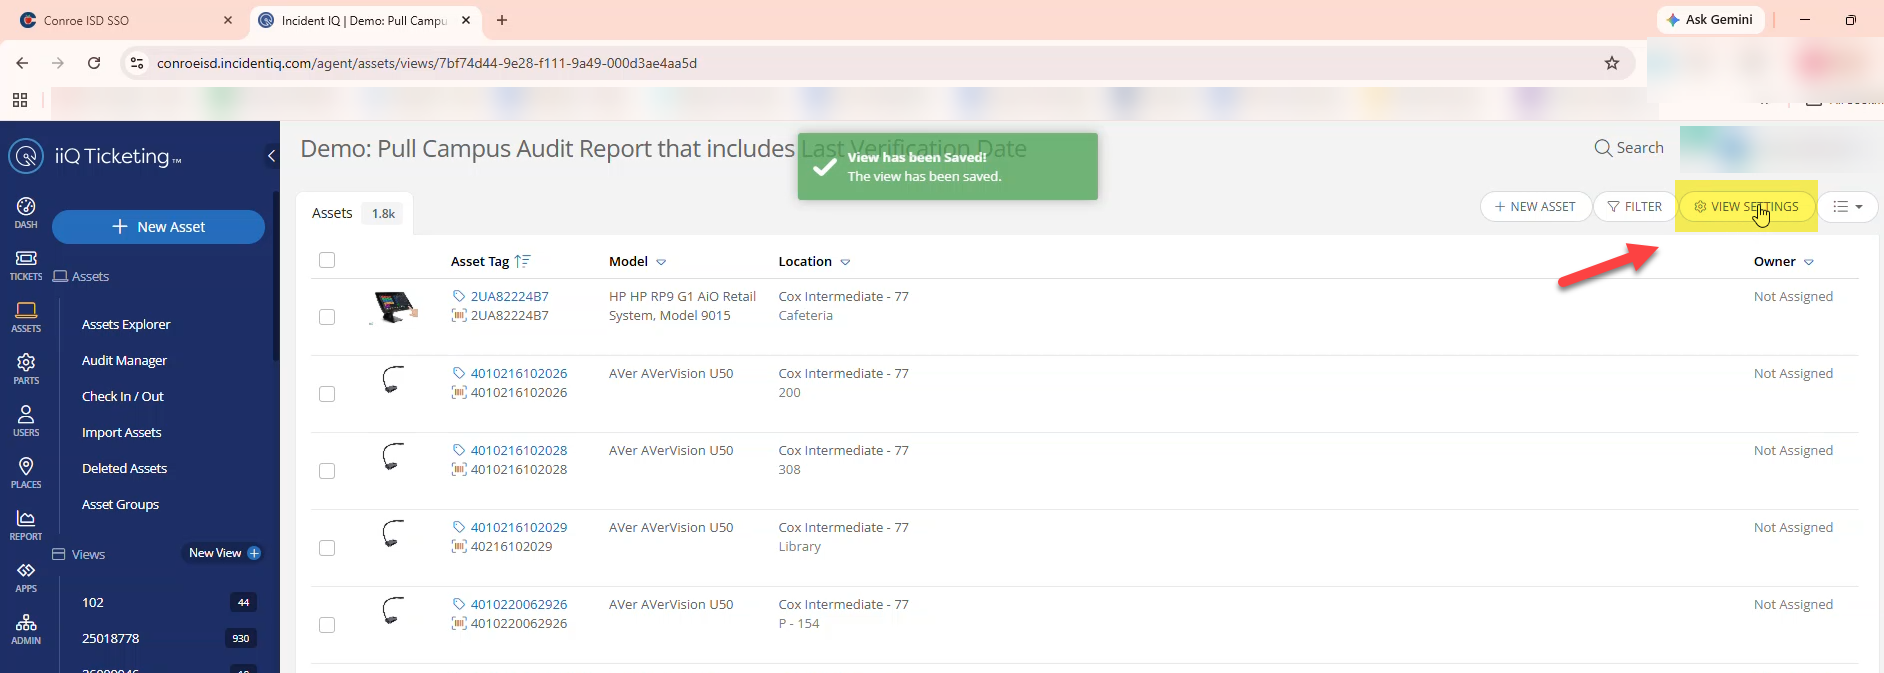
Step 5: Open View Settings
On your newly created Custom View page, click the View Settings button.
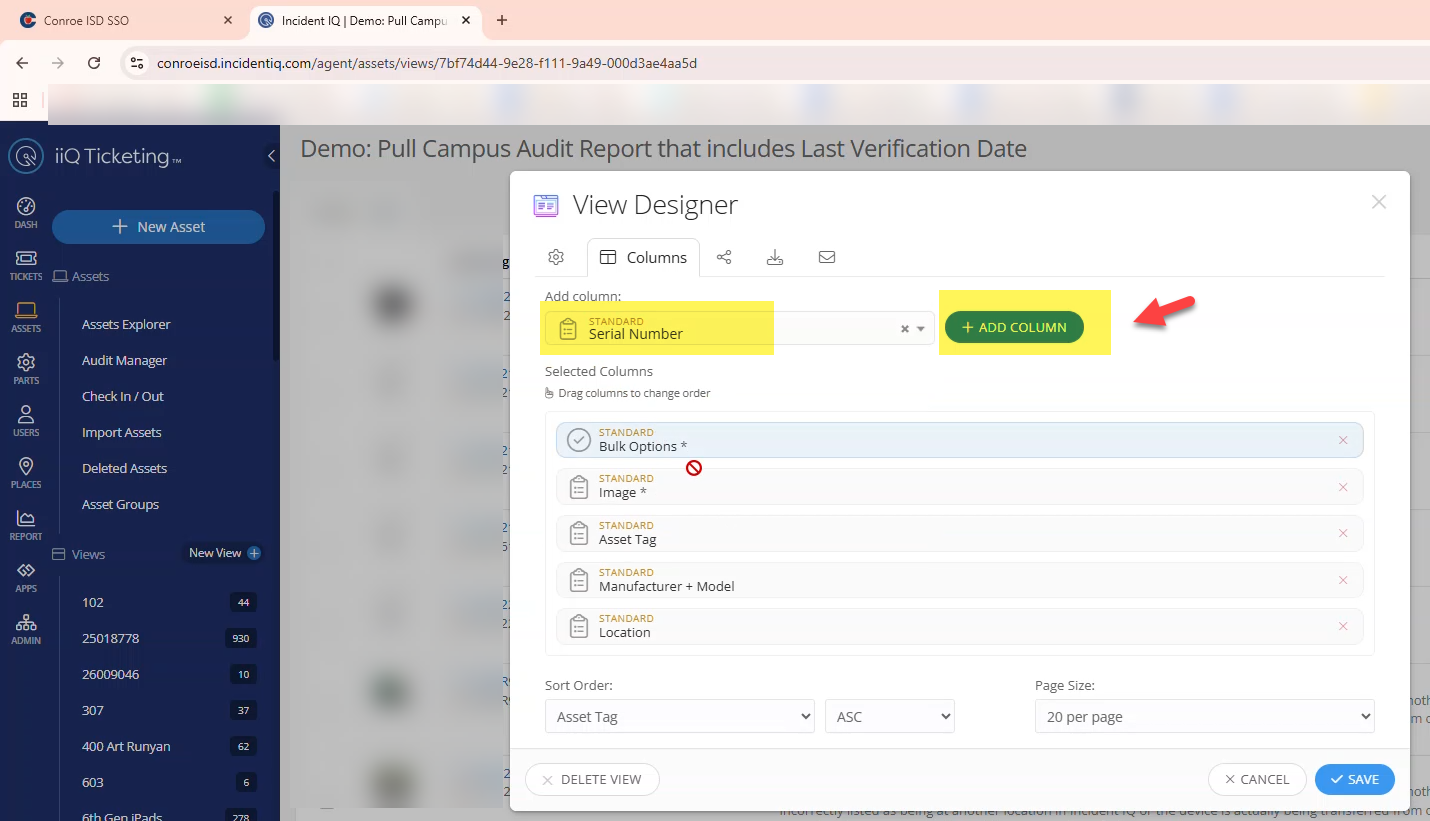
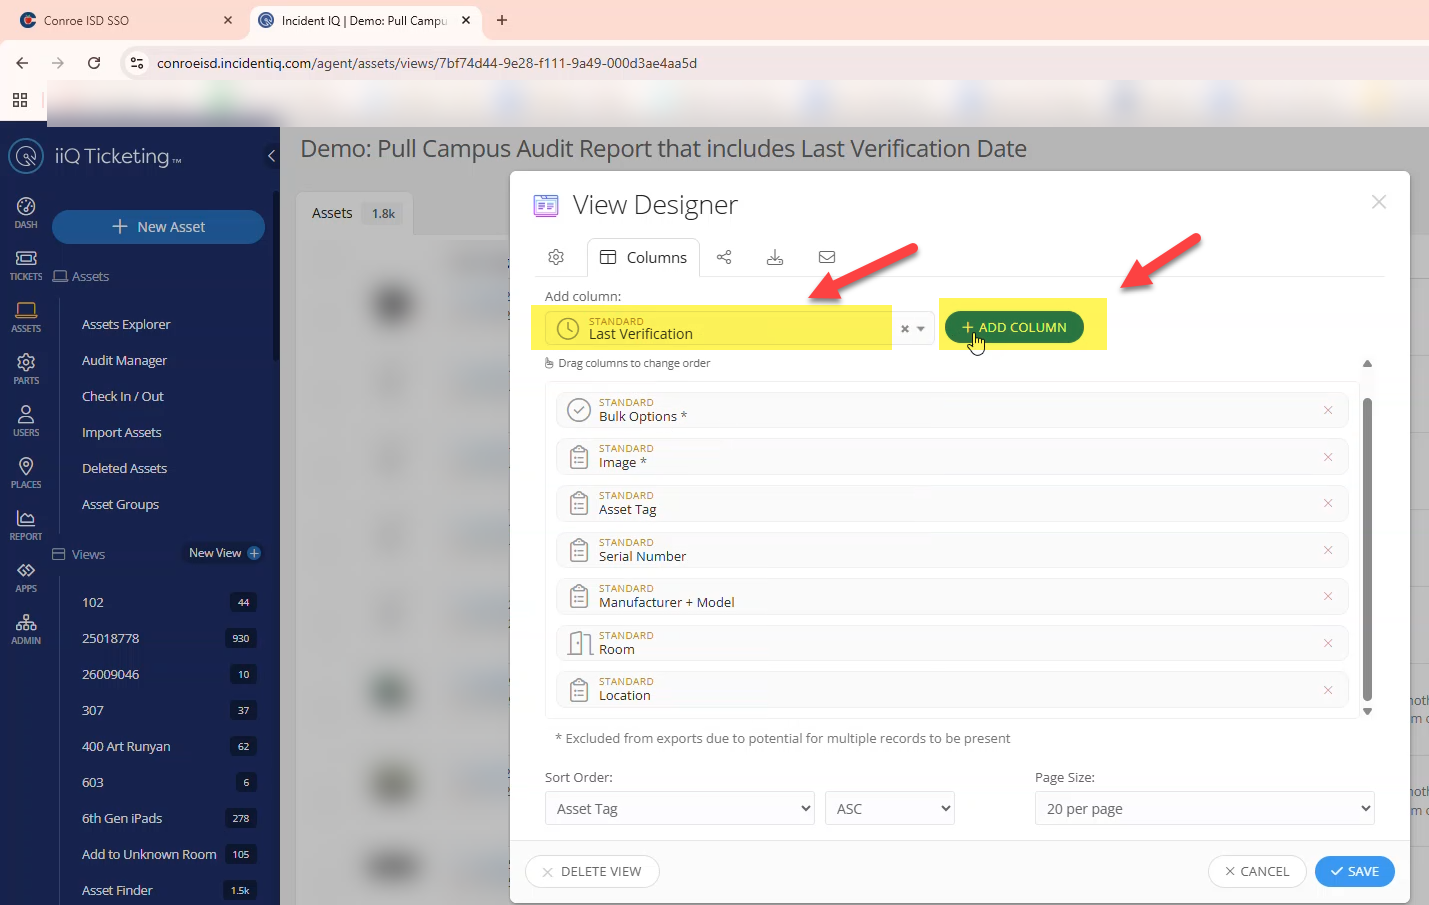
Step 6: Add Required Columns
In the settings menu, you need to add three specific columns to your report. Search for and add the following:
Serial Number
Room Number
Last Verification
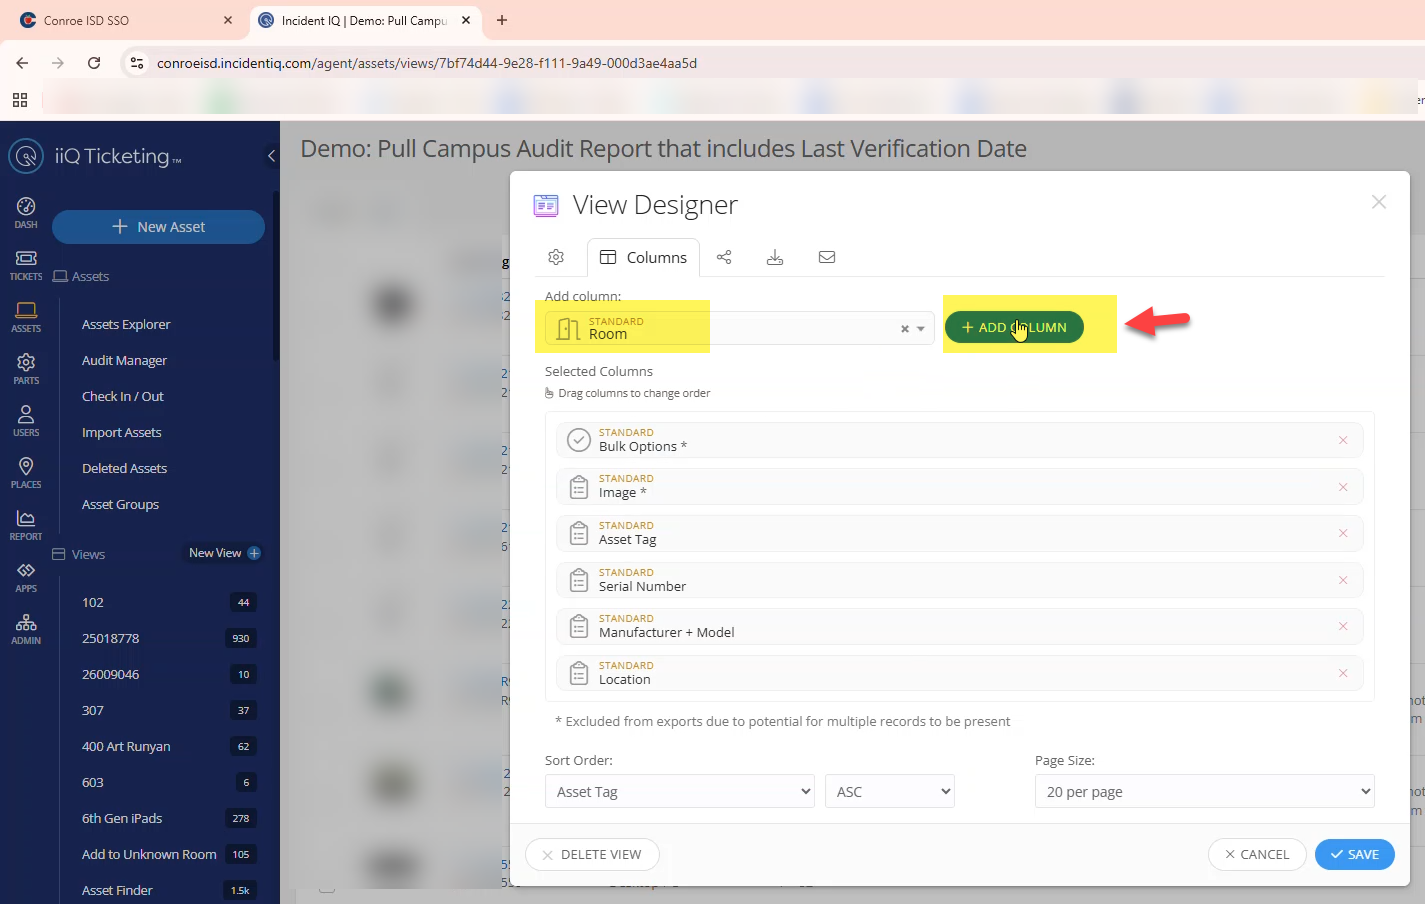
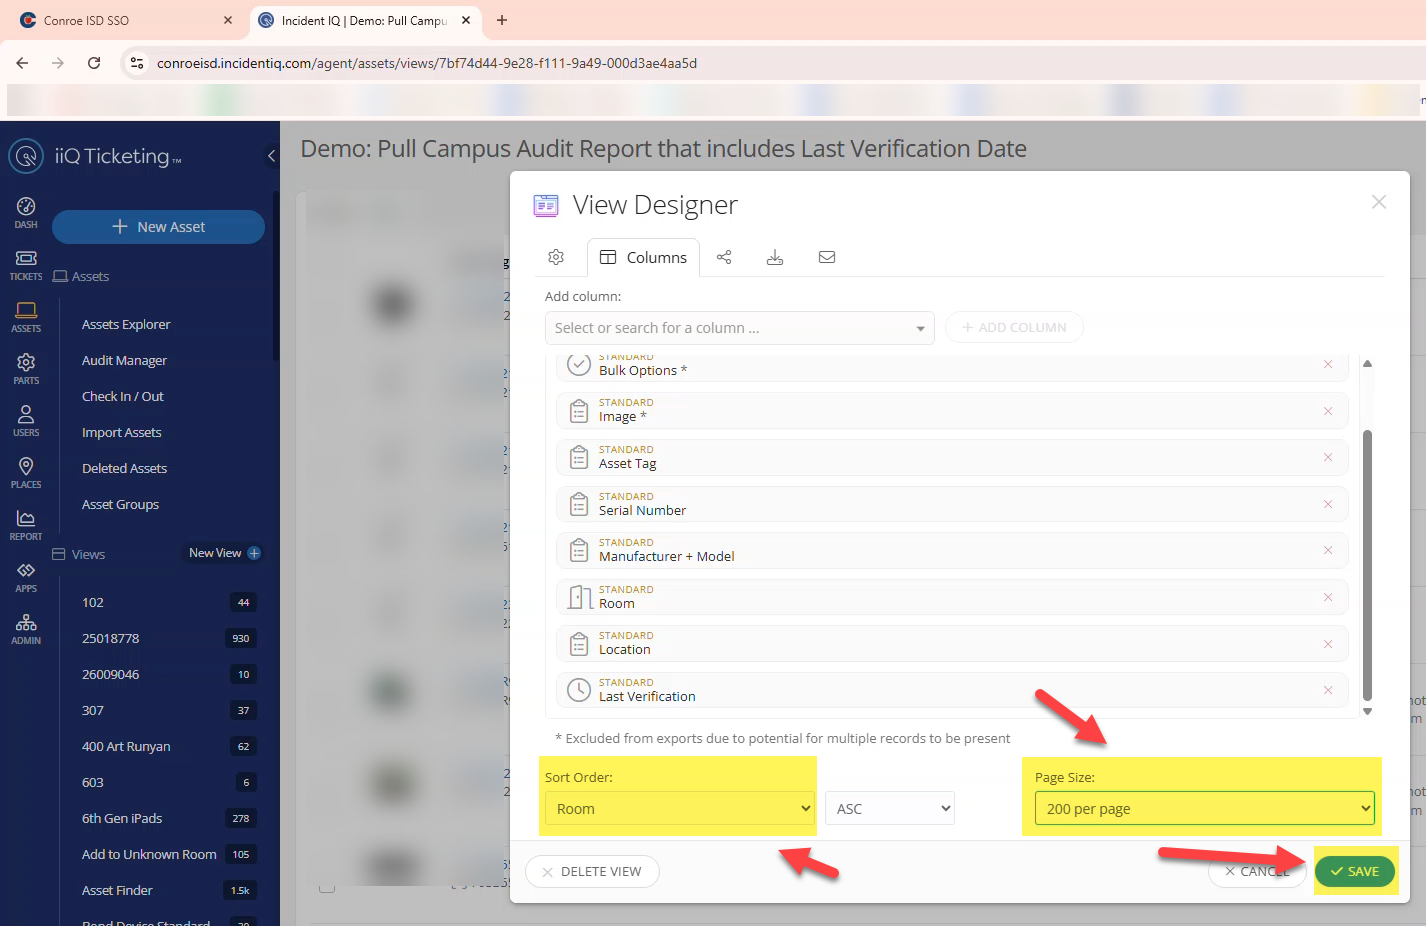
Step 7: Sort and Save
Change the "Sort Order" option to Room.
Change the "Page Size" to 200 per page.
Click Save.
Success! You have successfully created and formatted your EOY Campus Audit Report.
Phase 3: Exporting and Submitting Your Report
Once your actual campus audit is fully completed, you must email your downloaded EOY Campus Audit Report Excel file to Shane Mitchell, along with your signed Campus Audit Certification Oath.
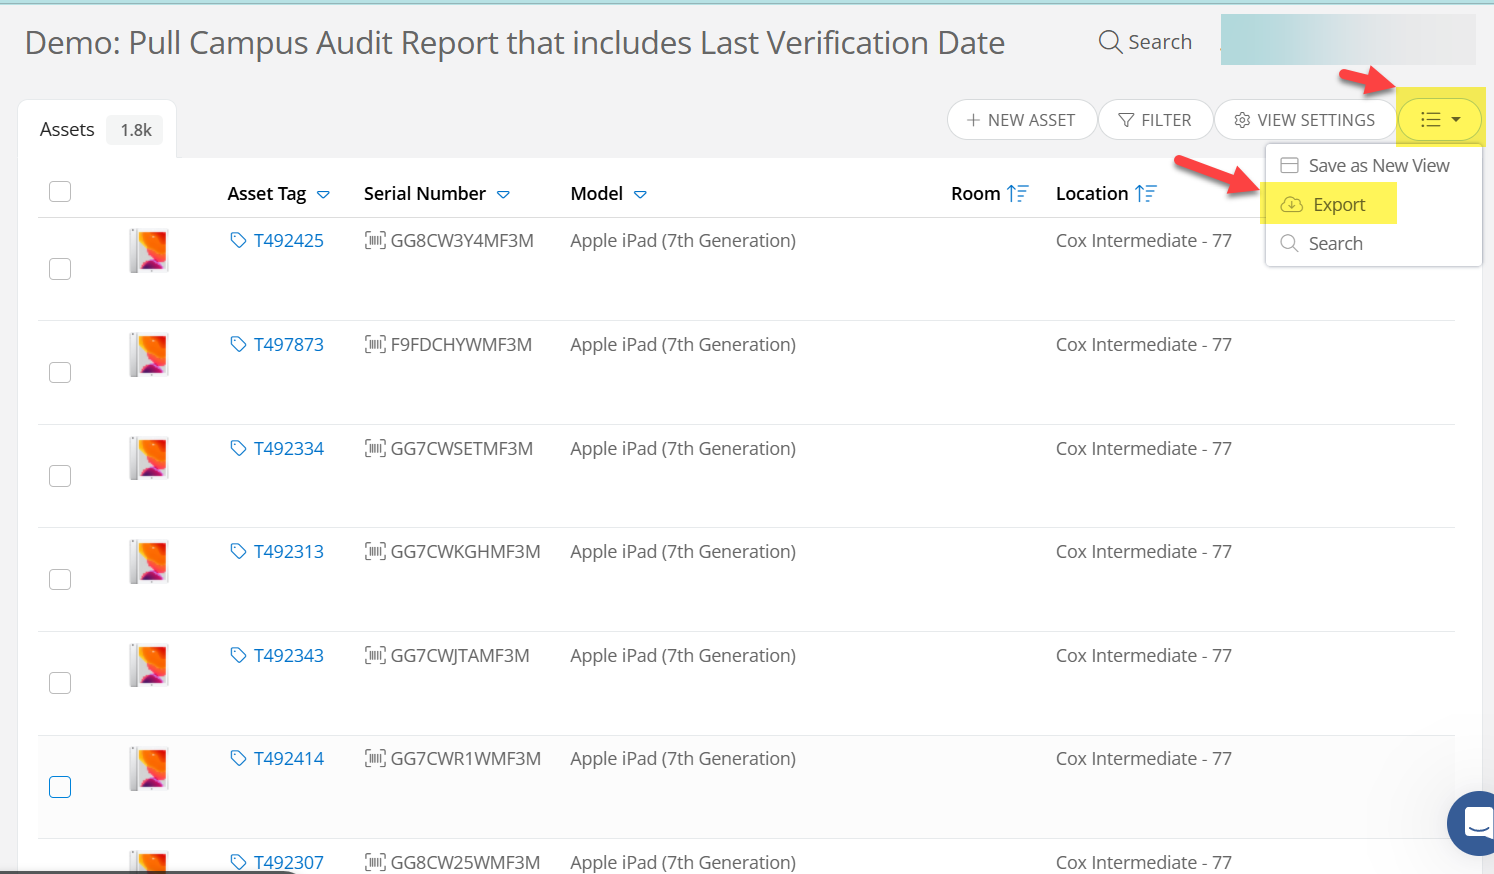
Step 8: Export the File
While still in the Custom View of your EOY Campus Audit Report, click the 3 lines icon (Action Menu) in the upper right corner, and then click Export.
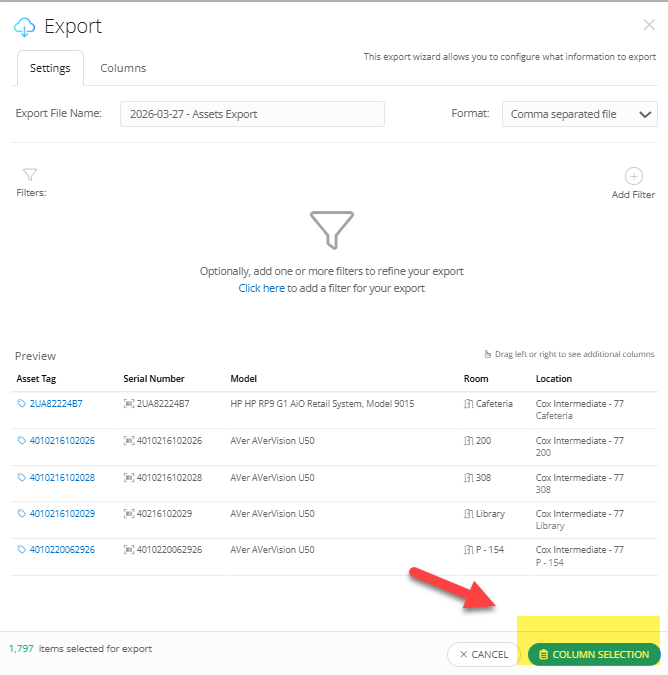
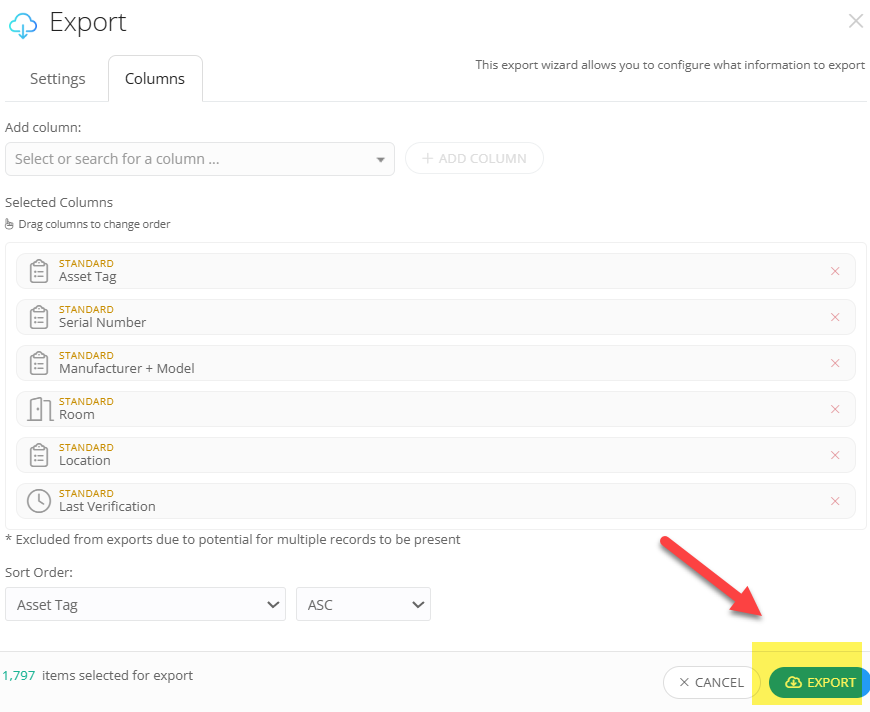
Step 9: Choose Column Selection
In the export menu, choose the Column Selection option to ensure it only exports the specific columns you set up earlier. Then, click Export.
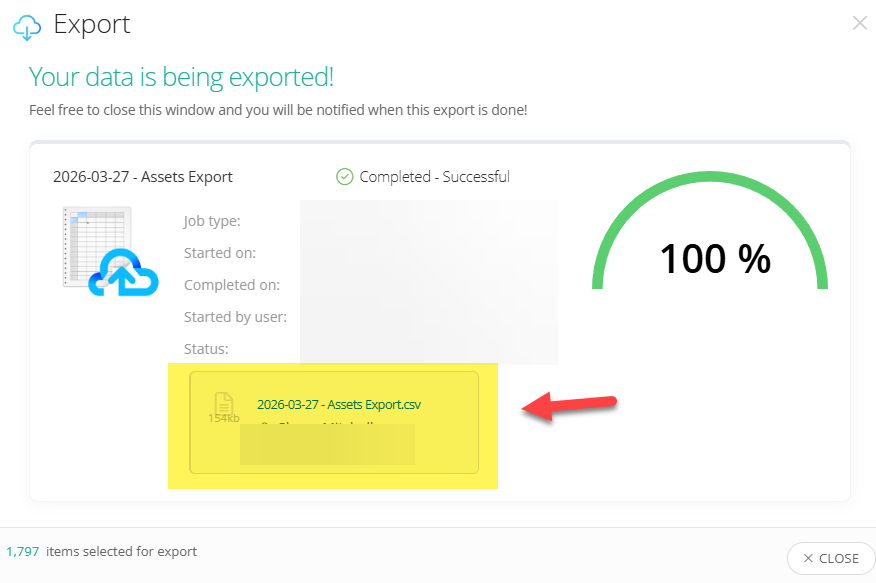
Step 10: Download the Excel File
Incident IQ will process the request. Once finished, a download window will appear. Click the hyperlink of the Excel file to download it to your computer.
Final Audit Requirements
Please ensure you follow these final cleanup and submission rules once your audit is completed:
Unknown Room Cleanup: Any assets on your final Custom View report that do not have a room listed, or have a verification date that is earlier than your Campus Audit date, should be placed in your Unknown Room in Incident IQ.
Submission: Email your downloaded EOY Campus Audit Report Excel file to Shane Mitchell, along with your signed Campus Audit Certification Oath.
Questions: If you have any questions, please reach out to Shane Mitchell.
Still have questions? Visit the Additional Help section for further assistance.