
This guide explains how to install an approved (allow-listed) Chrome Extension on a school Google account.
Key Concepts:
-
User-Based: Extensions are installed on the user's account, not the physical device. Once installed, the extension will appear on any Chromebook that specific user signs into.
-
Approved Only: You can only install extensions that have already been approved by the district.
-
Note: If the extension you need is not available, you must request it first. See How to Request a Google App or Extension.
-
Teachers: If you want your students to use a specific extension, they must log in and perform these steps themselves to add it to their own accounts.
Step 1: Open the Chrome Web Store
-
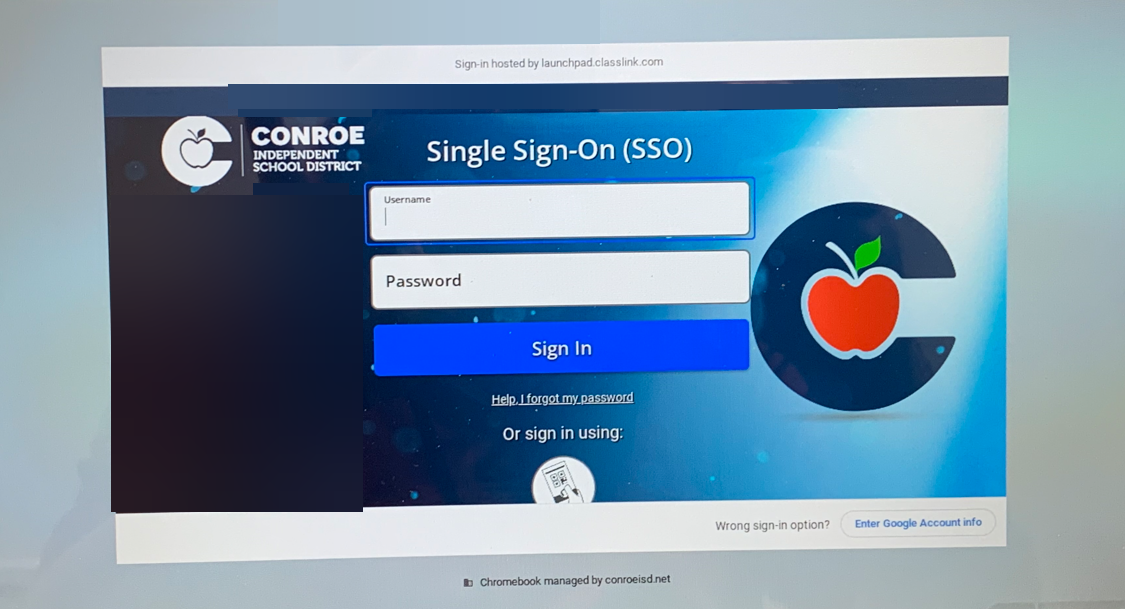
Log in to the Chromebook.
-
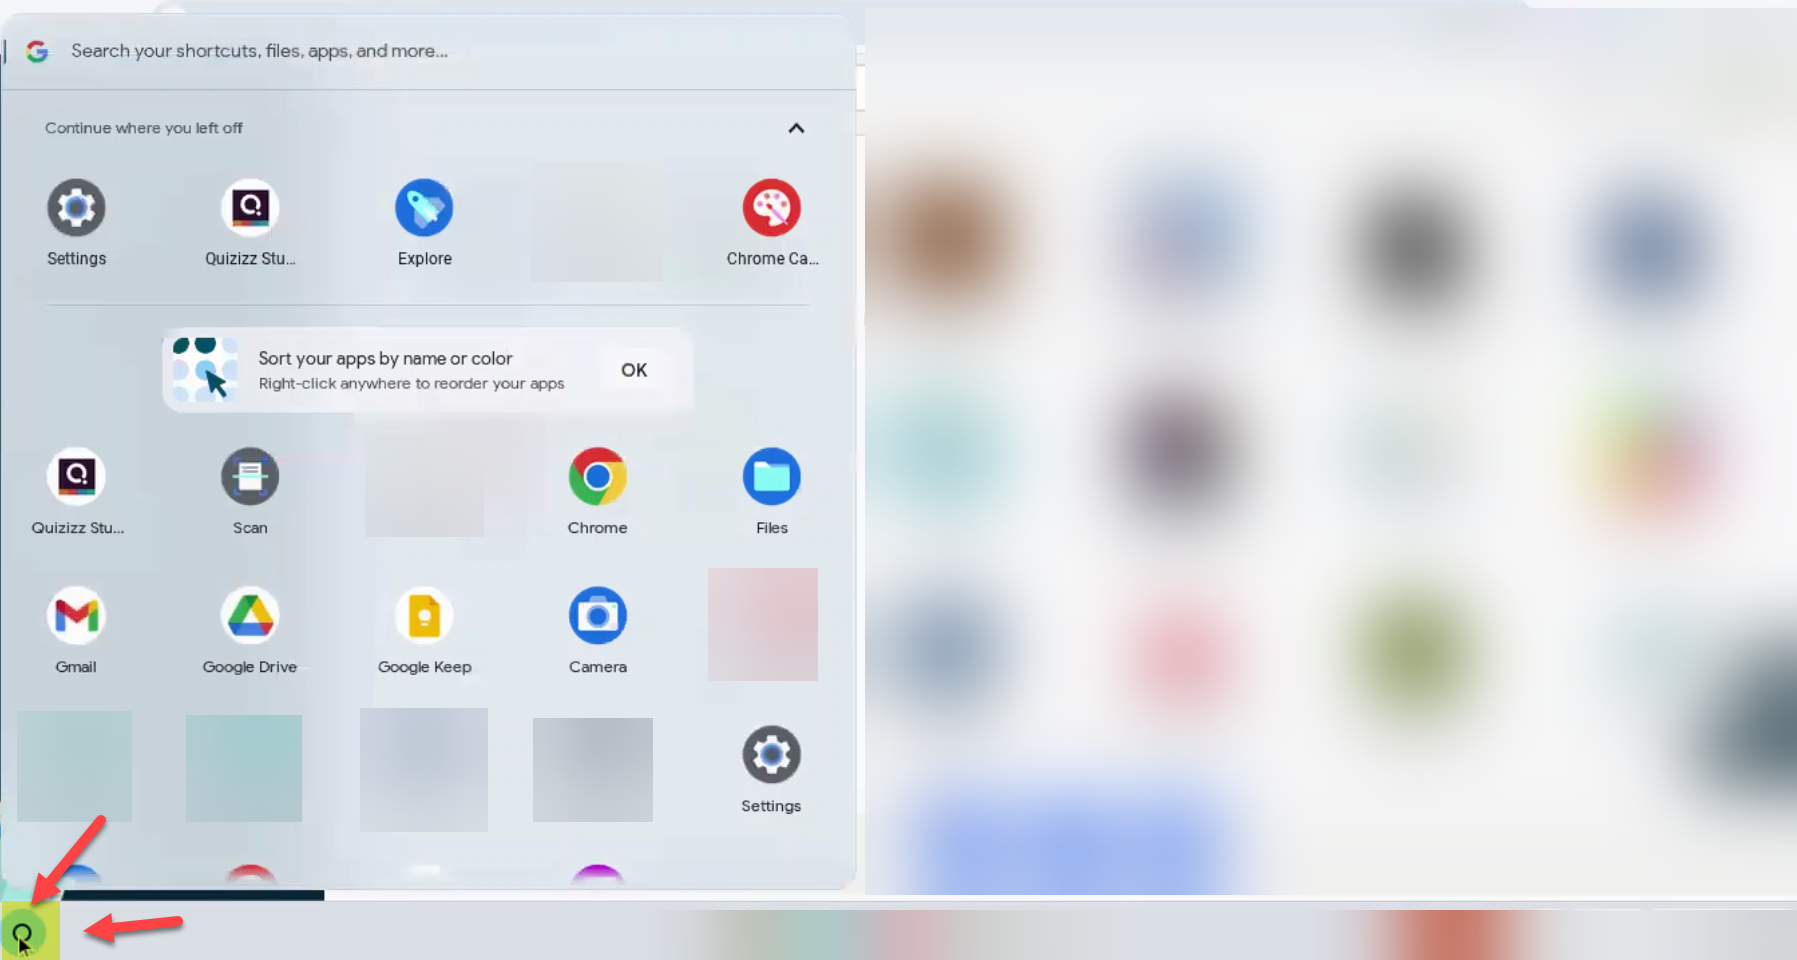
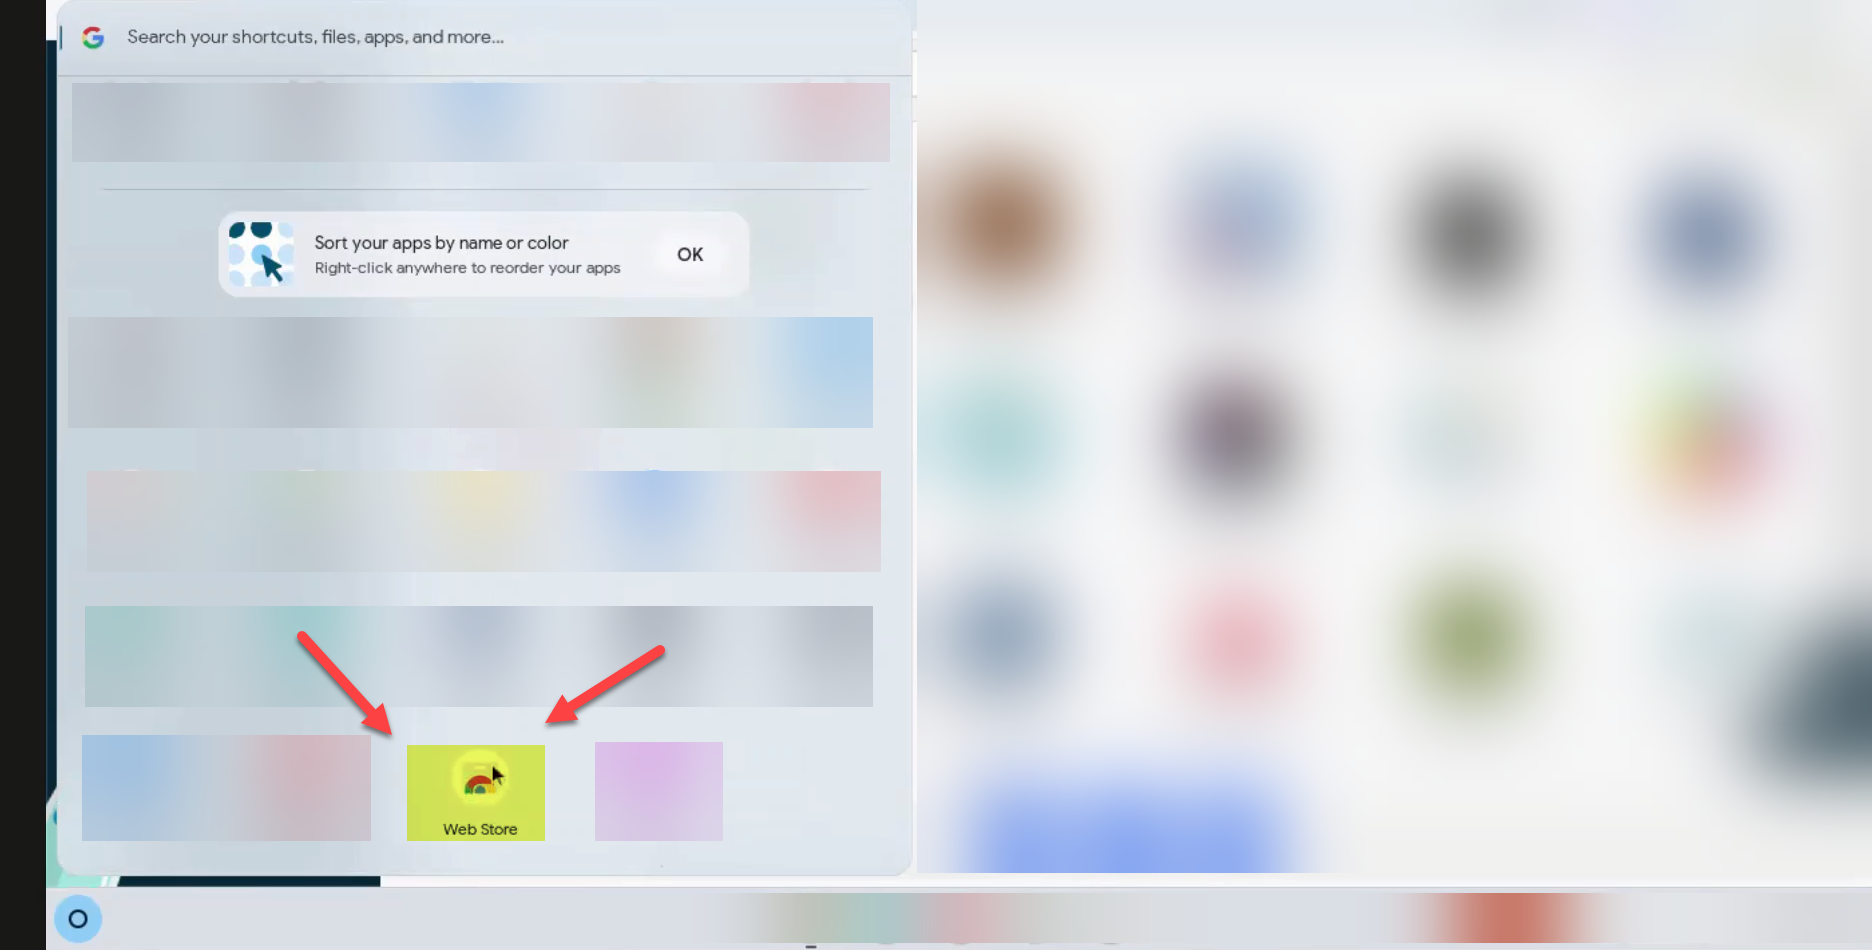
Click the Launcher (small circle) in the bottom left corner of the screen.
-
Find and select the "Web Store" icon.
Step 2: Find the Extension
-
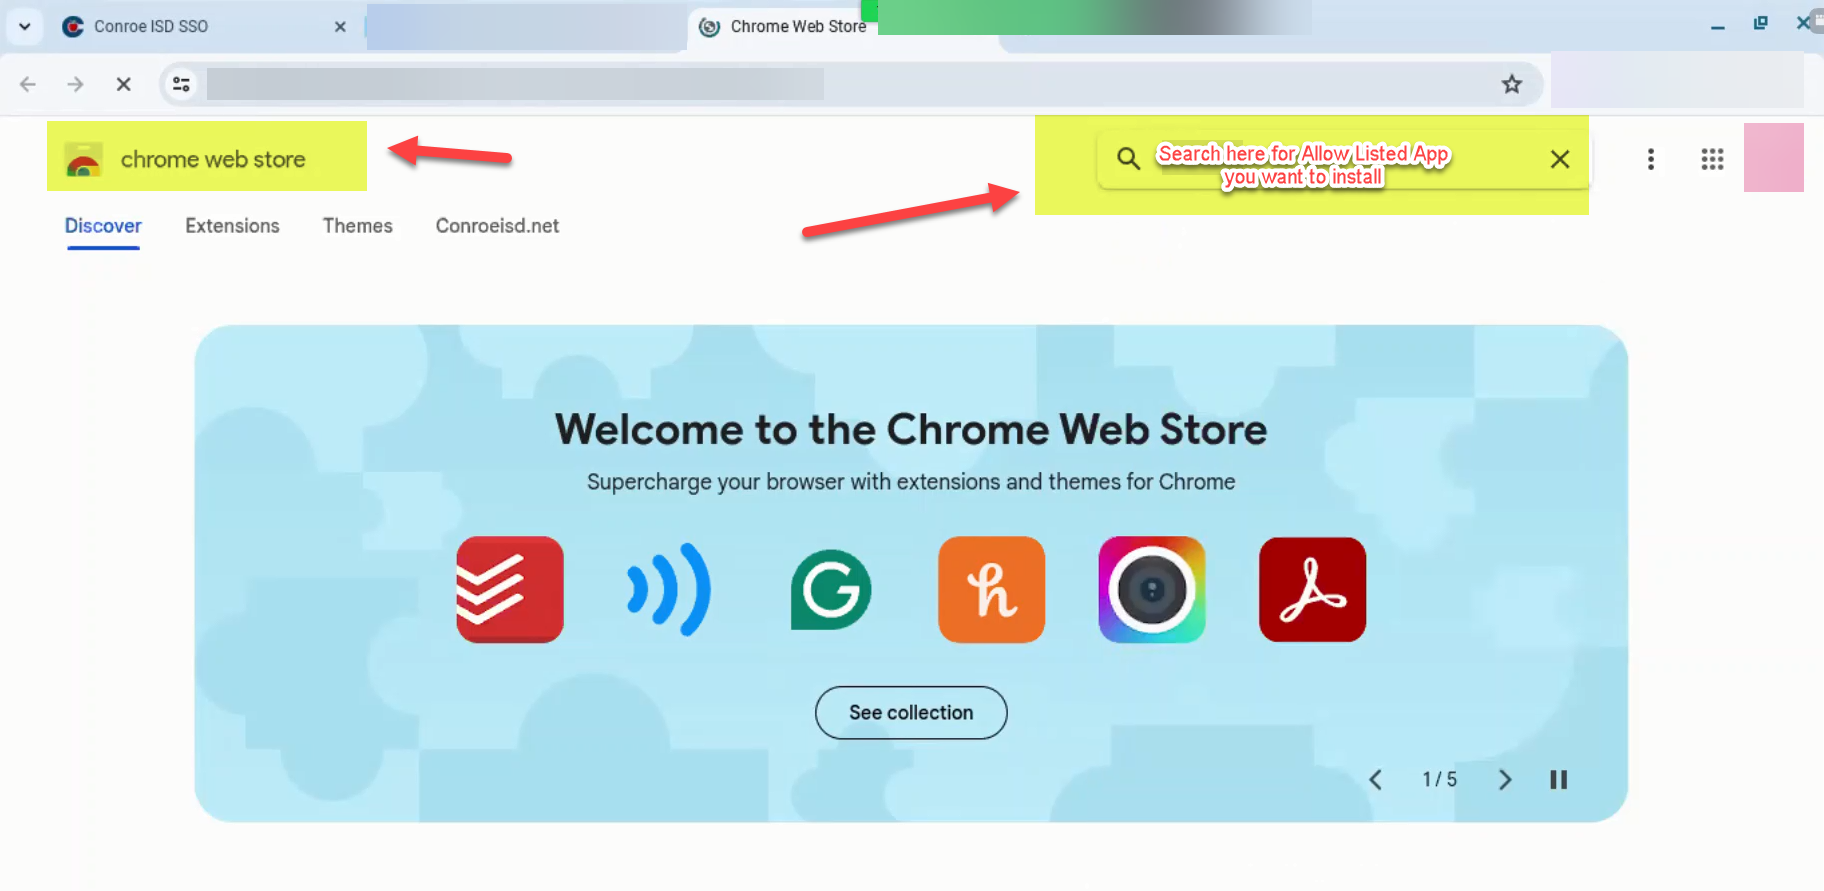
Use the search bar in the Chrome Web Store to type the name of the approved extension.
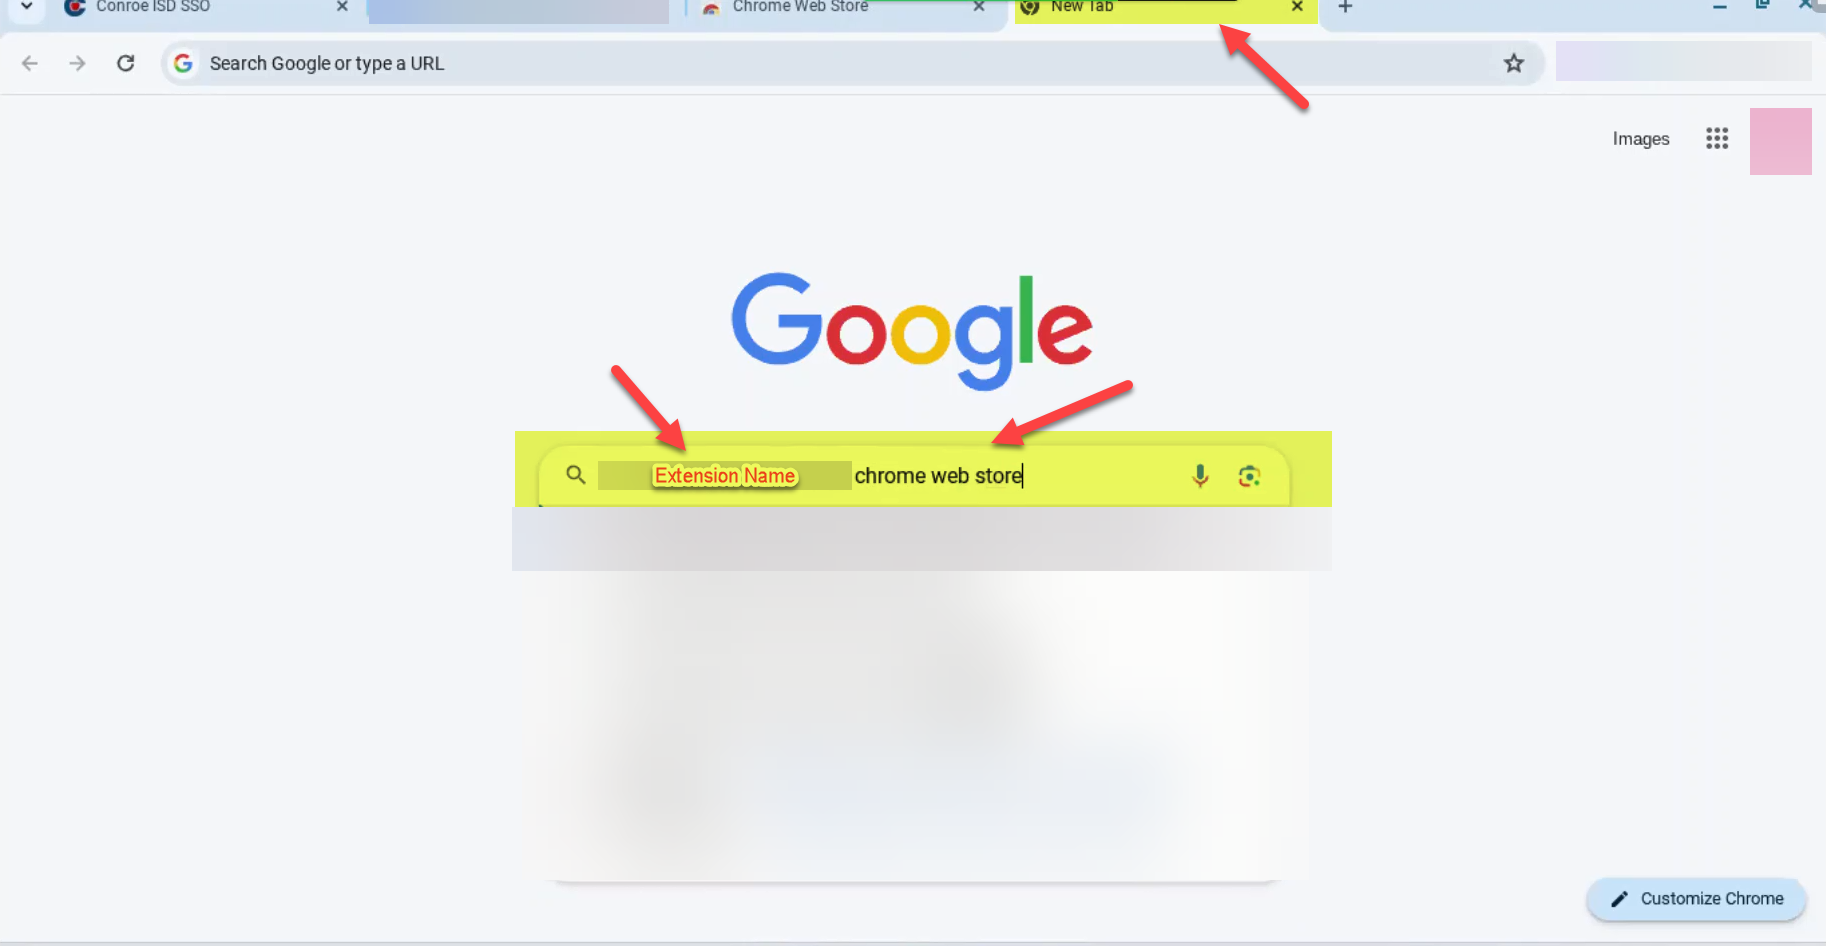
Troubleshooting: Can't find the extension? Sometimes the internal store search is tricky. If it doesn't appear:
-
Open a new browser tab.
-
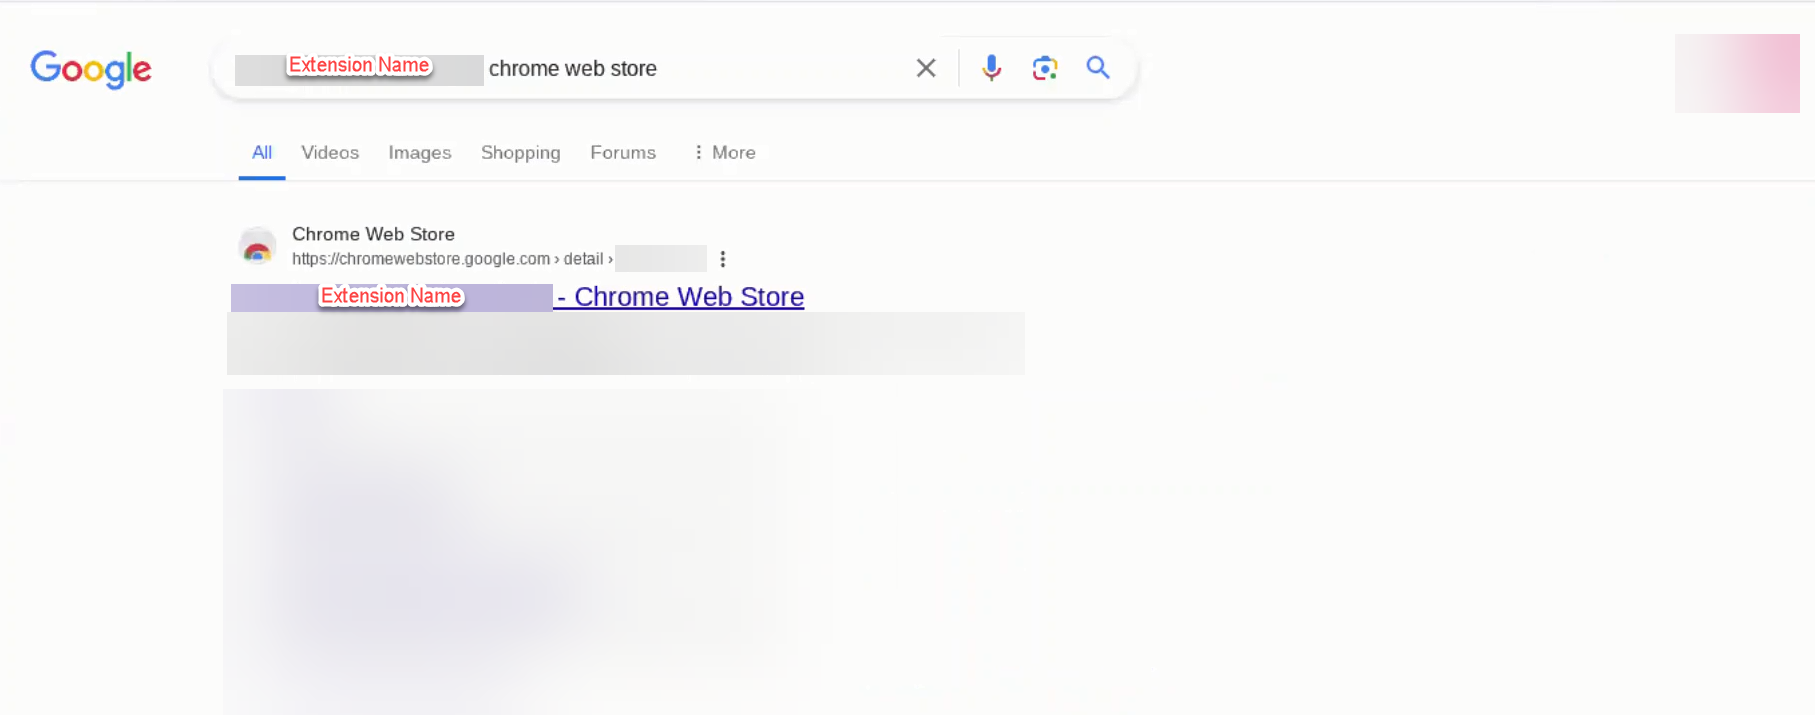
Go to 🔎 Google.com and search for:
[Extension Name] Chrome Web Store. -
Click the first result that links to the Chrome Web Store.
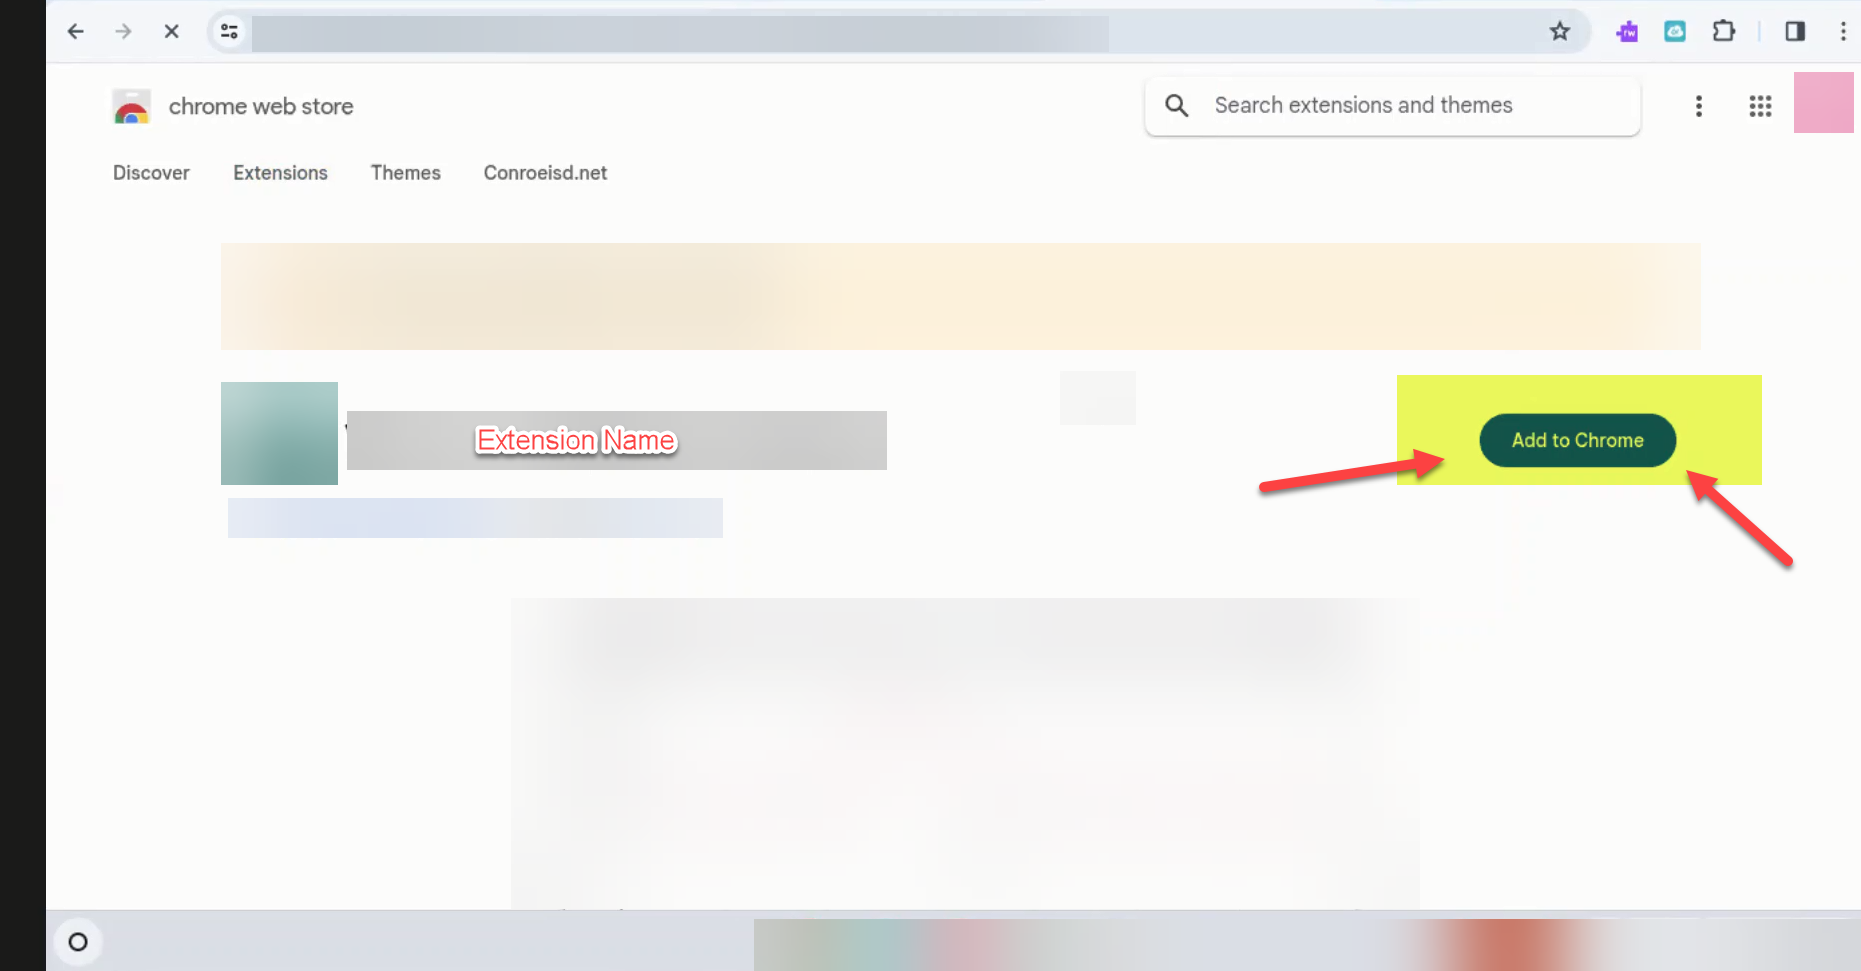
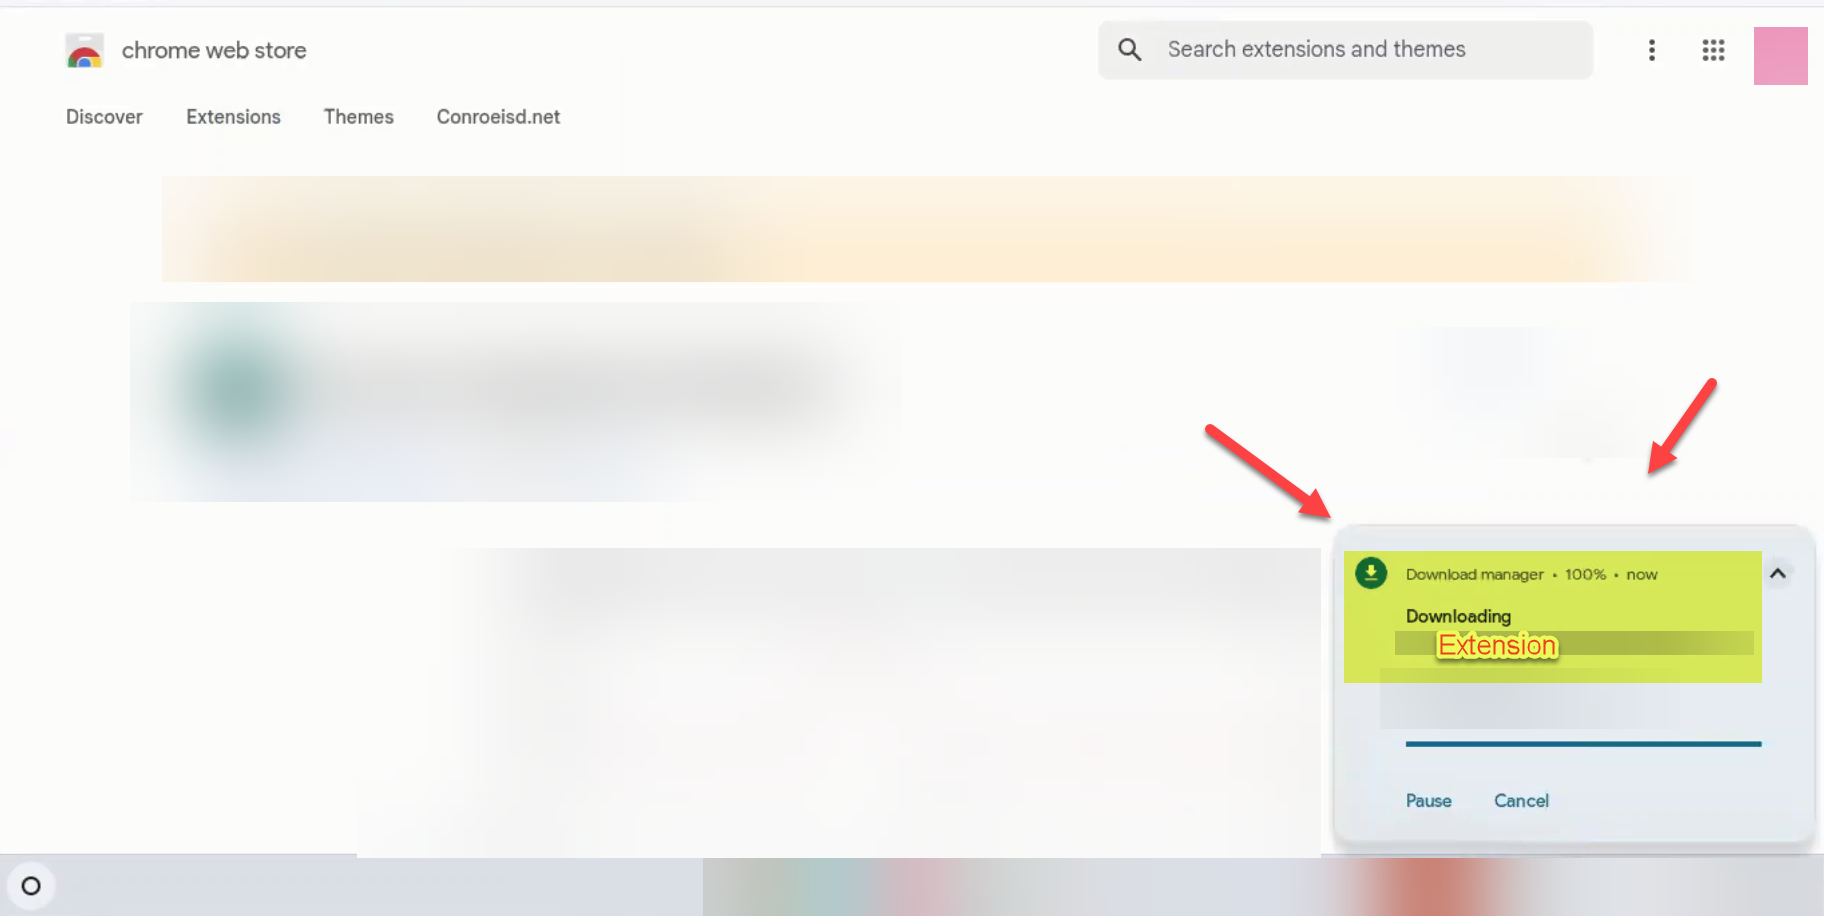
Step 3: Install the Extension
-
Once on the extension's page, click the blue Add to Chrome button.
-
A confirmation box will appear. Click Add app (or "Add extension").
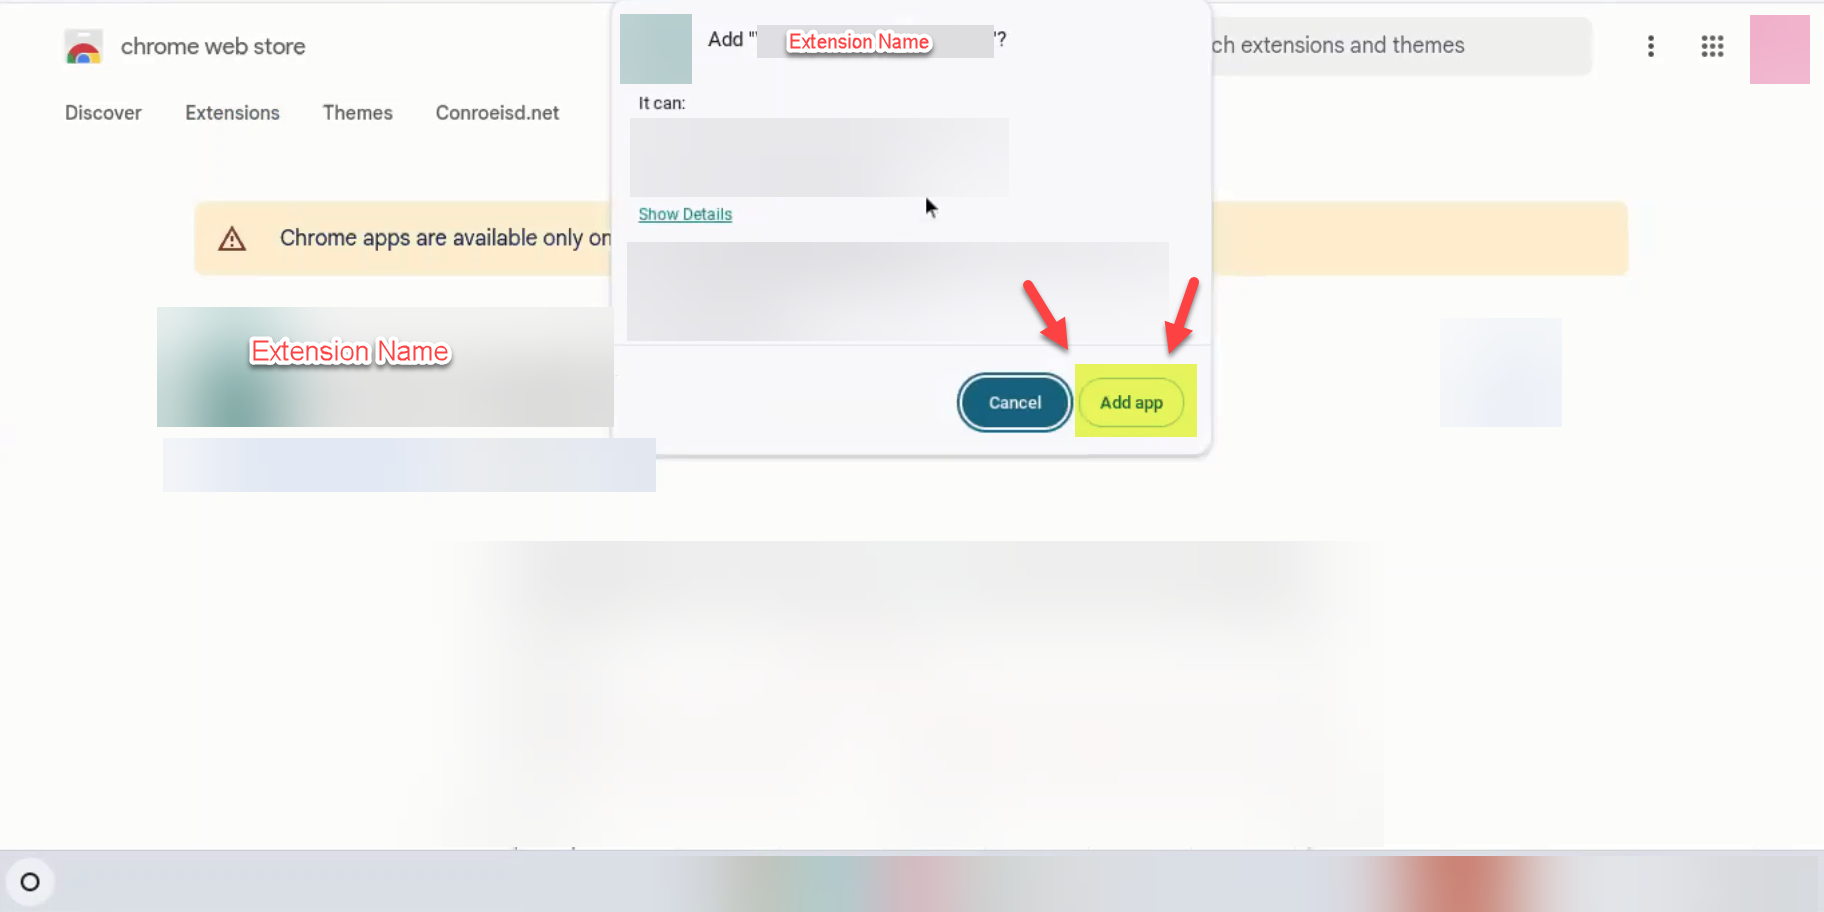
-
A notification in the bottom right corner will confirm that the download and installation have started.
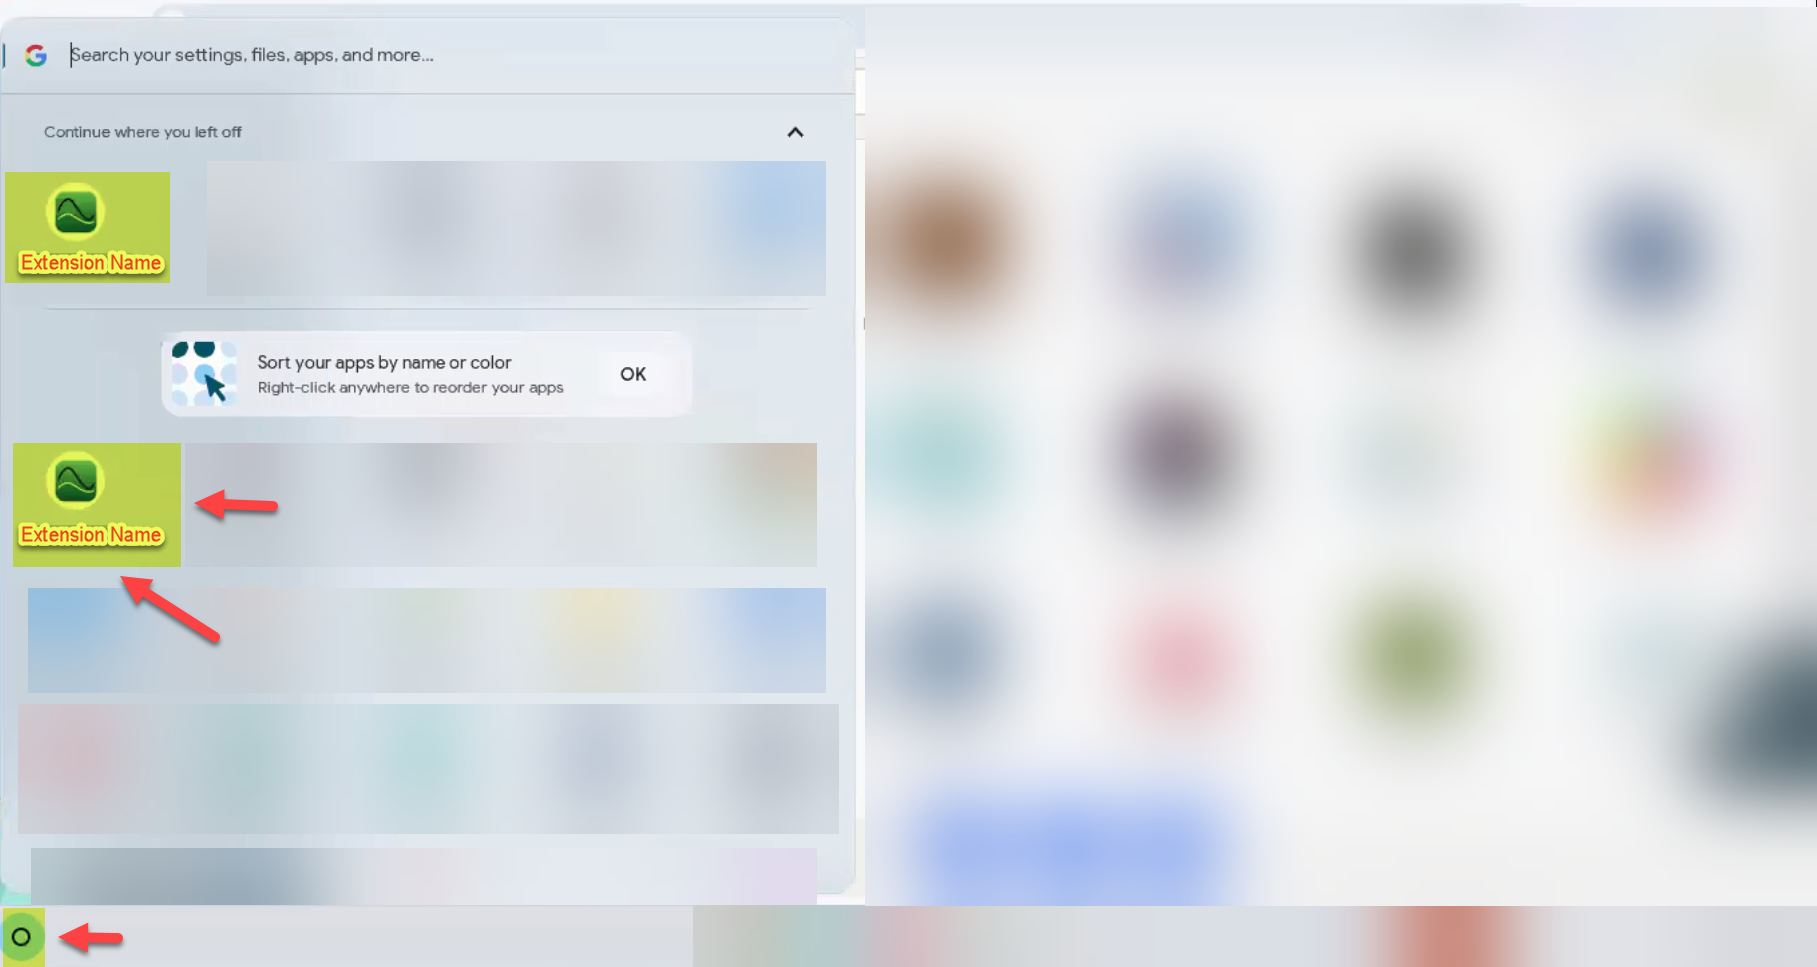
Step 4: Verify Installation
-
Click the Launcher (small circle) in the bottom left corner again.
-
Look for the extension icon in your list of apps.
-
If the icon is there, the extension has been successfully added to your account.
Need additional help? Click here for further assistance.