
New Features of Canvas Studio Capture

Canvas Studio Capture provides you with a native screen capture recording experience. This browser-based solution allows you to create content quickly and smoothly, while also eliminating the need to download and install a separate screen capture product. You will be able to create captions for uploaded media and for media linked from YouTube and Vimeo.
Canvas Studio Capture is currently supported on Chrome and Edge browsers only. For all other browser you should continue to use Screencast-o-Matic.
Canvas Studio Capture is optimized for Full-HD recordings, with a maximum resolution of 1920 x 1080 pixels. This feature performs best when the screen matches or is below the maximum resolution. If the screen has a higher resolution, performance issues may occur during recording and/or a decrease in video quality.
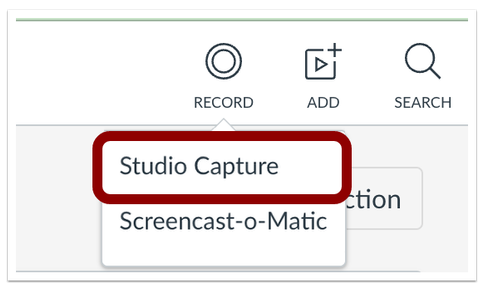
In your Studio Library, your Record options are updated to include Studio Capture and Screencast-o-Matic. The Studio Capture option allows you to capture screen recordings within their browser.
SCREEN SHARING IN STUDIO CAPTURE
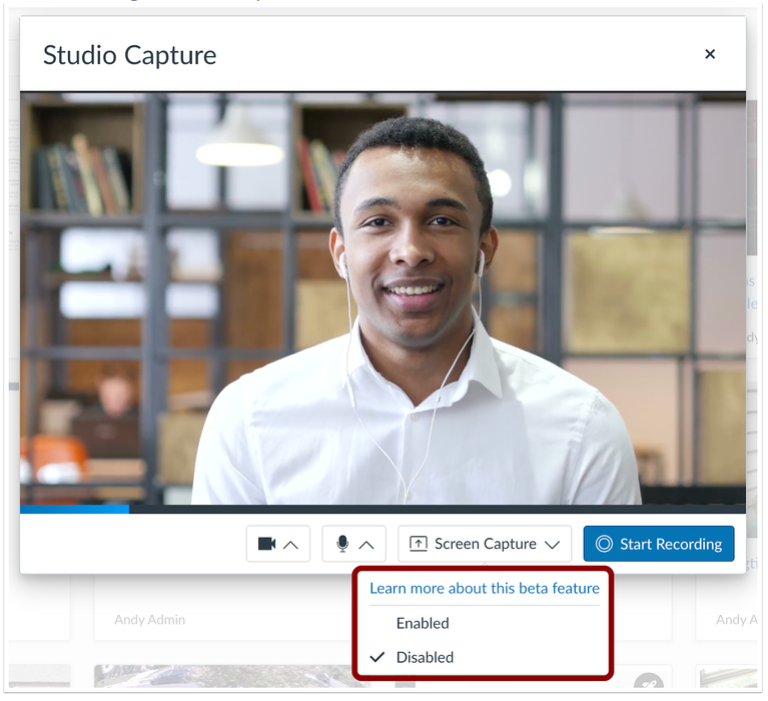
The Screen Capture solution is disabled by default and can be enabled by selecting the Enable Options.
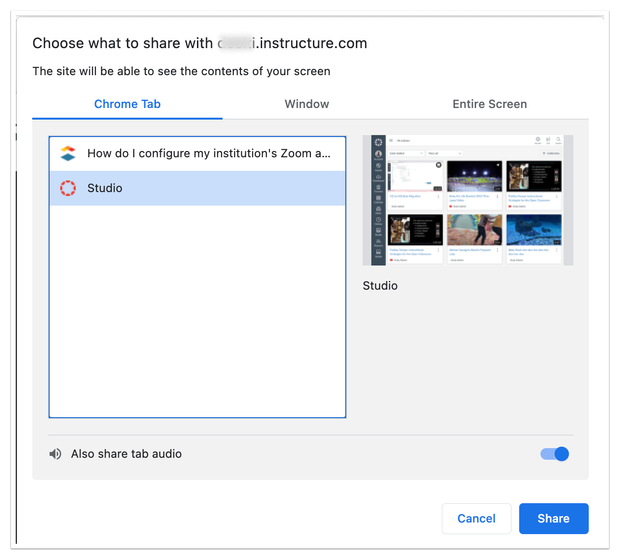
The Screen Share window provides options to share specific tabs, windows, or their entire screen. Click the Share button to set up screen sharing.
The Share button starts screen sharing only; it does not begin recording.
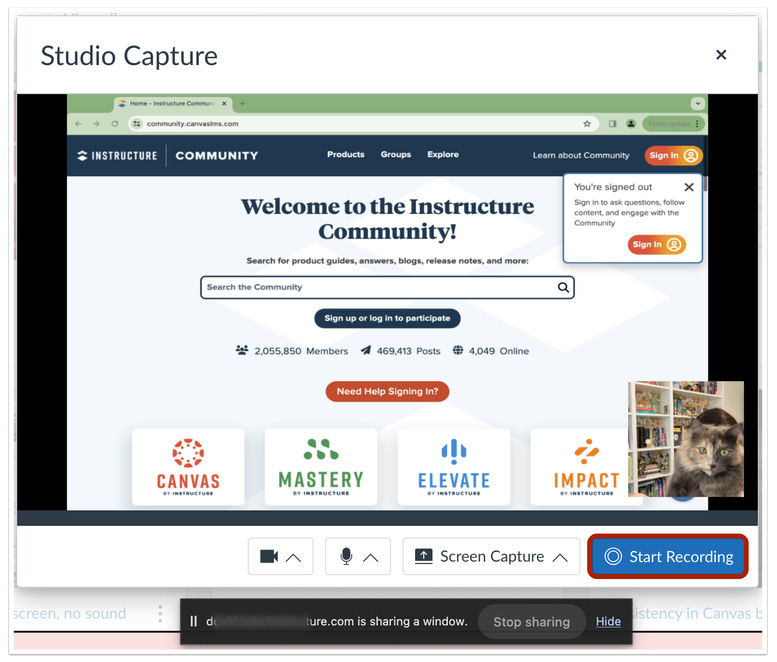
Once screen sharing is initiated, click the Start Recording button to begin the recording, you will get a countdown prompt.

Click the Stop sharing button to finish the screen sharing session and the recording.
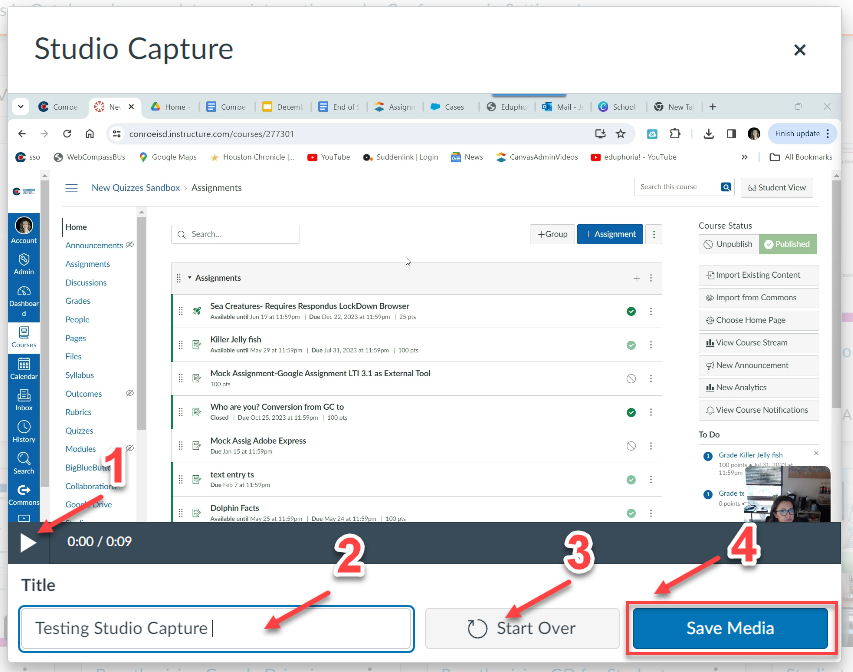
You are now given the option to Review your recording [1], Title your Studio Capture [2], Start Over [3], and Save Media [4].
WEBCAM RECORDING IN STUDIO CAPTURE
Again from your Studio Library, click on Record then, select Studio Capture.
The Studio Capture pop screen will display, click the Start Recording button to begin a webcam recording session.
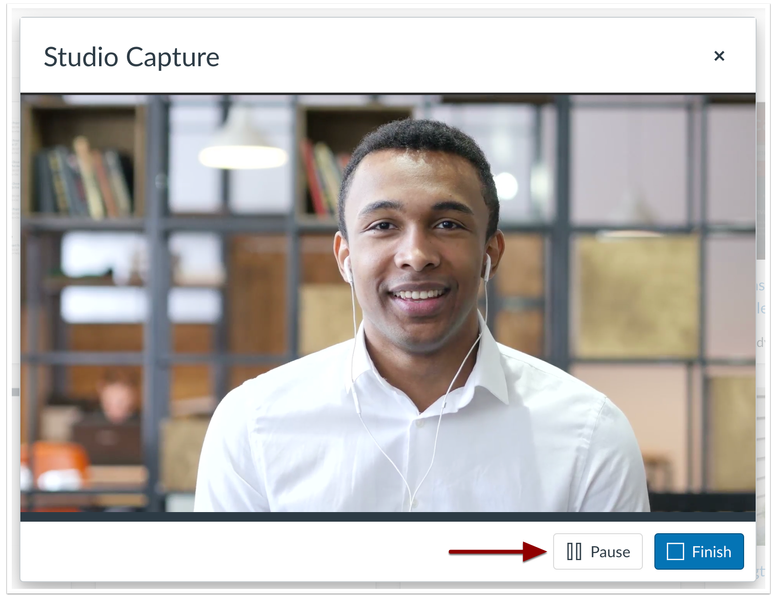
The Pause button allows you to pause during a recording. Click the Finish button to end a webcam recording session.
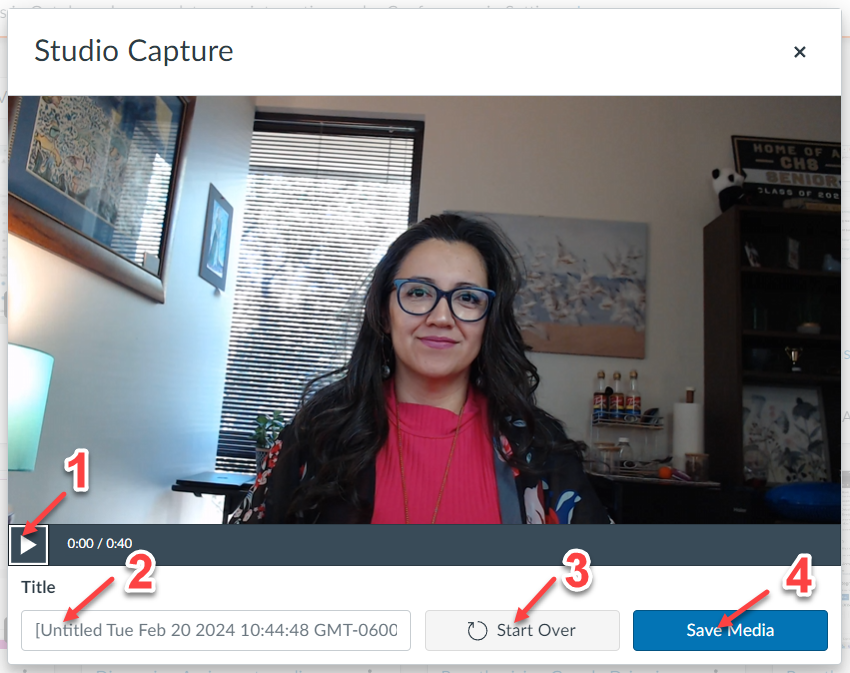
You will be given the option to Review your recording [1], Title your Studio Capture [2], Start Over [3], and Save Media [4].
STUDIO CAPTURE MEDIA RECOVERY SOLUTION
Canvas Studio for Chrome and Edge Browsers provides expanded recovery features that allow you to continue recording if connectivity is lost and to save partial recordings interrupted by a browser crash or loss of power during recording.

In the case of a browser crash or loss of power while recording a video, the unfinished recording notification displays when the browser is restored.
Click the Handle it button to manage the unfinished recording.
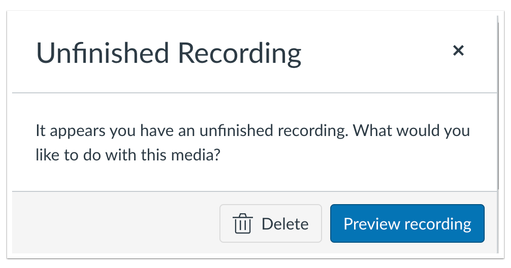
You can Delete or Preview the unfinished recording.

Additionally, if connectivity is lost during recording, Canvas Studio continues to record without interruption using the computer's memory. If connectivity is not restored when the recording has ended, the Upload Video notification displays.
When the connection is restored, refresh the page, then, preview and save or delete the recording.
MANUALLY CREATE CAPTIONS
You can manually create captions for uploaded media and for media linked from YouTube and Vimeo. This functionality allows you to easily create your own captions within the Studio Caption Editor.
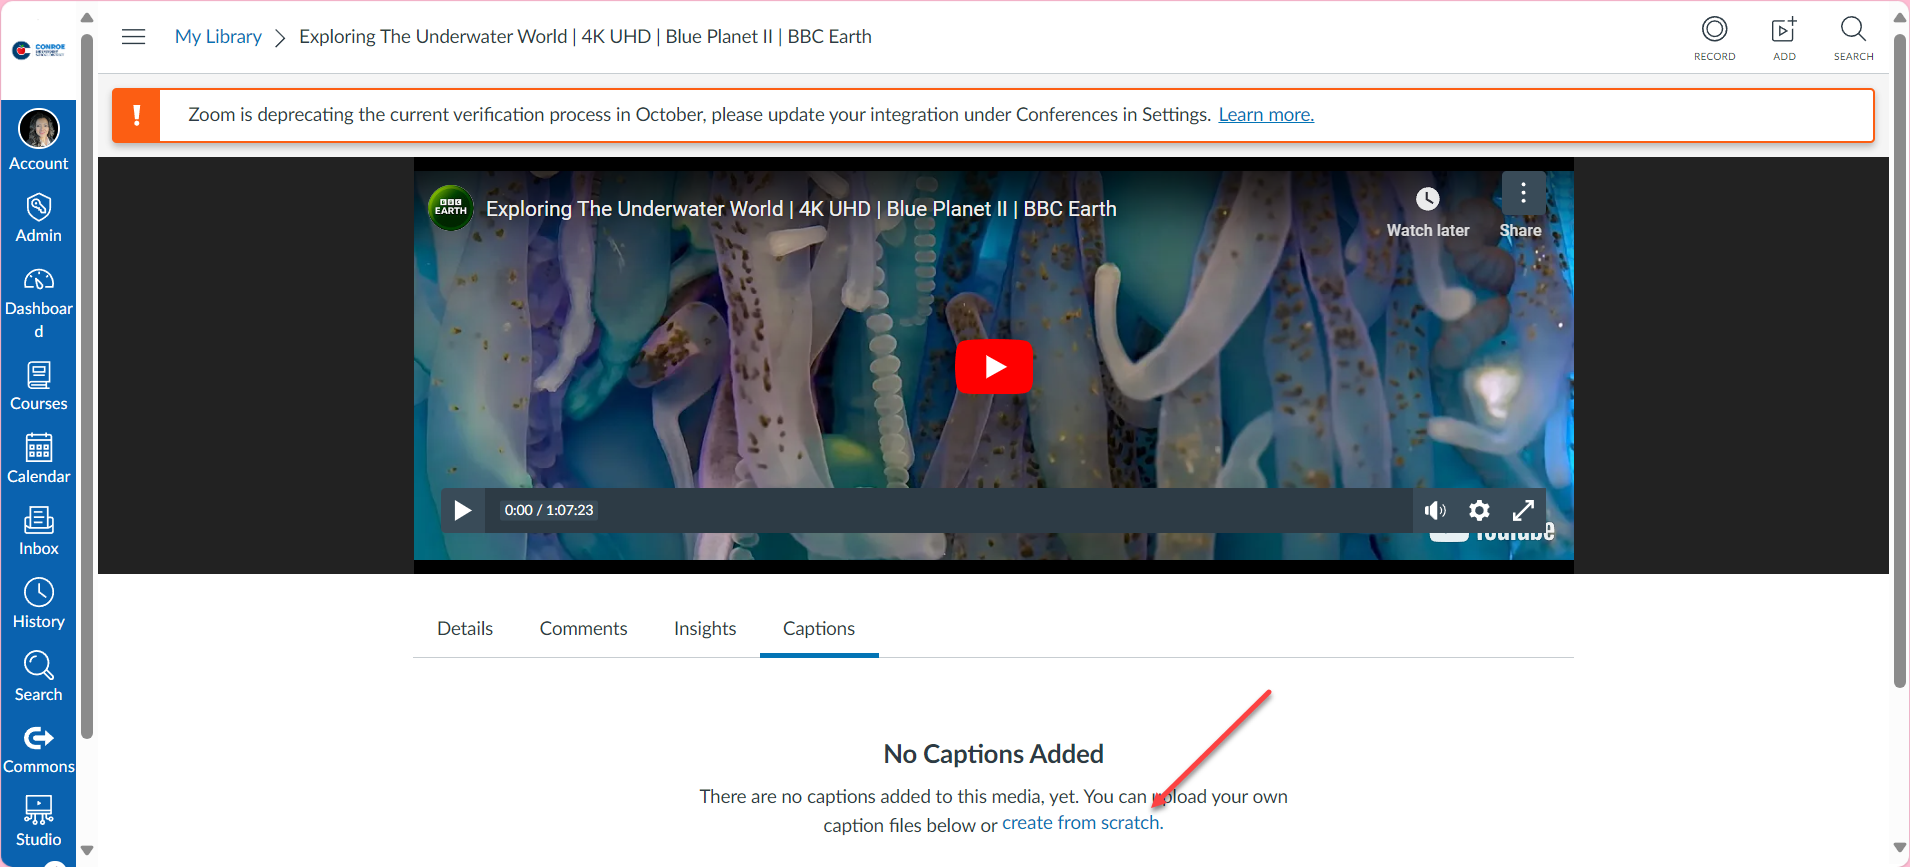
From your Studio library or Canvas course’s Studio, select the YouTube or Vimeo video you wish to caption.

Click the Create from scratch link to manually add captions to Studio media.
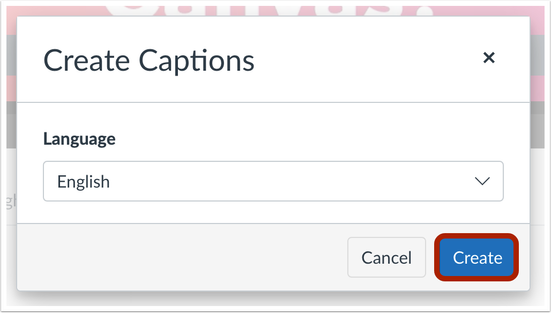
If captions already exist for the media, select the Create Captions option to create captions in additional languages.

In the Create Captions window, select the caption language. Click the Create button to begin caption creation.
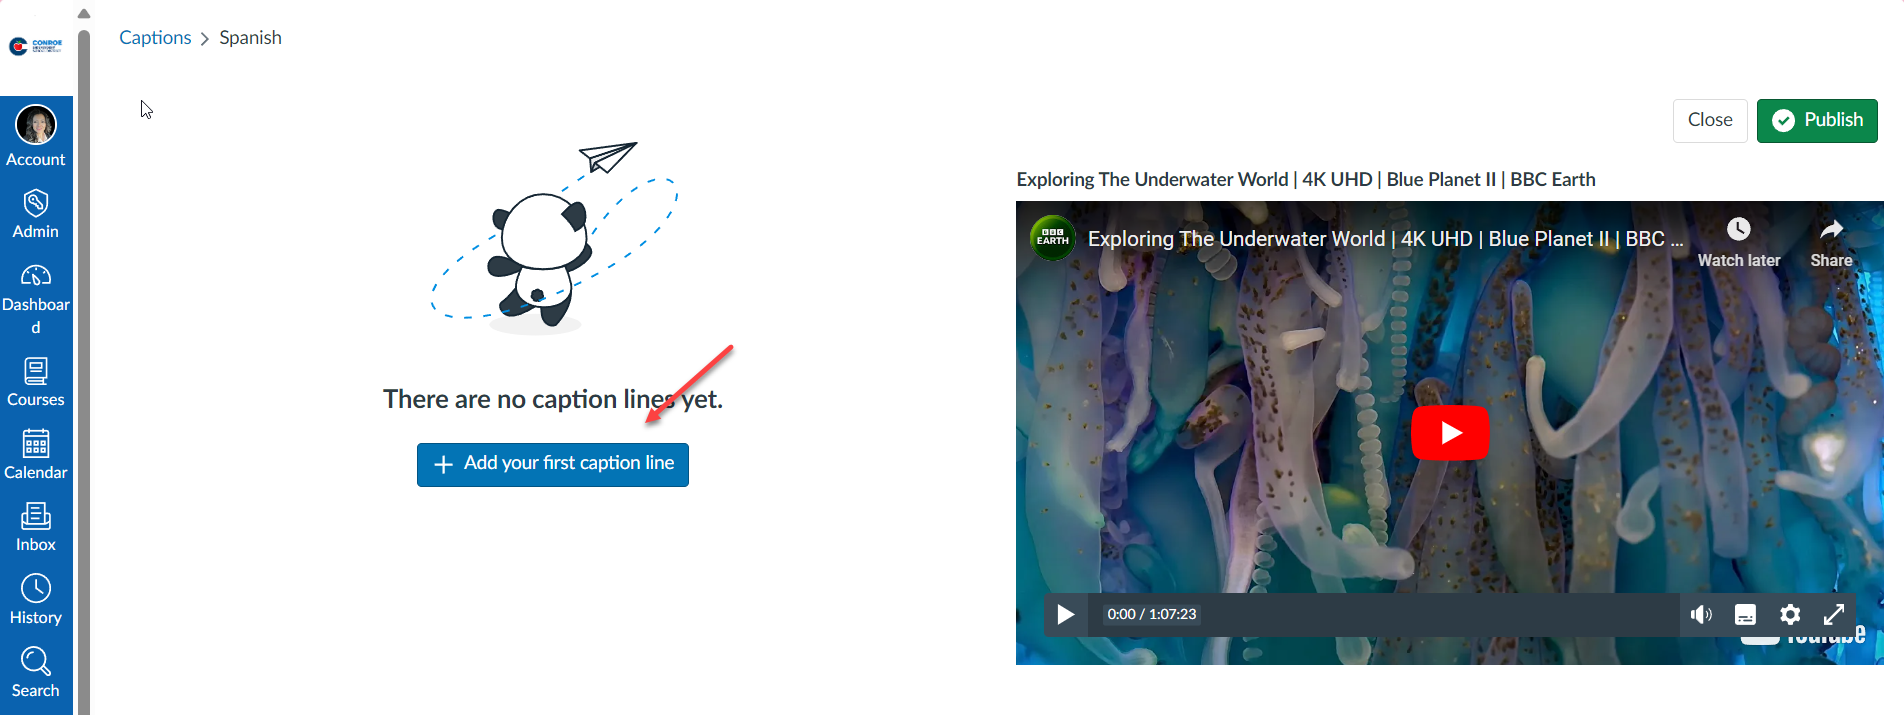
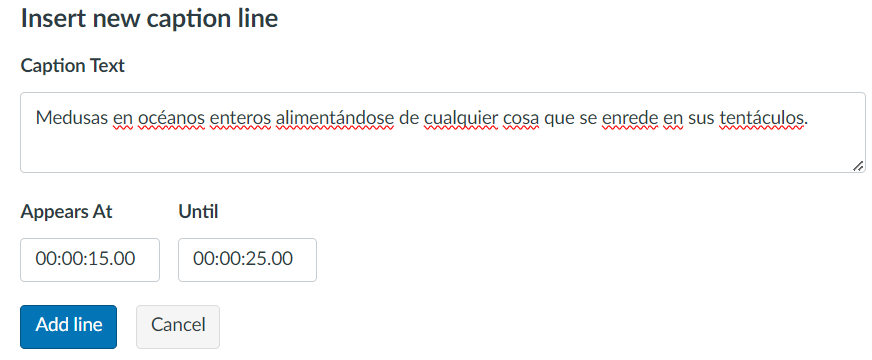
In the Caption Editor, click the Add your first caption line button to begin manually adding captions.
Enter a caption line in the Caption Text field.
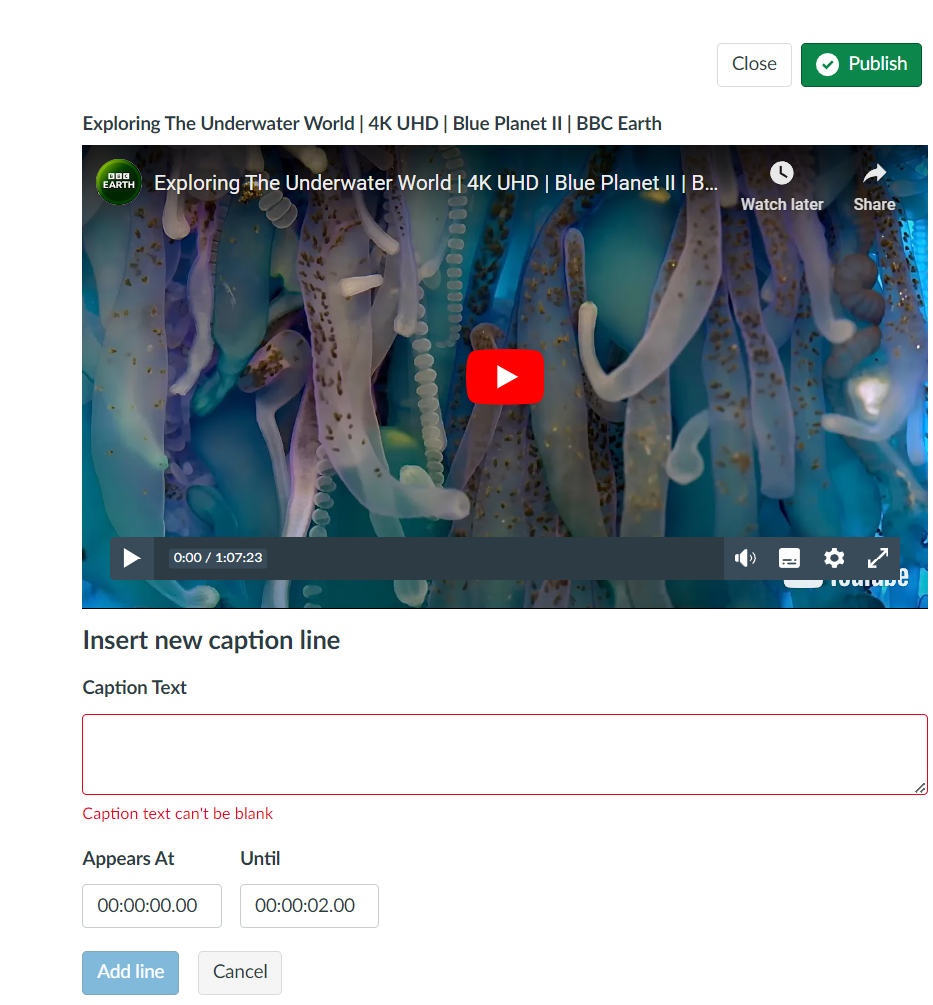
To control how long the caption line displays, enter a start time in the Appears At field and an end time in the Until field. The timestamp format is: [hours]:[minutes]:[seconds].[milliseconds]. Click the Add line button.
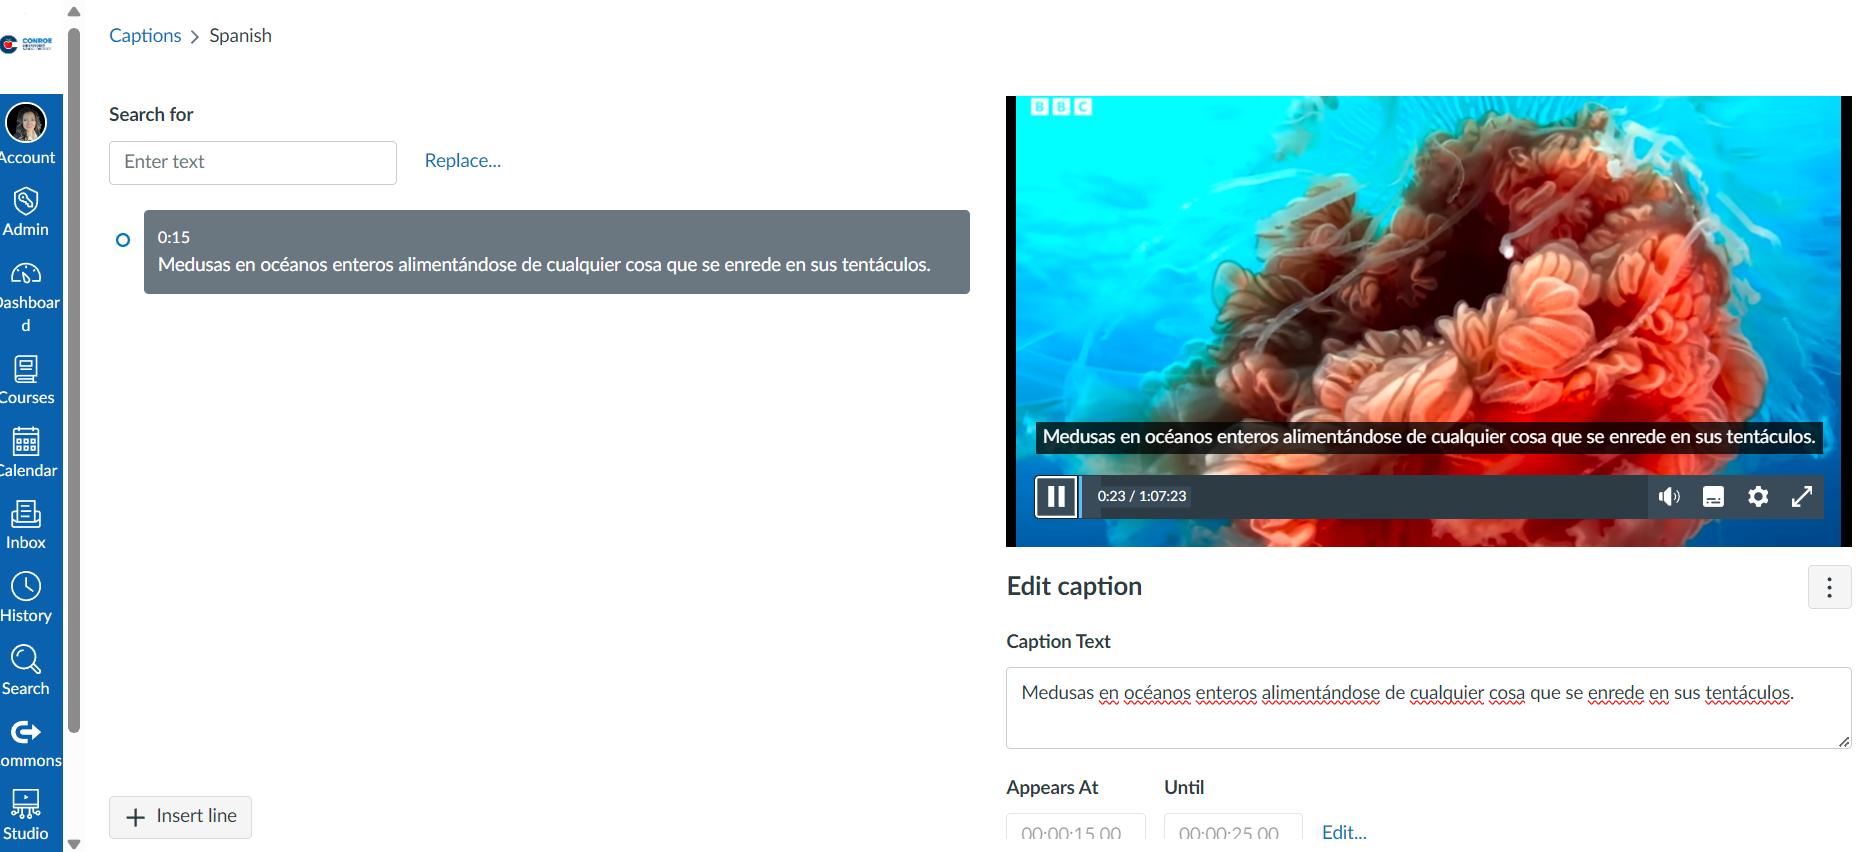
Once added, the caption line and start time display in the Caption Editor. To add additional caption lines, click the Insert line button.
You can click the Close button to save captions, or the Publish button to publish the media with captions.
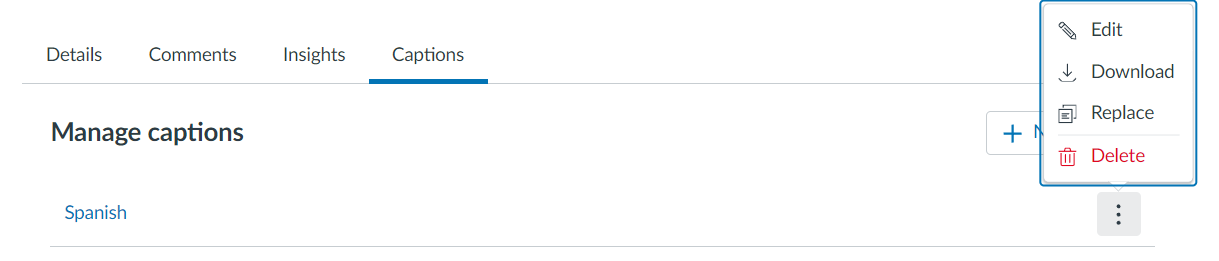
Once the captions file is published, you can edit, download, replace, or delete the file.
😀 Thank you for taking the time to view this help document! If you encounter any issues, please use the “Report a Problem” option in the Canvas Help menu.