
If you scan an asset during an audit and notice it has the incorrect room or location in Incident IQ, you can easily correct it. The Bulk Action Move feature allows you to quickly update the location and room assignments for one or multiple assets at once after adding them to a Rapid Scan list.
Prerequisite: You must have a list of scanned assets first. If you need help creating this list, please review our guide on Performing an Audit: Rapid Scanning.
How to Move Assets in Bulk
Step 1: Select Assets and Click Move
-
Once you have Rapid Scanned the assets that need to be updated, look at your list in the pop-up window.
-
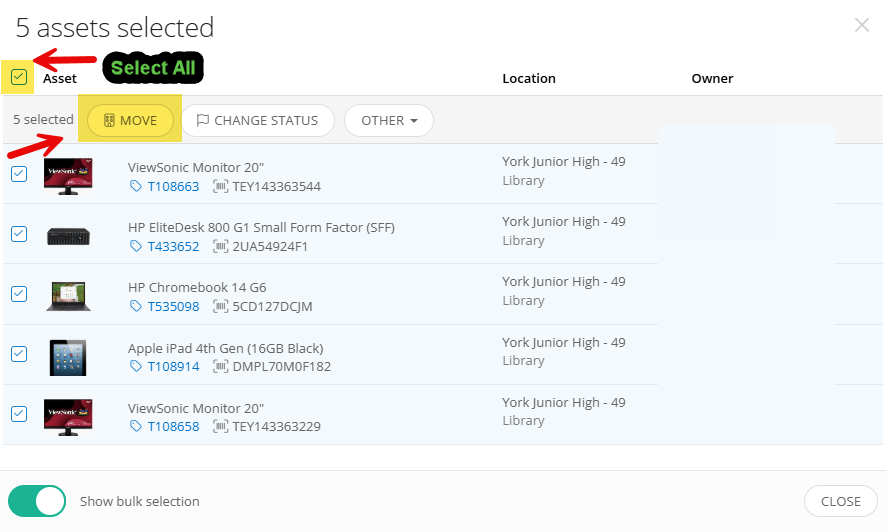
Click the Select All checkbox to select all the assets on your list.
-
Click the Move button.
Step 2: Select the Location
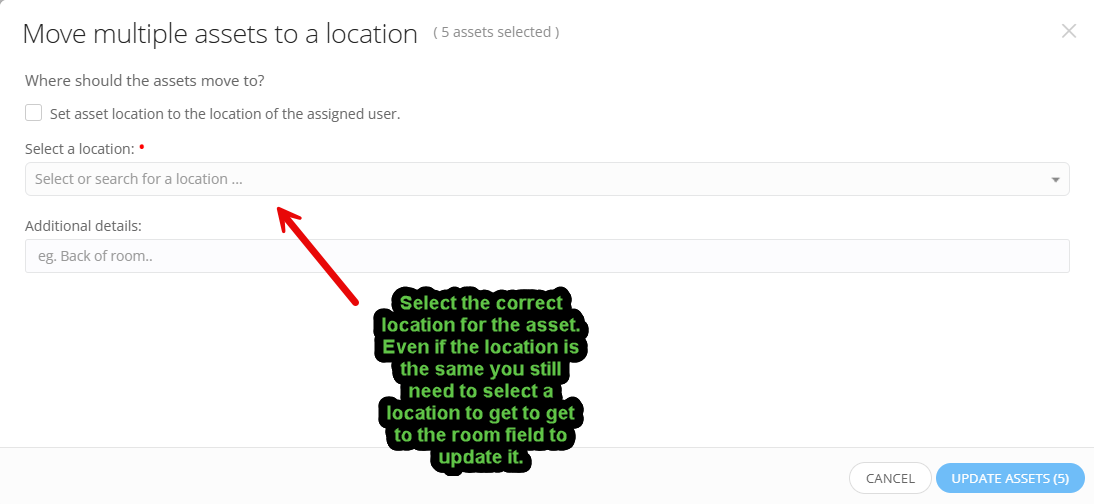
In the Bulk Action Move pop-up window, you must first select the Location for the asset.
-
CRITICAL SYSTEM NOTE: Even if the campus/location is staying exactly the same, you must re-select the location from the drop-down menu. If you do not click the location, Incident IQ will not unlock the "Room" field for you to update.
Step 3: Select the Room
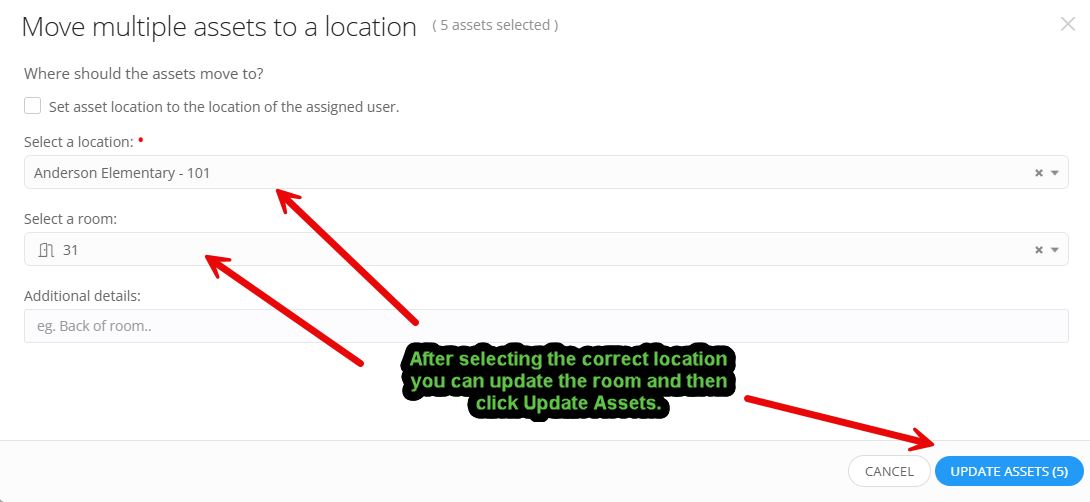
Once the location is selected, the room field will become available. Select the correct Room for the assets, and then click Update Asset.
Step 4: Confirm and Apply Changes
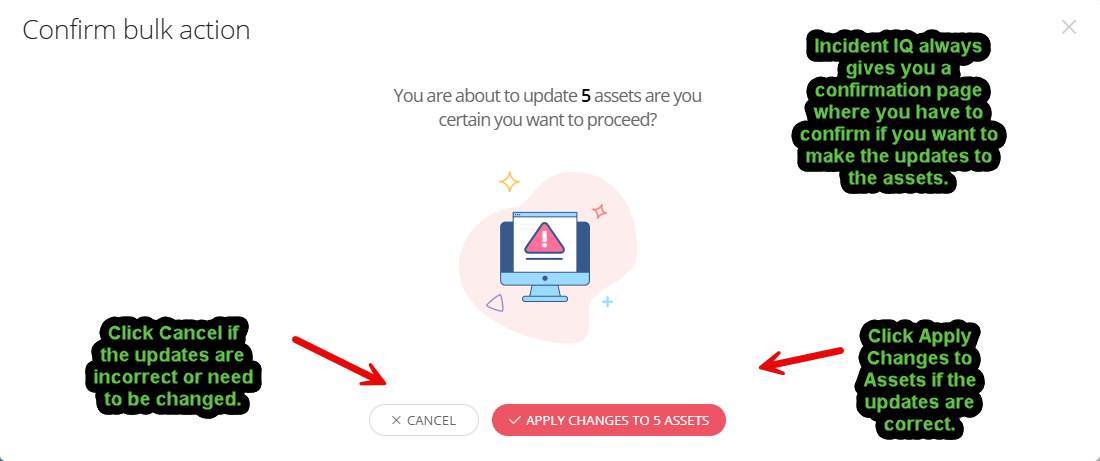
Incident IQ will display a confirmation page summarizing the location and room changes.
-
Review the details carefully. If everything is correct, click Apply Changes.
-
If something is incorrect, click Cancel to go back and fix the information.
Next Steps: Verify Your Assets
You have successfully updated the room and location info for your assets! However, the audit process for these items is not fully complete until they are verified.
Now that their locations are accurate, you must verify them. Follow the Performing an Audit: Bulk Actions Verify Assets guide to learn how to stamp them as verified.
Still have questions? Visit the Additional Help section for further assistance.