
The Bulk Actions Verify Assets tool allows you to quickly verify multiple assets at once in Incident IQ. Follow this guide to learn how to efficiently verify a batch of assets during your audit.
Important Note: If you scan an asset in your room and it is not showing up in Incident IQ, please contact the campus tech at your location. Your campus tech will reach out to the District Asset team to get the asset added to the system.
How to Verify Assets in Bulk
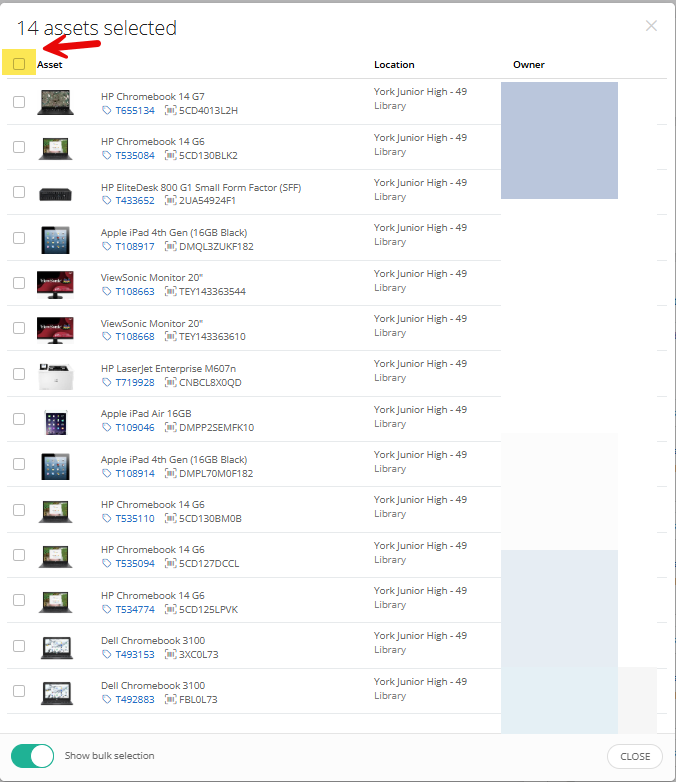
Step 1: Rapid Scan and Select All
-
Perform a Rapid Scan of all the assets you are verifying in the room.
-
Click the Select All Checkbox located in the top right corner (just below the asset count) to select all the devices you have scanned.
Need help with scanning? See our guide on Performing an Audit: Rapid Scan.
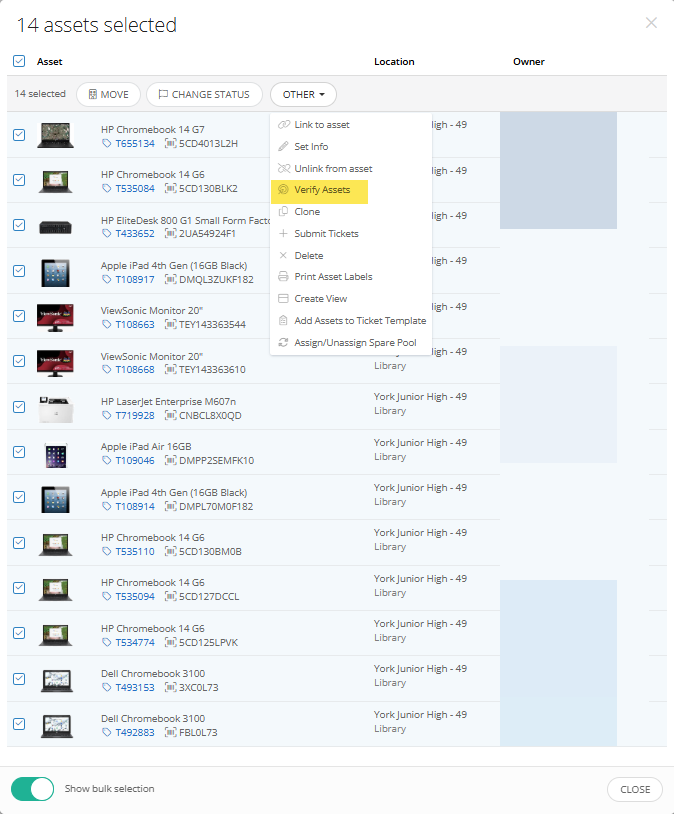
Step 2: Select 'Verify Assets'
Click the Other drop-down arrow and then select Verify Assets.
Only verify the assets if they currently show the correct room and location you are auditing. If the location is wrong, do not verify them yet (see the Troubleshooting section below).
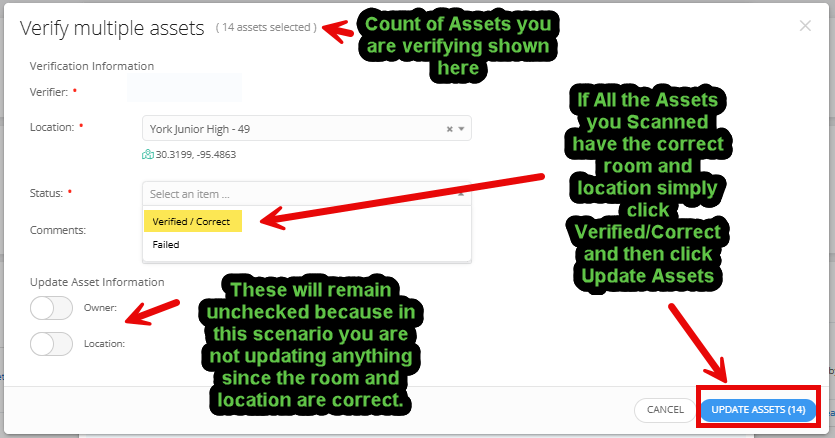
Step 3: Update Verification Status
If all the assets you scanned show the correct Location and Room:
-
Click the Status drop-down arrow.
-
Select Verified/Correct.
-
Click the Update Assets button.
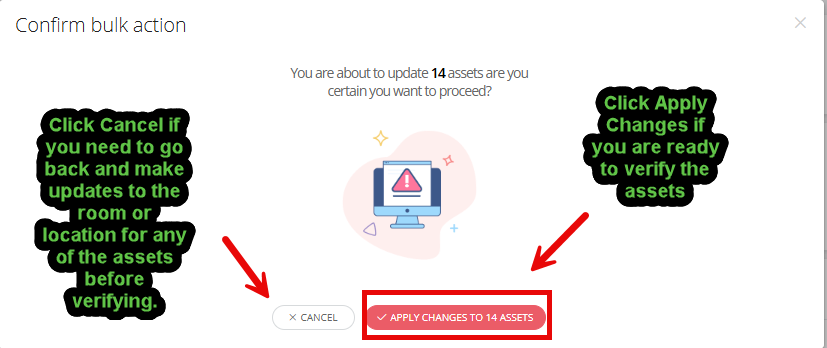
Step 4: Confirm and Apply Changes
A "Confirm bulk action" window will appear asking you to confirm the updates.
-
Review the information. If everything is correct, click Apply Changes.
-
If you mistakenly clicked the update button or changes need to be made, click Cancel to return to the previous window.
What does this change do? The "change" in this scenario refers only to the verification status. Because you did not make updates to the room or location, that info remains exactly the same in Incident IQ. The only change is that the assets now have a "Verified" status stamped with the current date and time.
Troubleshooting & Next Steps
If the assets you scanned do not have the correct information, you must update them before you verify them:
-
To update only the Room or Location: Follow the guide for Performing an Audit: Bulk Actions Move Assets.
-
To update additional fields (like Cart Number or Notes): Follow the guide for Performing an Audit: Bulk Actions Set Info.
Important Note: If you scan an asset in your room and it is not showing up in Incident IQ, please contact the campus tech at your location. Your campus tech will reach out to the District Asset team to get the asset added to the system.
Still have questions? Visit the Additional Help section for further assistance.