
Follow this guide to create a Custom View of your EOL Recycling Room in Incident IQ.
Important Prerequisite: Before following the instructions below, you must change the status of the assets you are recycling to their corresponding EOL status so that they are automatically moved to your Recycling EOL Room.
If you have not done this yet, please see How to Change the Status of Technology Being Recycled to EOL.
How to Create the EOL Custom View
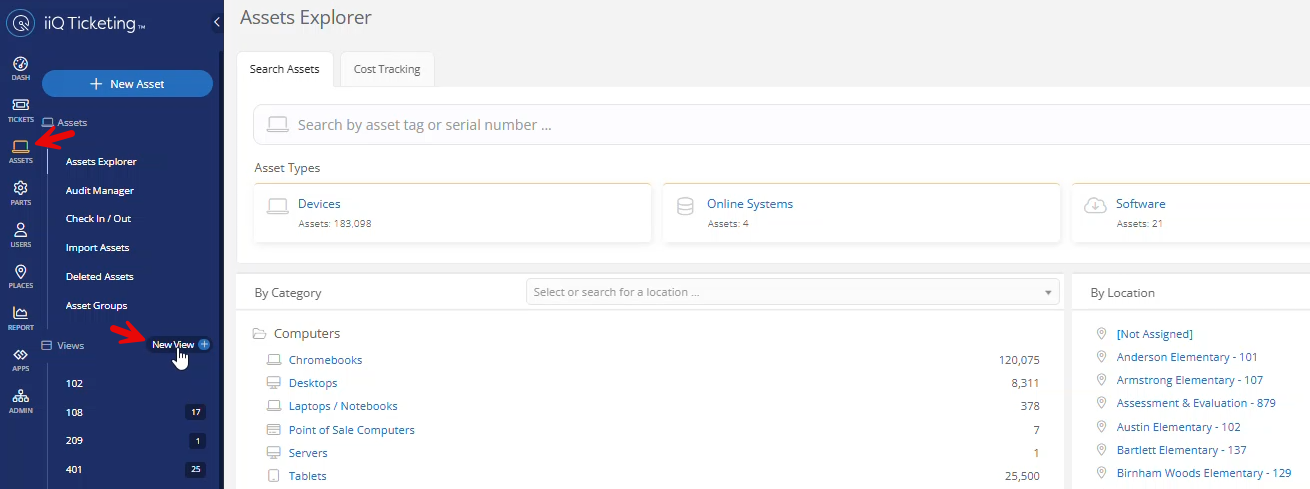
Step 1: Navigate to New View
Log into Incident IQ. On the main navigation menu, click on the Assets tab, and then click on New View.
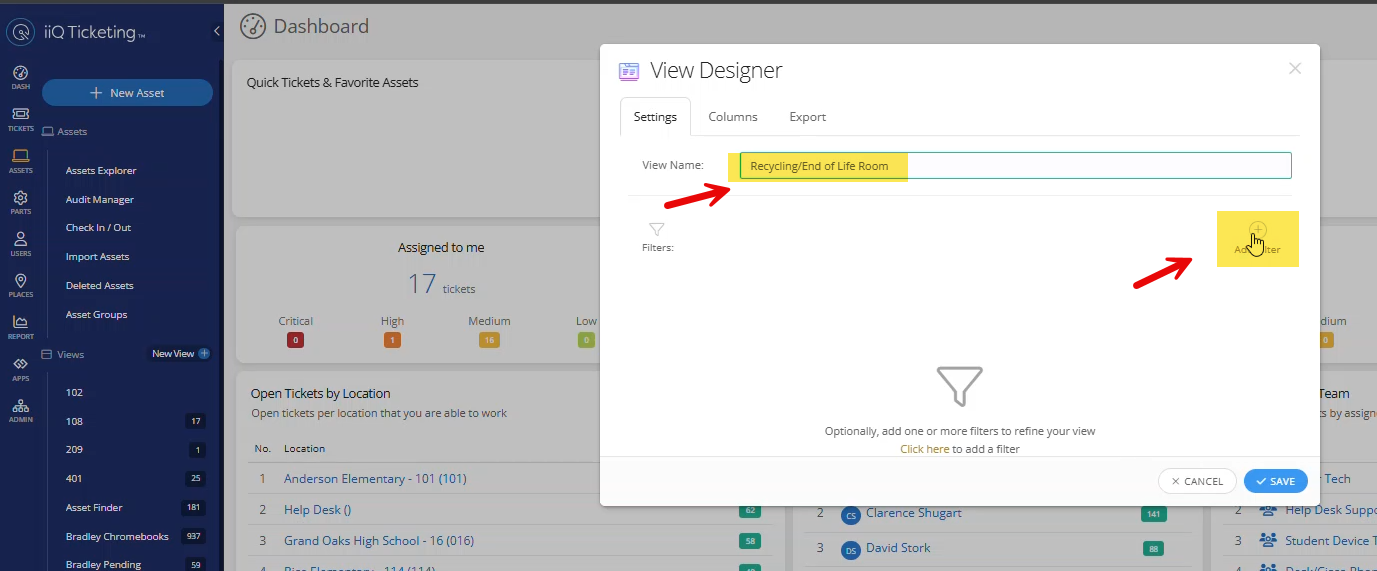
Step 2: Name the View and Add a Filter
-
Change the name of the Custom View to Recycling/End of Life Room.
-
Click the Add Filter button.
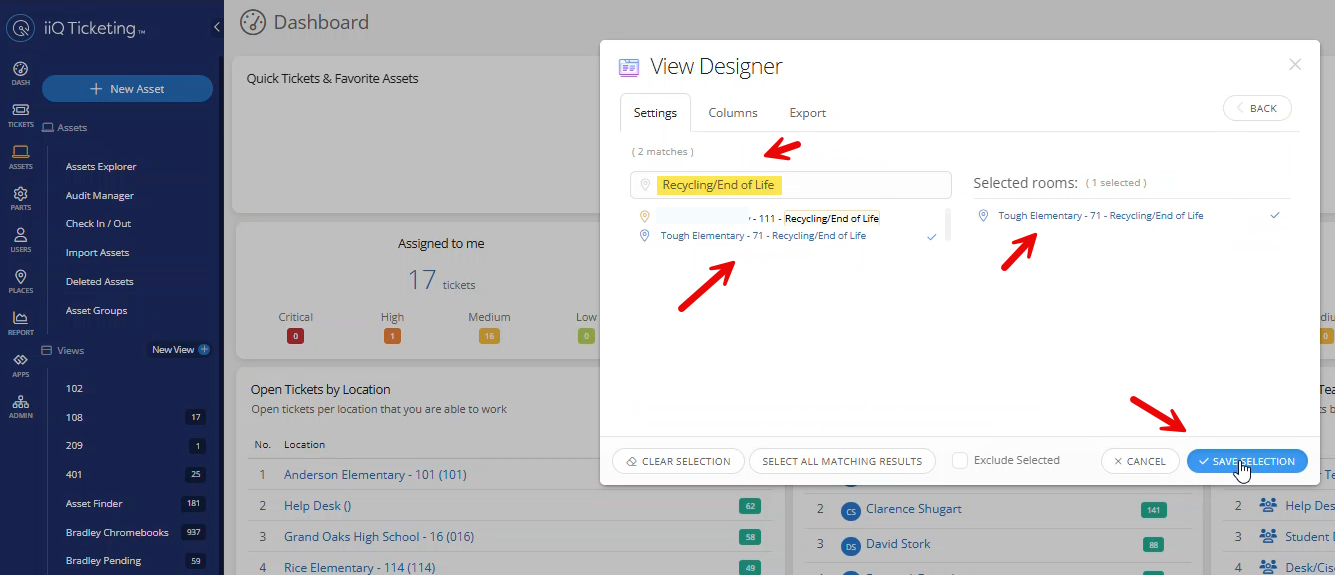
Step 3: Select the Room Filter
In the filter menu, click on Location Filters, and then click on Room.

Step 4: Search and Select Your EOL Room
Type Recycling/End of Life into the search bar. Locate and select your specific school's Recycling/End of Life room from the results, and then click Save Selection.
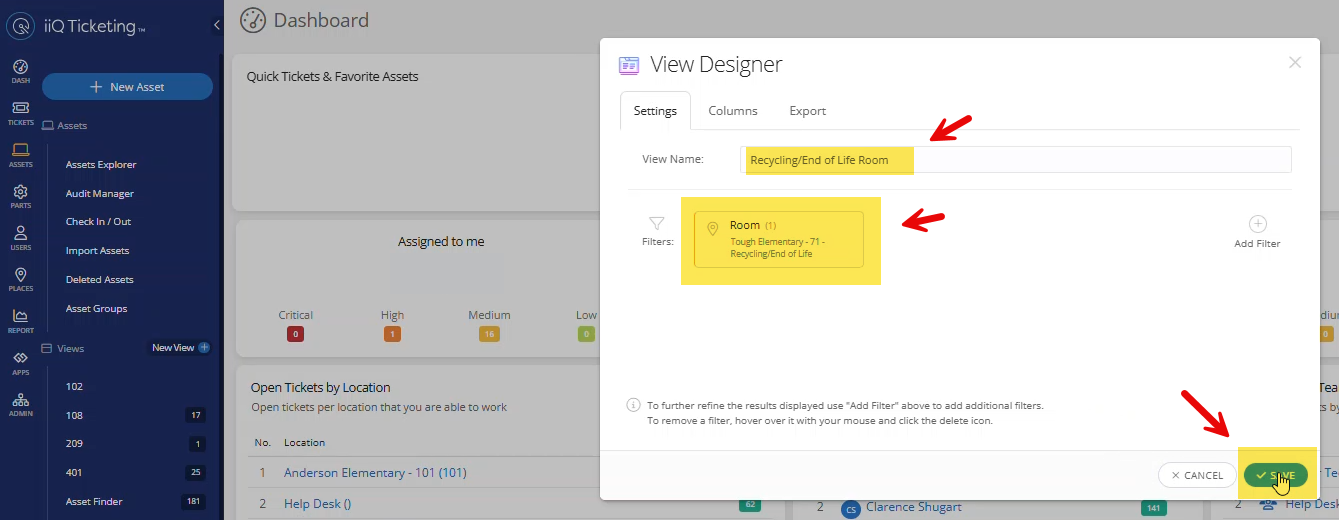
Step 5: Verify and Save
Double-check the top of your screen to ensure that your custom view has the correct name and that the correct room is selected. Once verified, click Save.
Success & Next Steps
You have successfully created a Custom View of your Recycling/End of Life Room!
To complete the technology recycling workflow, you must now complete the following steps:
-
Export Assets Being Recycled in Excel Format (This file will be uploaded to the Technology Recycling ticket you submit).
-
Submit a Technology Recycling Ticket so that your Network Tech can come and pick up your old tech.
Still have questions? Visit the Additional Help section for further assistance.