
This guide explains how to claim your specific classroom, office, or physical workspace in Incident IQ. Claiming your room is a required step for all campus staff. It associates your account with your physical location so you can view and manage the technology assets assigned to that space.
Steps to Claim Your Room
1. Access Your Profile
-
Open Incident IQ by searching and opening Incident IQ.
-
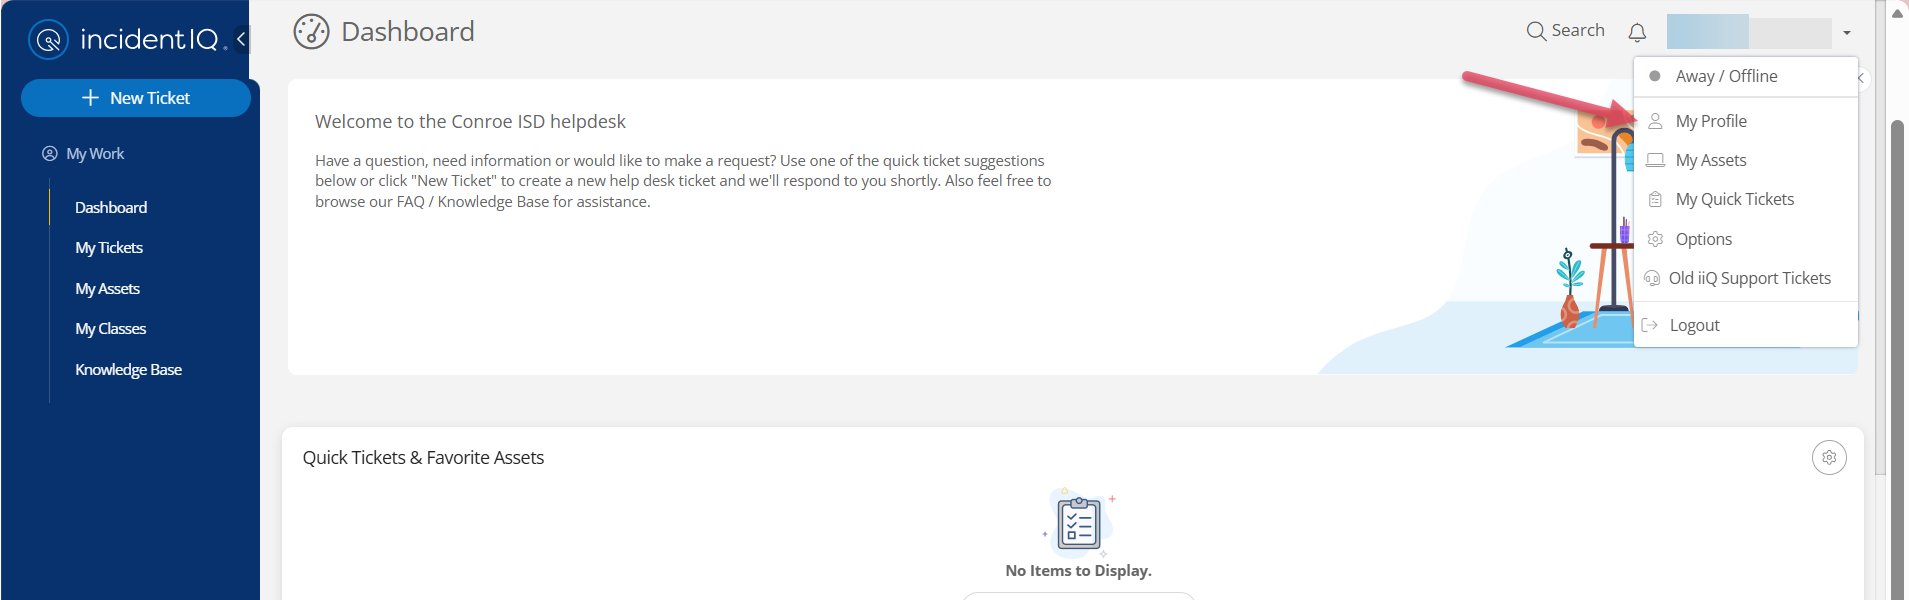
Select your Name in the top-right corner of the screen.
-
Select My Profile from the drop-down menu.
2. Search for Your Room
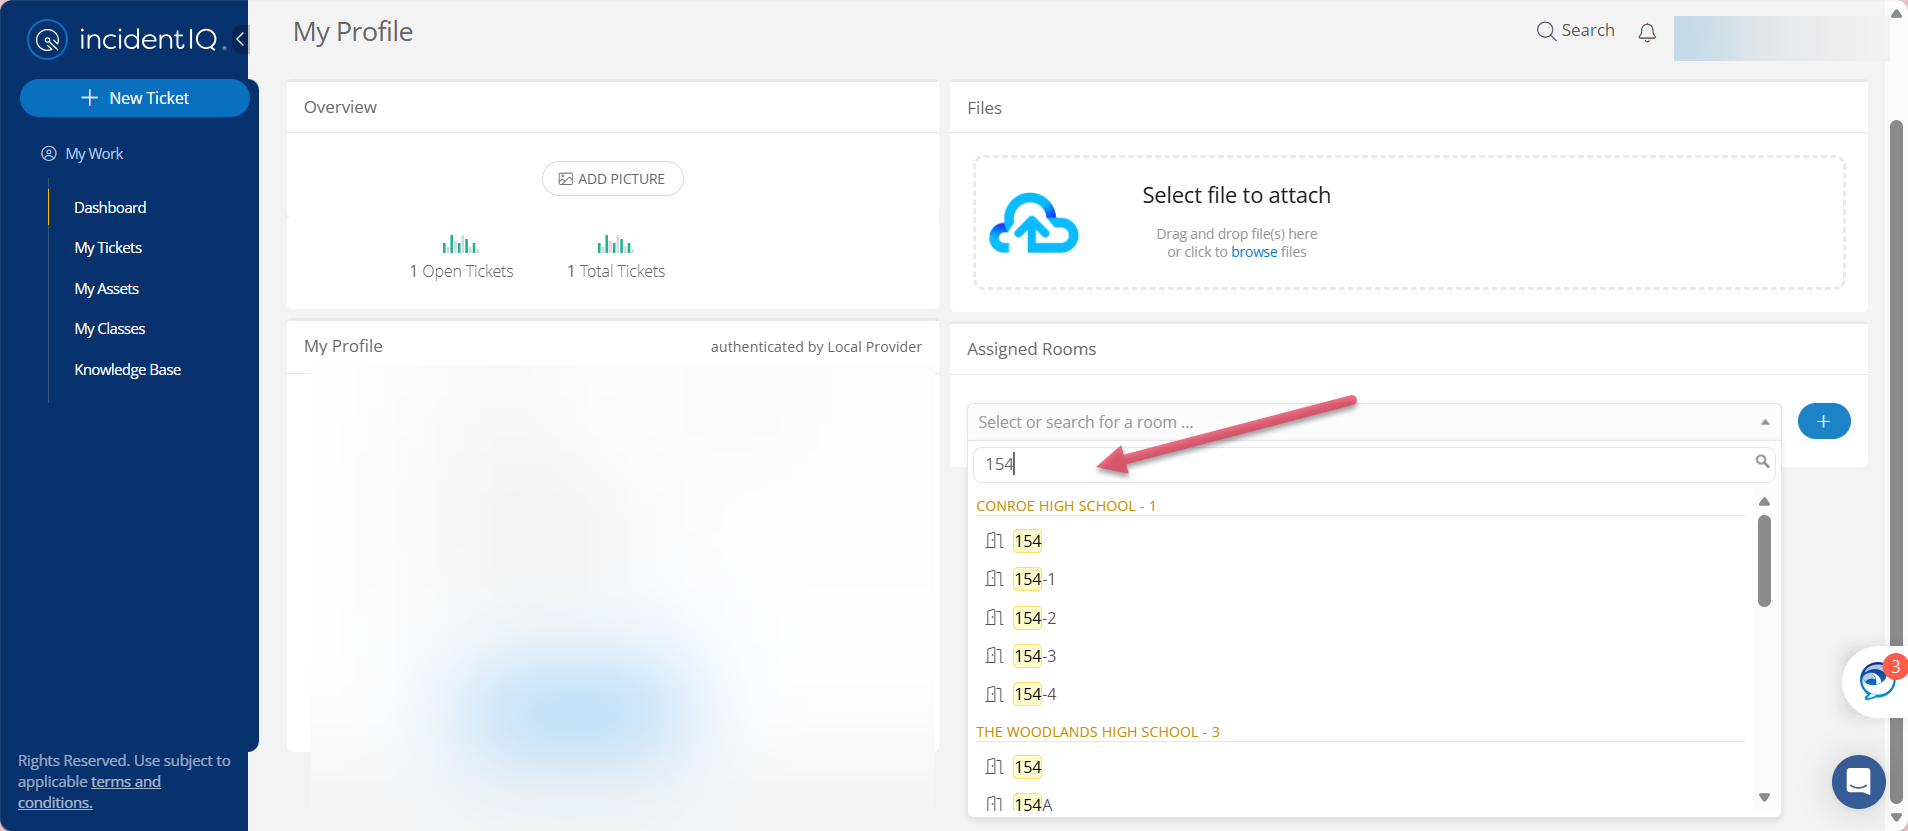
In your profile settings, locate the Assigned Rooms box and use the drop-down menu to search for your space.
Important: Type the Room Number
Please make sure you type the room number into the drop-down field when selecting a classroom.
Not all room numbers will appear when scrolling through the list. Some rooms will only populate after you manually enter the room number.
-
If you have a room number: Type the number (e.g., "154").
-
If you do not have a room number: Type the name of the room (e.g., "Cafeteria," "Gym," or "Library").
3. Add the Room
-
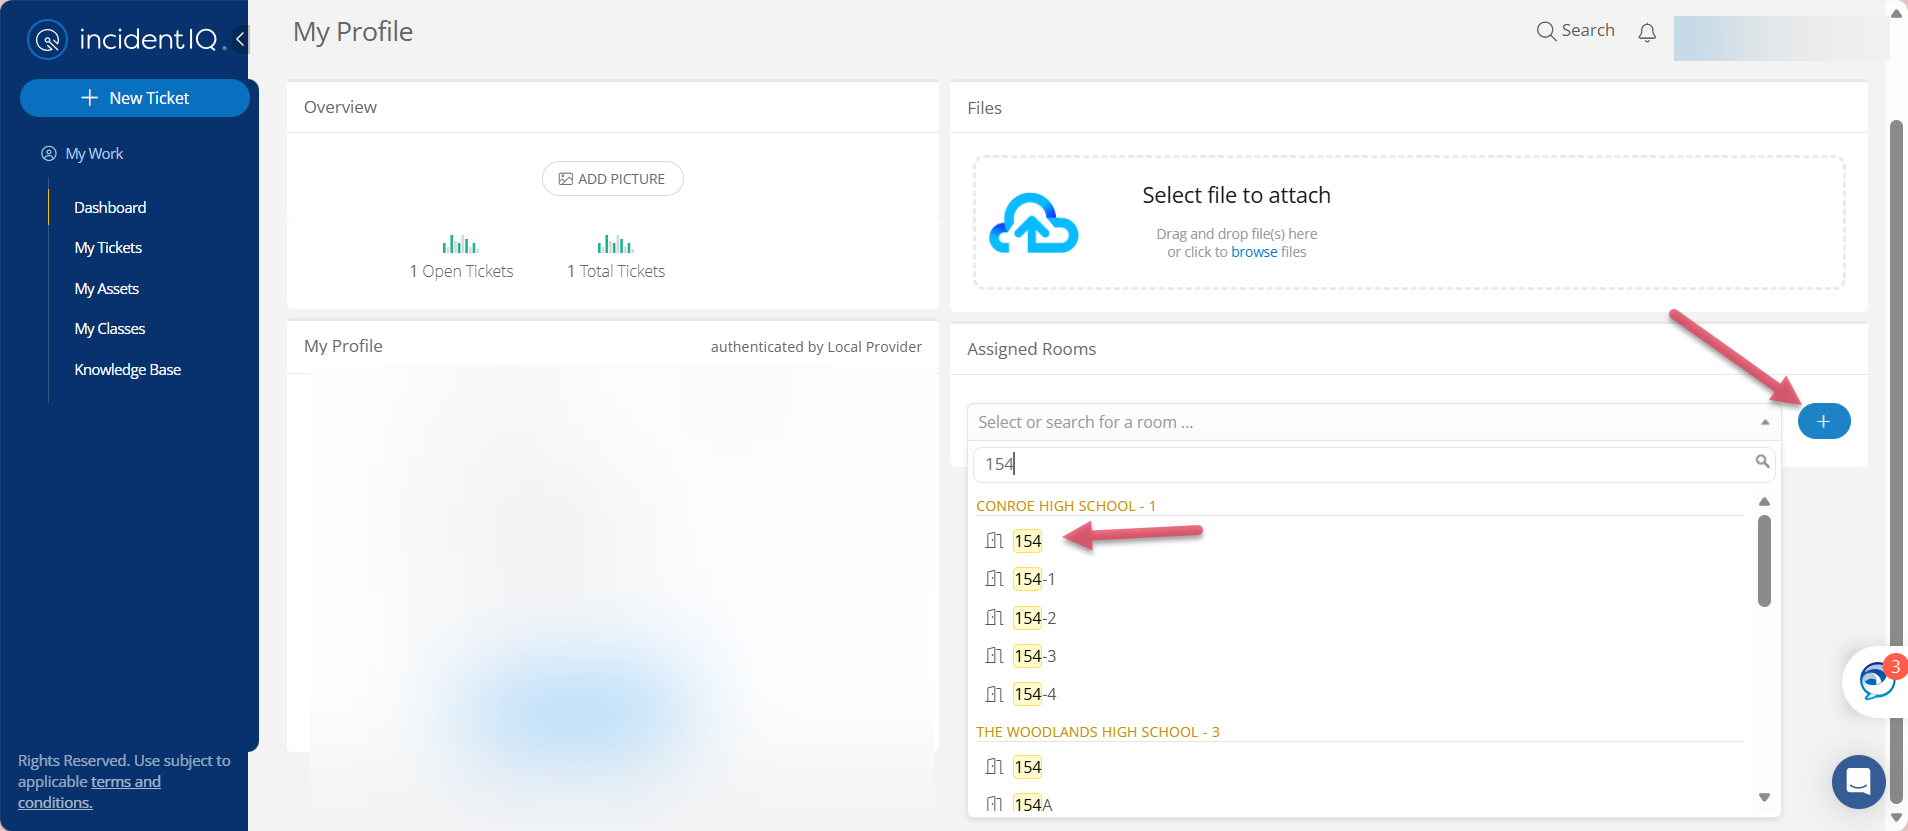
Select your room from the search results.
-
Click the + (Plus) icon to save this location to your profile.
-
The system will automatically save your changes.
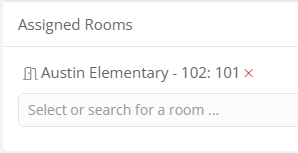
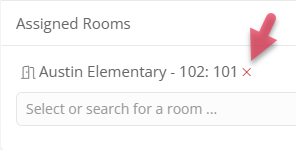
Once completed, your profile will display your claimed space showing your campus name, building code, and room number (for example: Austin Elementary, Building Code 102, Room 101).
Important: Remove Outdated Room Assignments
If an old room is still listed on your profile, please remove it by selecting the red X next to the location name and room number. Removing outdated room assignments ensures that only your current space is associated with your profile and helps keep room information accurate.
Next Step
Now that your room is associated with your account, you are set up to view your devices and request support when issues arise.
To learn how to view your equipment and request help, proceed to our next guide: How to Submit a Ticket: Campus Hardware & Devices
Still have questions? Visit the Additional Help section for further assistance.