
Submitting a ticket on behalf of someone else is based on your permissions and access in Incident IQ, so this option may not be available to everyone. If you have the appropriate access, you can open a support ticket for someone in your department or on your campus, such as a coworker, principal, or teammate, and attribute the ticket to the correct person at your location.
This ensures that the right person receives all automatic email updates and that our technicians know exactly who to contact to resolve the issue.
Steps to Submit a Ticket for Another User
1. Start a New Ticket
-
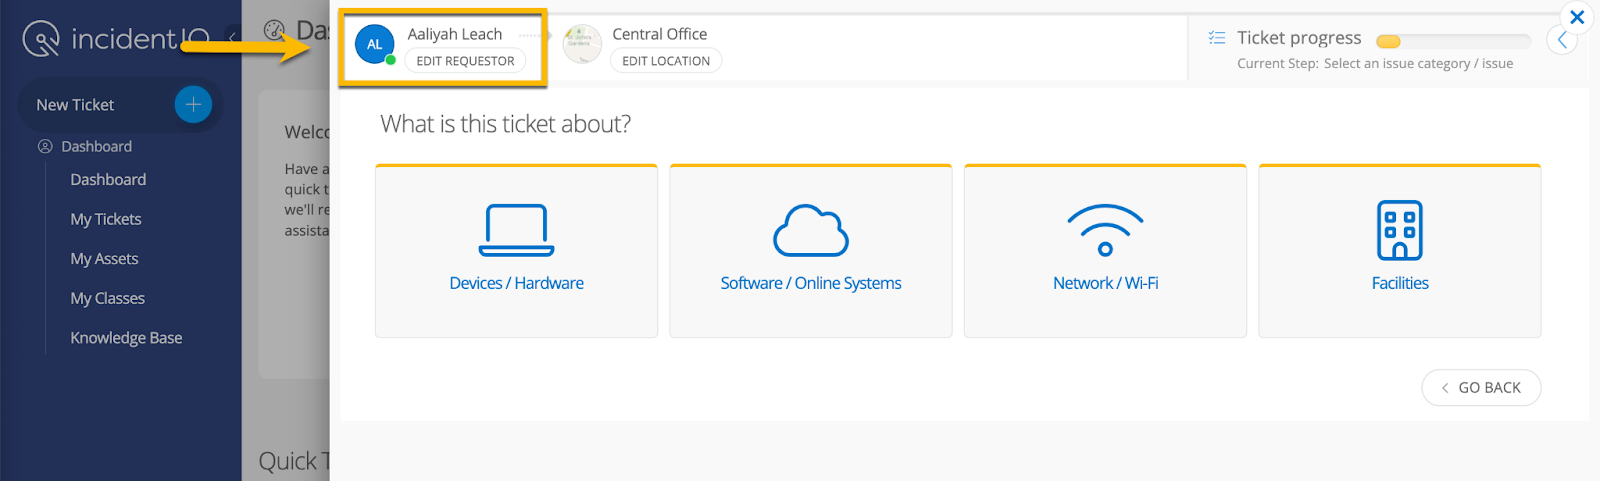
Open Incident IQ. From your main Dashboard, click the + New Ticket button to begin the submission process as you normally would.
2. Change the Requestor
-
At the top-left of the ticket form, locate your name or profile icon. Click on your name to open the user selection menu.
3. Search and Select the User
-
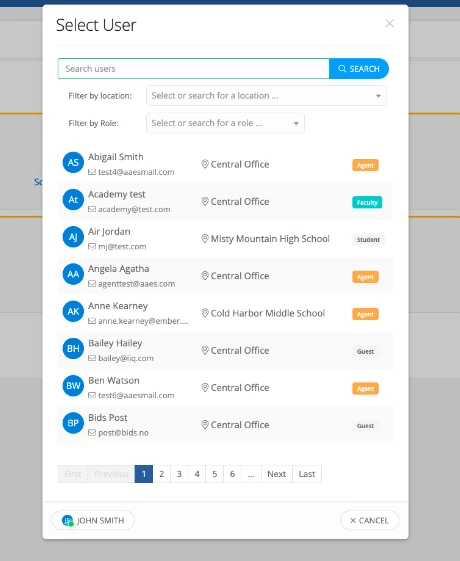
A search field will appear. Type the first and last name (or the school email address) of the person you are submitting the ticket for, then select their name from the drop-down list.
4. Confirm the Selection
-
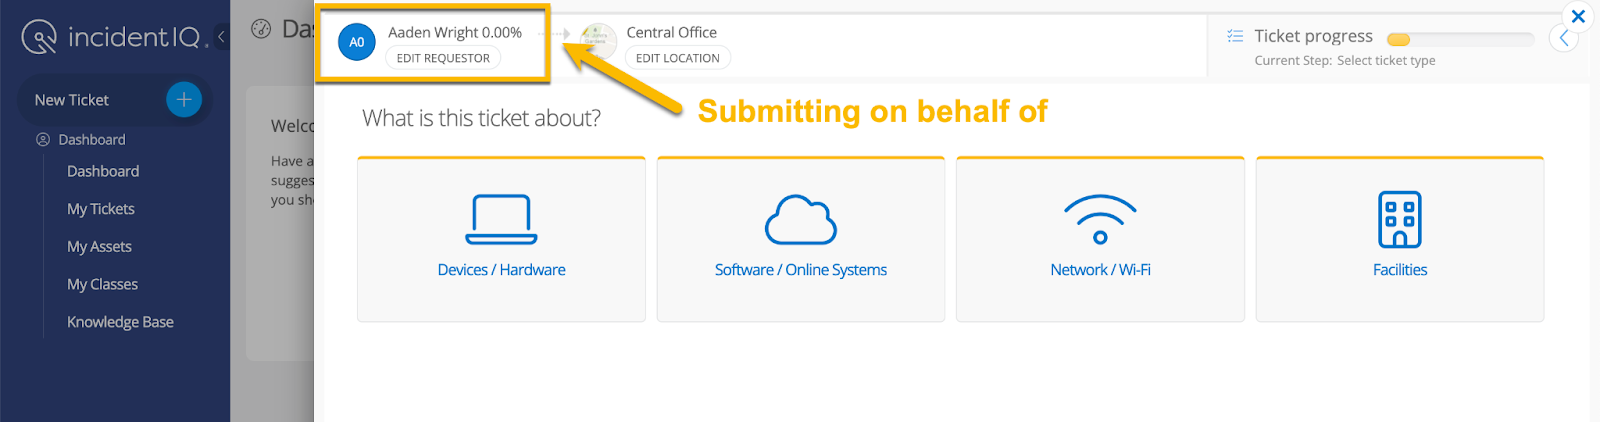
Verify that the name at the top-left of the ticket form has updated. Once selected, their name will display as the primary requestor in place of yours.
5. Complete and Submit the Ticket
Fill out the rest of the ticket details, including the device information or issue description.
-
Provide details from the actual user's perspective to help support staff troubleshoot the issue effectively when they reach out.
-
When you are finished, click Submit Ticket. The ticket will now be officially associated with, and managed under, the user you selected.
Need to print a physical copy of a ticket for your records?
To learn how to generate a physical or digital copy of a submitted request, please continue to our next guide:How to Print a Ticket as the Requestor
Still have questions? Visit the Additional Help section for further assistance.