
A custom view is a list you set up to show exactly what you need in Incident IQ. You decide which information appears, which items are included, and how the list is arranged. After you save the view, you can open it again without setting it up from the beginning.
This process applies to most module areas within Incident IQ, including Users, Assets, Tickets, Parts, and Places etc. The steps are similar in each, though specific filter choices may depend on your access permissions.
Setting Up a Custom View
Step 1: Navigate to the Module Area
Open Incident IQ and select the area where you want to find information from the main navigation menu.
-
Users
-
Assets
-
Tickets
-
Parts
-
Places
Please note the visibility of these options depends on your access; you may not see some or any options.
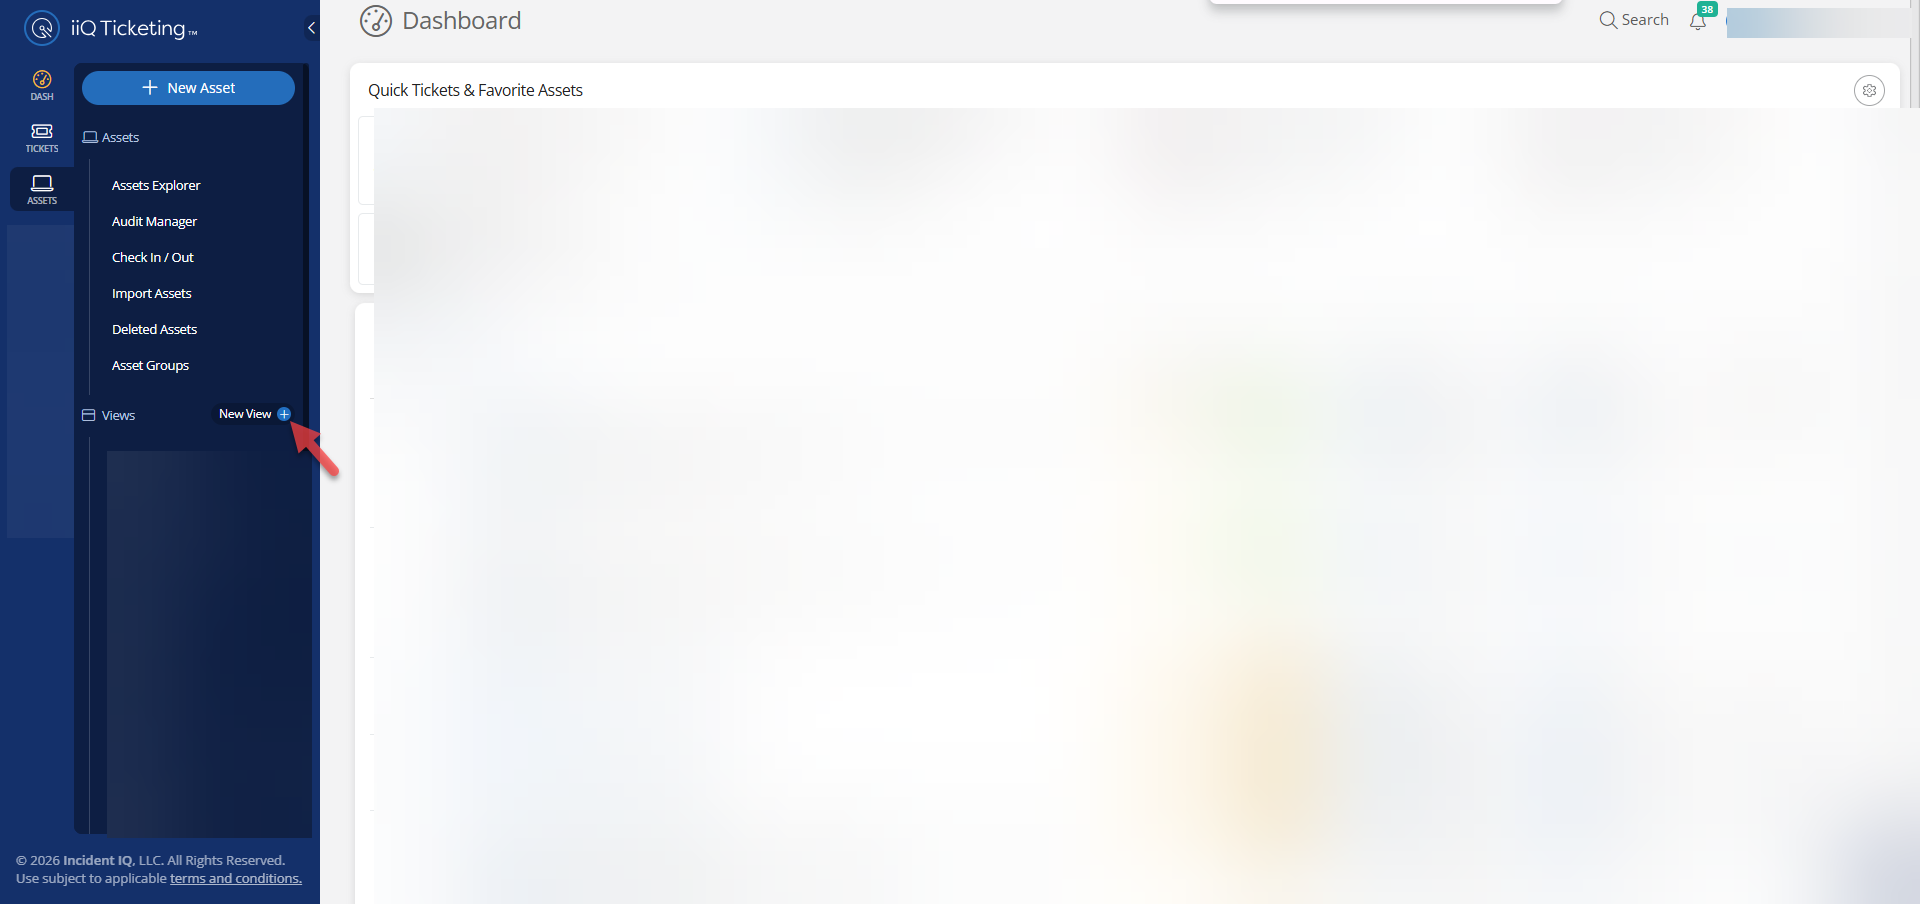
Step 2: Select "+ New View"
Once you are in the desired module area, locate and click the + New View button. This option is consistent across all modules and serves as your starting point for any custom list.
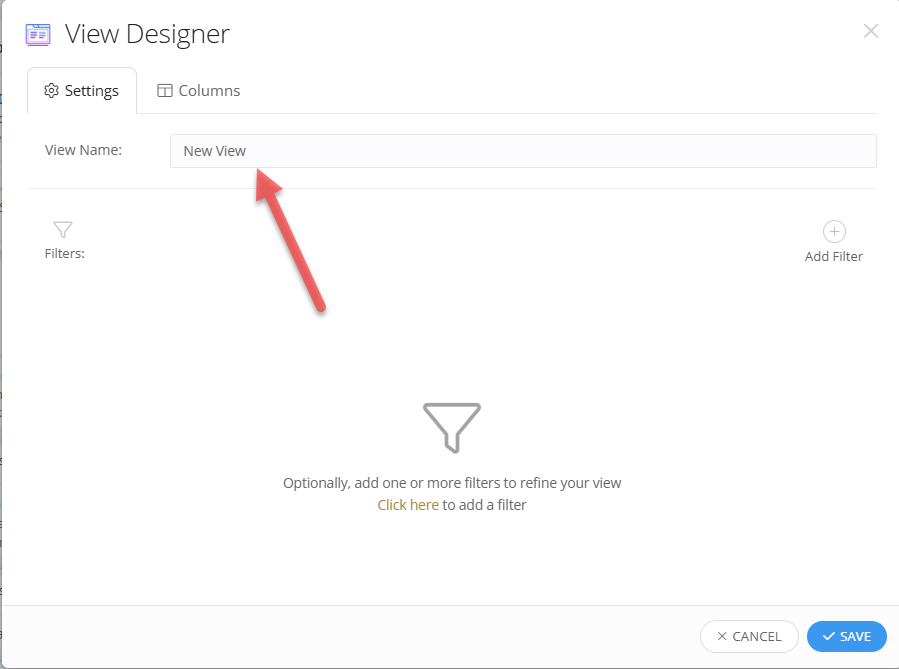
Step 3: Name Your View
Give the view a clear name that explains its purpose.
-
Example: Use Missing Assets for a list of devices that cannot be found, or Open Tickets at My Campus for a localized support list.
Step 4: Add Filters to Show the Right Items
Filters control which records appear in your view. While Incident IQ provides many options, here are the top-used filters for each section:
To apply a filter:
-
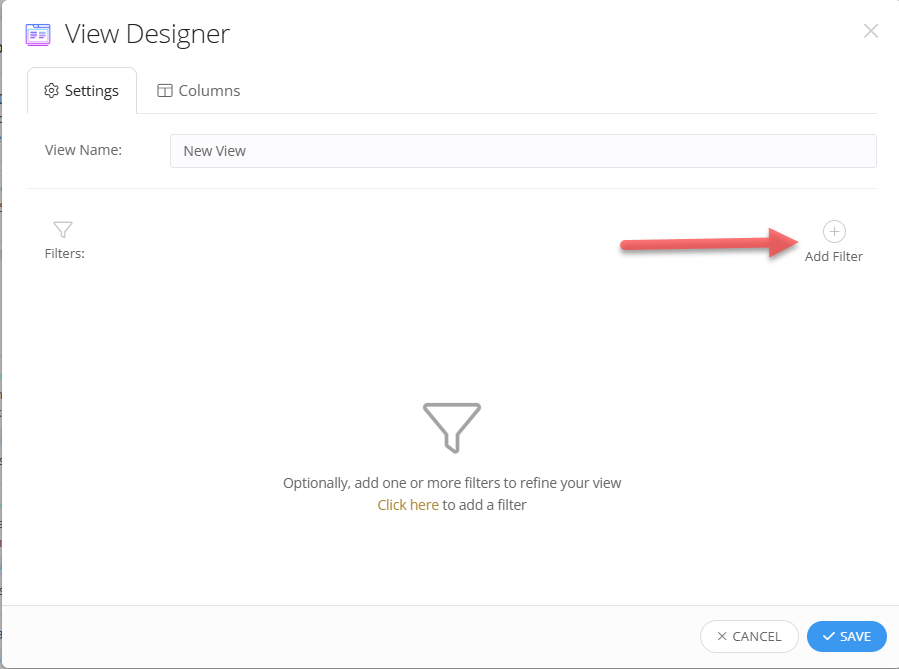
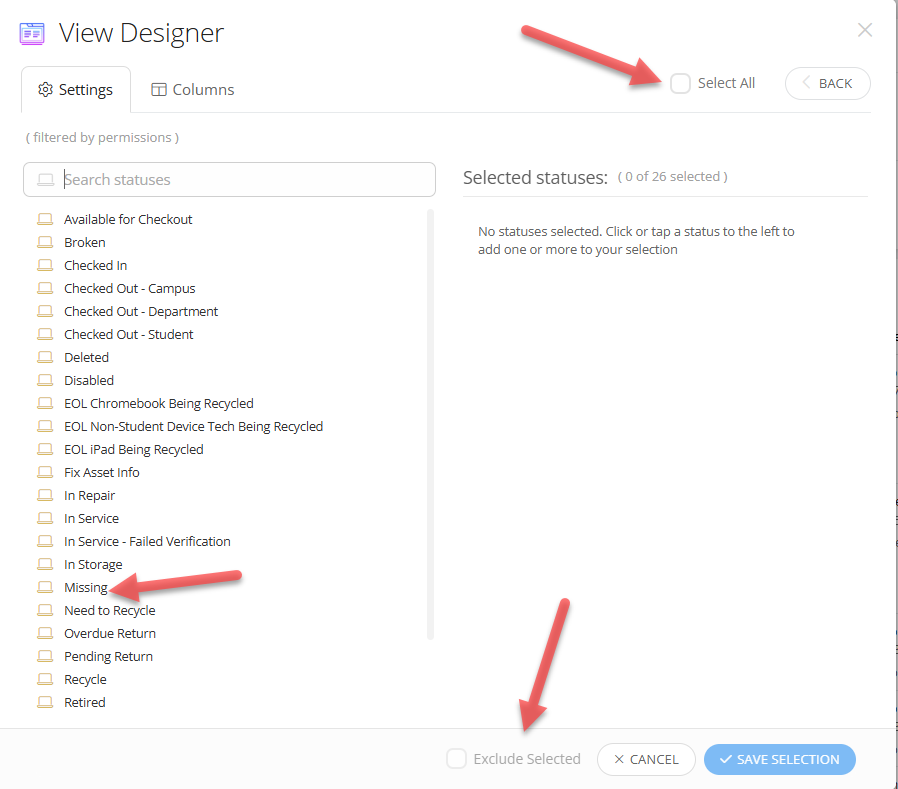
Select Add Filter.
-
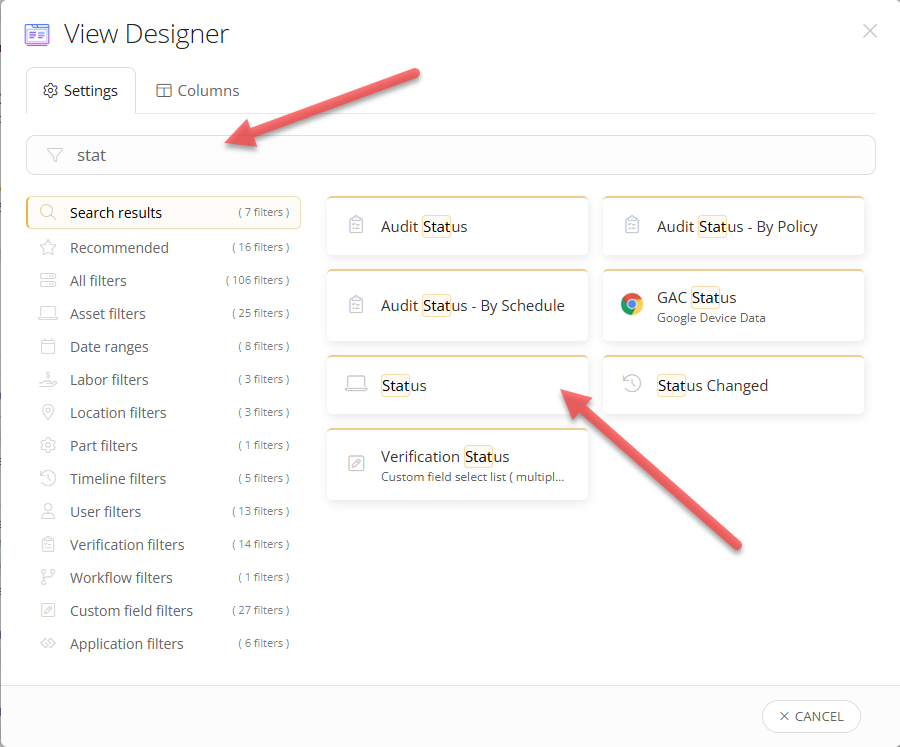
Search or Choose the filter you’re wanting to apply (e.g., Status, Location).
-
Select or Search the specific value (e.g., Missing).
-
You can choose multiple values or use Select All and then Exclude specific items.
-
After you’ve selected what the value you’re wanting to use, select Save Selection.
Frequently Used Filters by Module
|
Module |
Frequently Used Filters |
Example Use |
|---|---|---|
|
Users |
Location, Role, Status, Department |
Find active users at one campus or a specific department. |
|
Assets |
Location, Room, Asset Status, Model |
List devices in one room or find missing assets at a campus. |
|
Tickets |
Status, Priority, Assignee, Location |
Focus on open or high-priority work for a specific team. |
|
Parts |
Part Type, Stock Location, Quantity |
Review available inventory or items needing reorder. |
|
Places |
Location, Room, Place Type |
Review rooms or physical spaces associated with a building. |
Step 5: Choose Your Columns
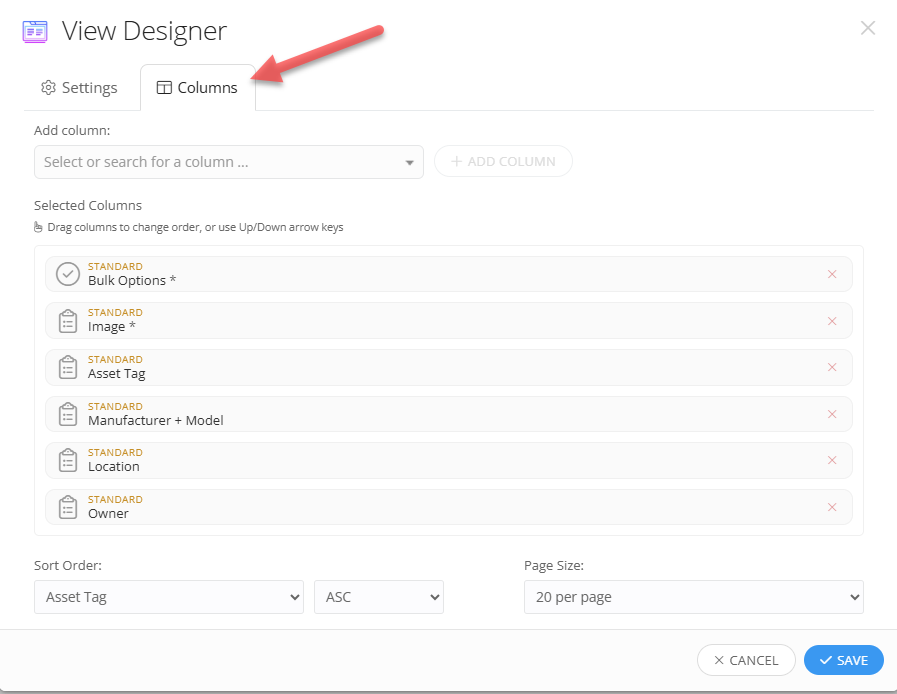
Columns are the headings shown across the top of your list. Choose columns that help you identify the record and its current status.
-
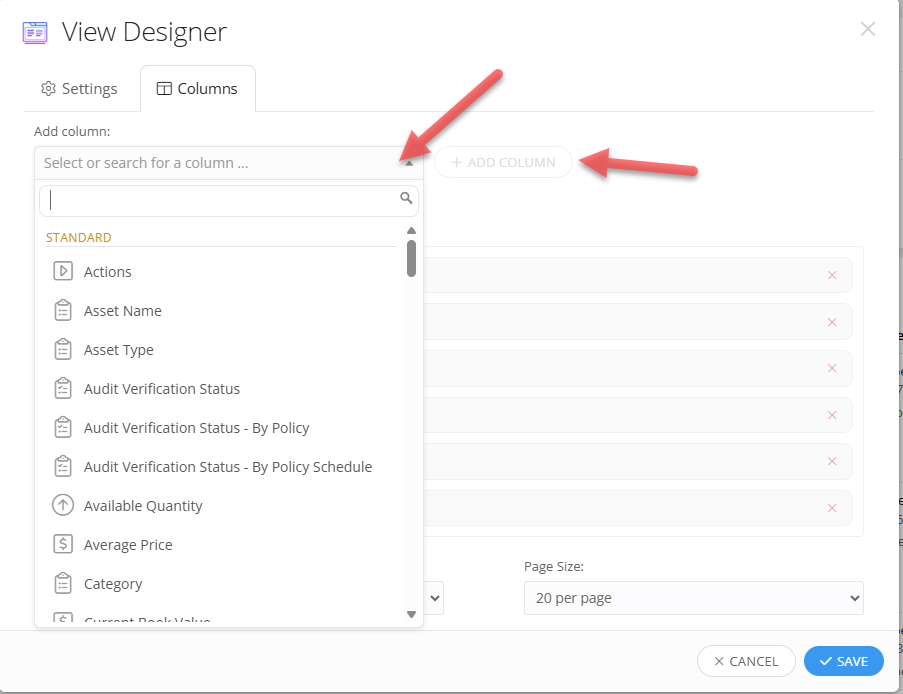
Click the column dropdown menu or search box, then select + Add Column.
Some popular columns to pull in are listed below:
-
Asset Columns: Asset Tag, Location, Room, Status.
-
Ticket Columns: Ticket #, Subject, Status, Priority, Submittor.
-
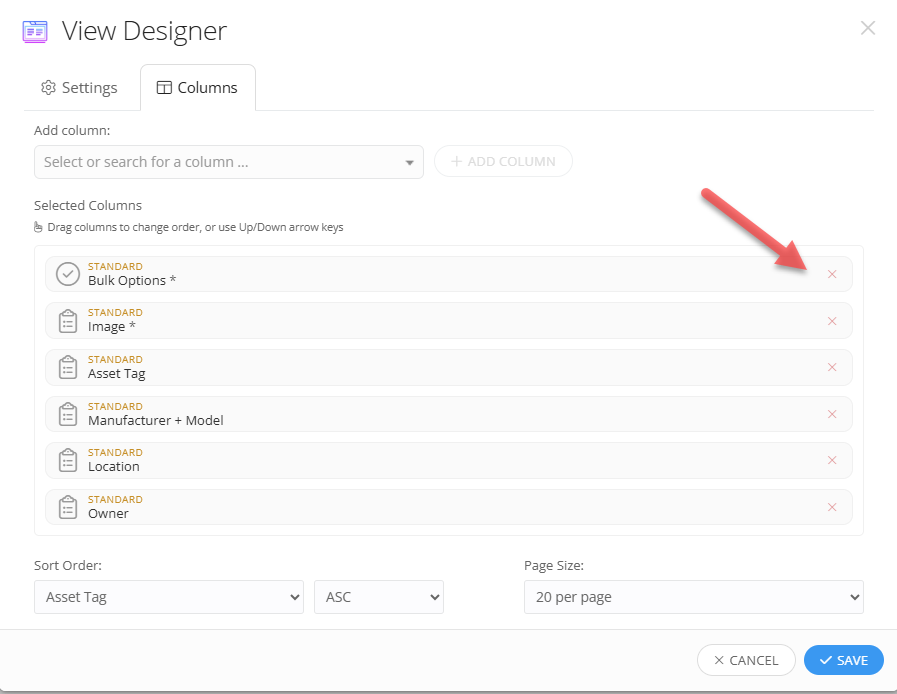
You can add as many columns as you’d like and you can also remove them by selecting the red X , next to the column.
Step 6: Set the List Appearance
-
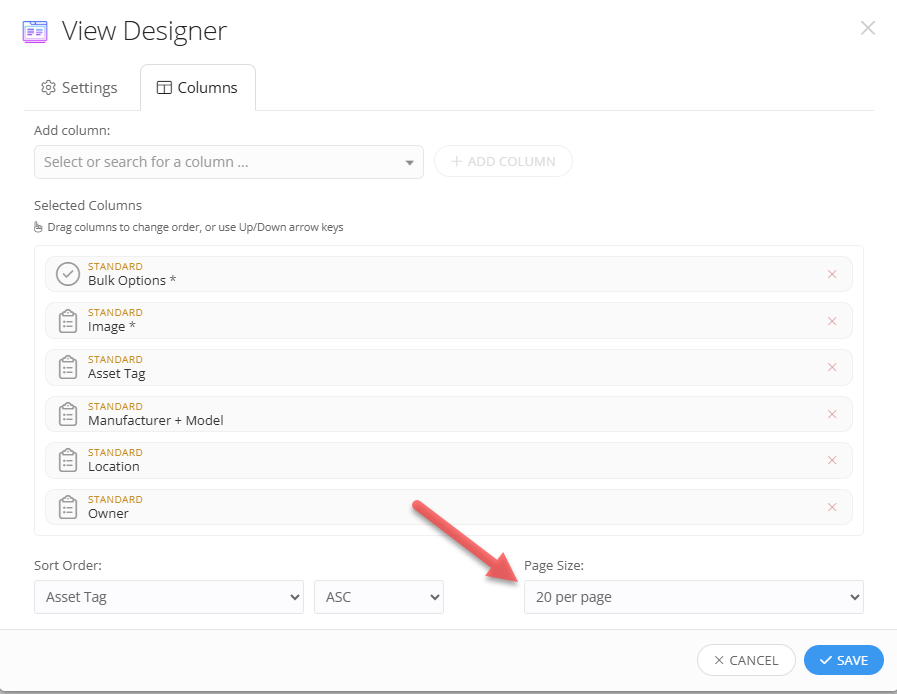
Page Size: Select 200 to see more records at once, or a smaller number for faster scrolling.
-
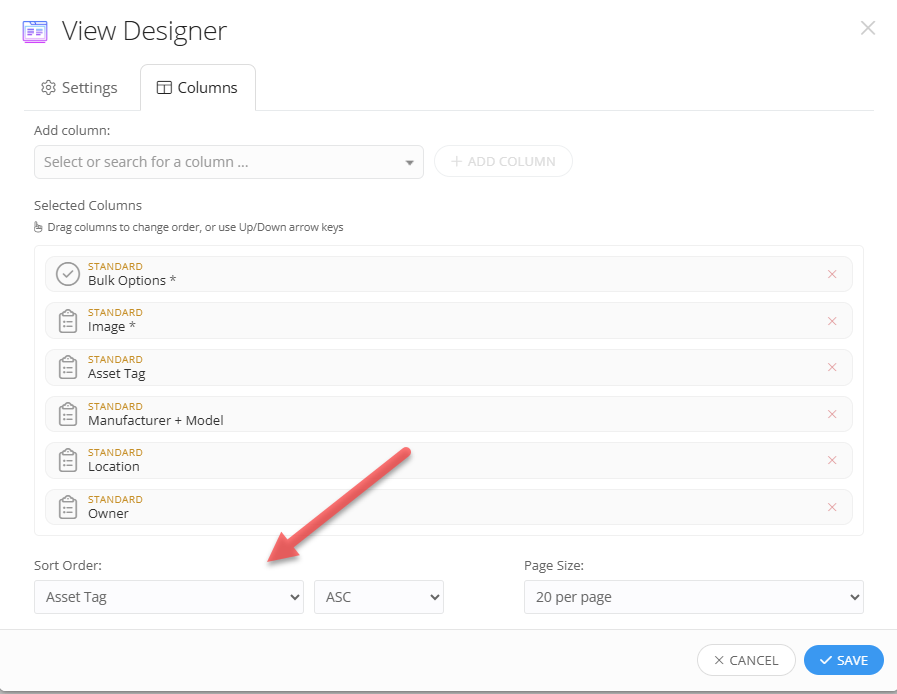
Sort Order: Select a field to sort by (e.g., Updated Date or Status) and set it to Ascending (ASC) or Descending (DSC).
Step 7: Save Your View
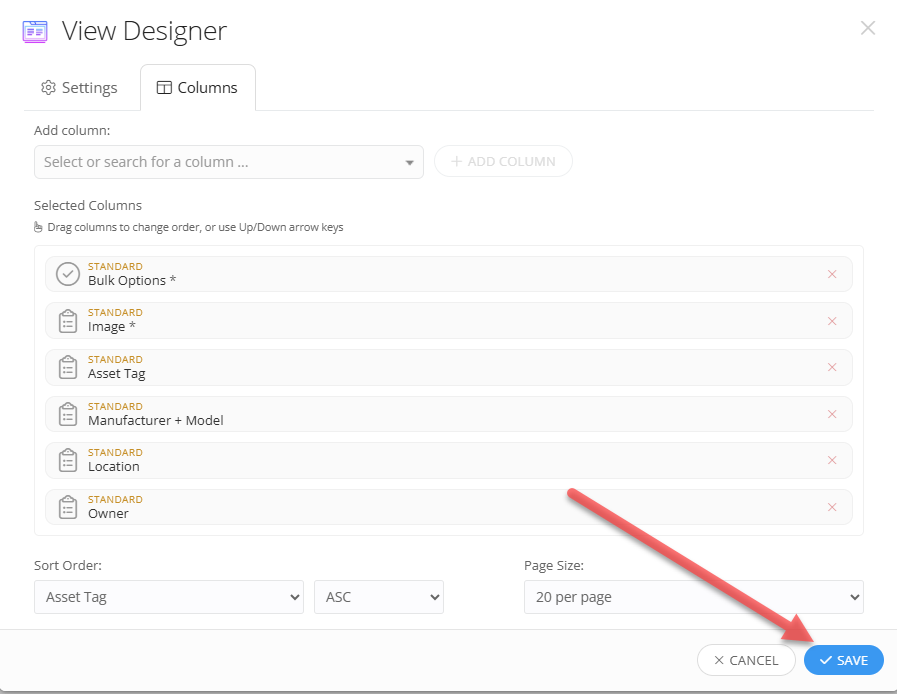
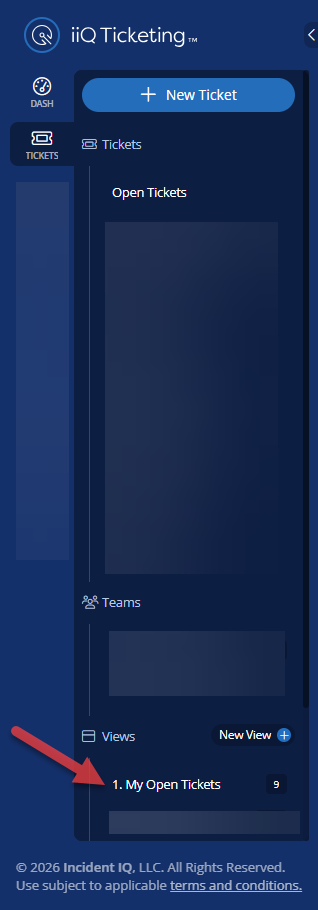
Review your setup and select Save. Your view will be saved under that specific module for quick access whenever you return.
Additional Features & Workflows
Temporarily Filtering a Saved View
Narrow down a list for a quick task without modifying your permanent settings:
-
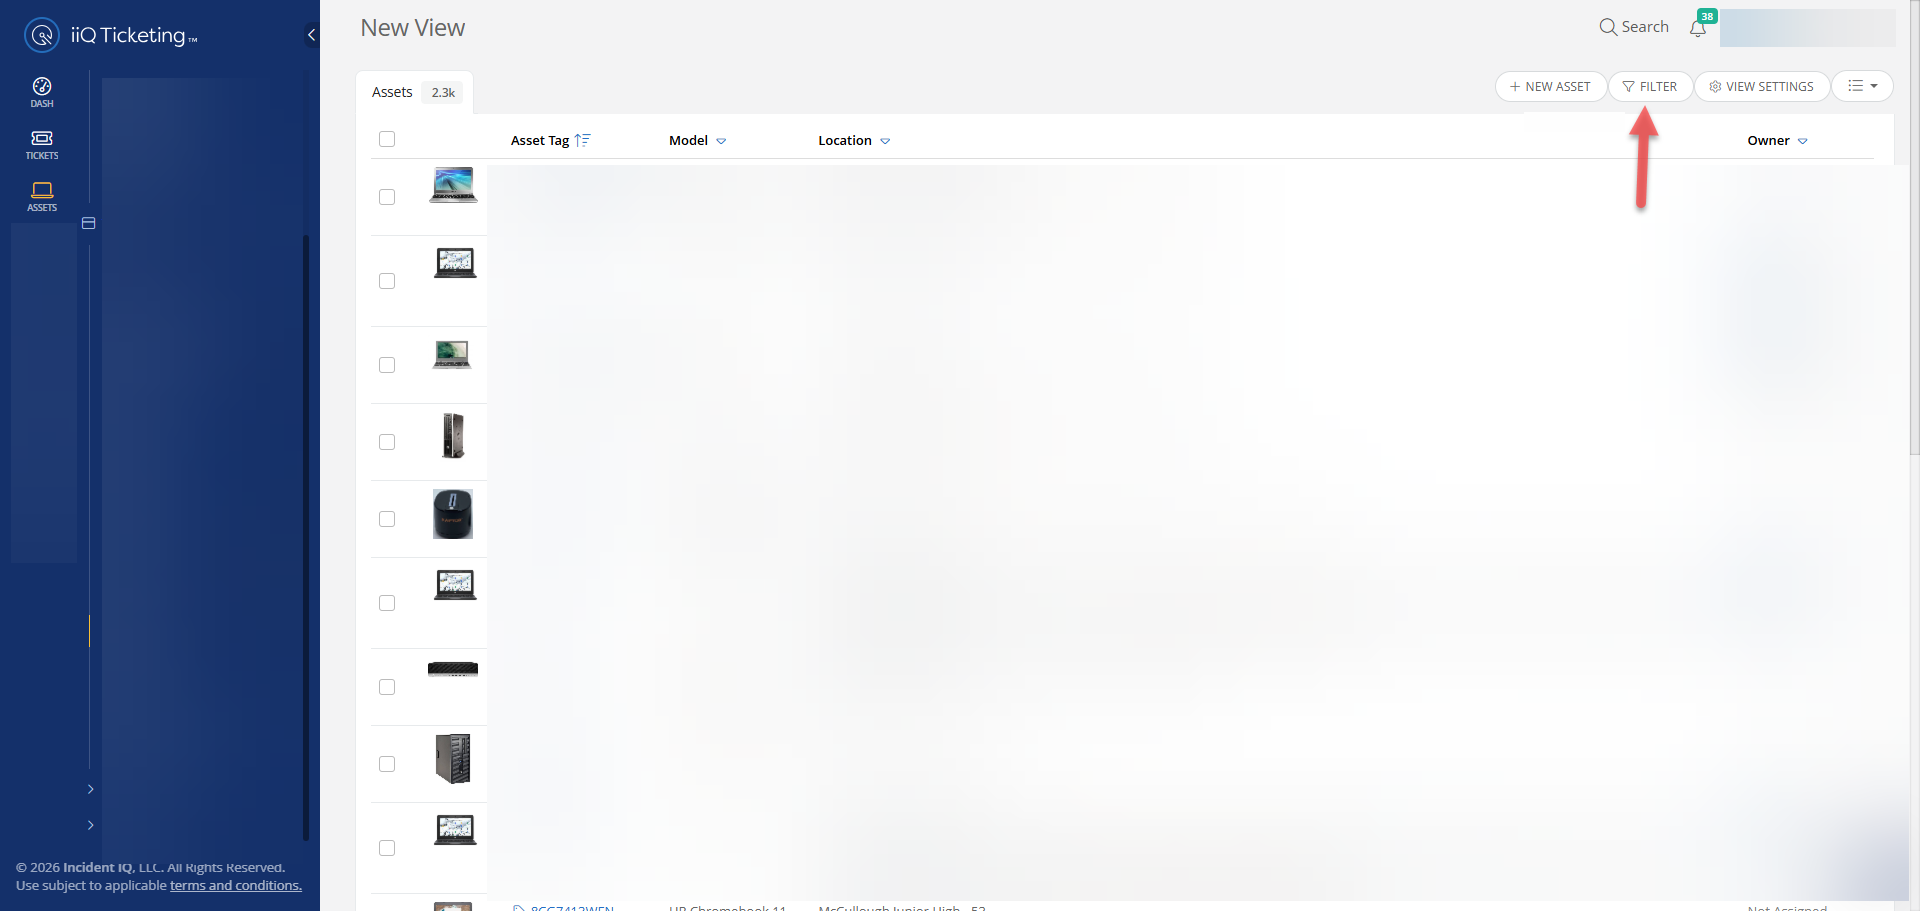
Open your saved view and click the Filter icon.
-
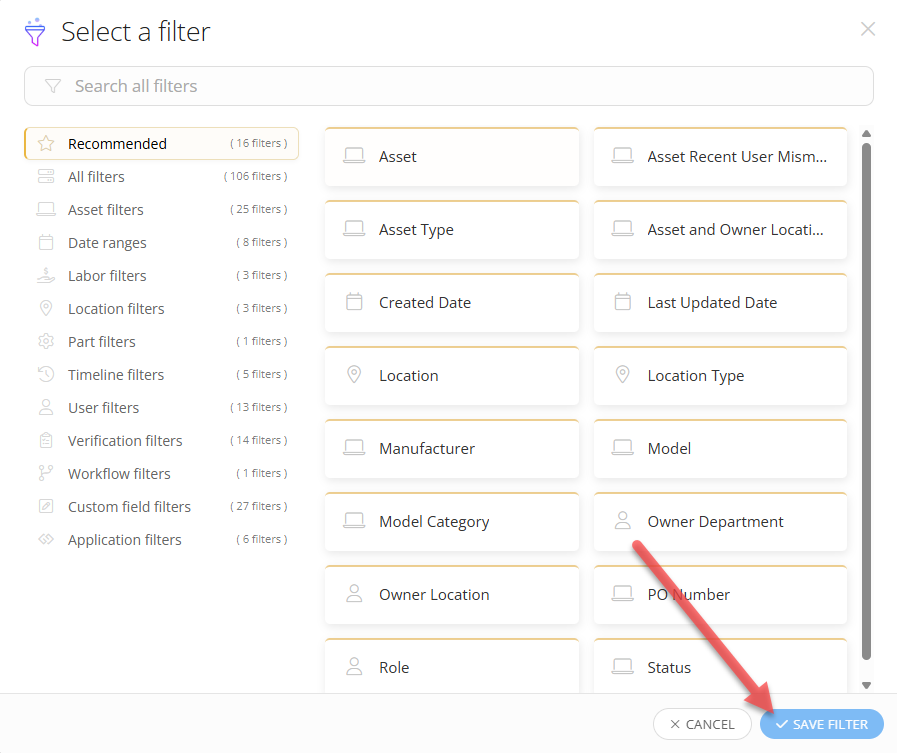
Select the filter you need (e.g., Location, Room, Status, Date).
-
Choose your desired values and click Save Filter.
-
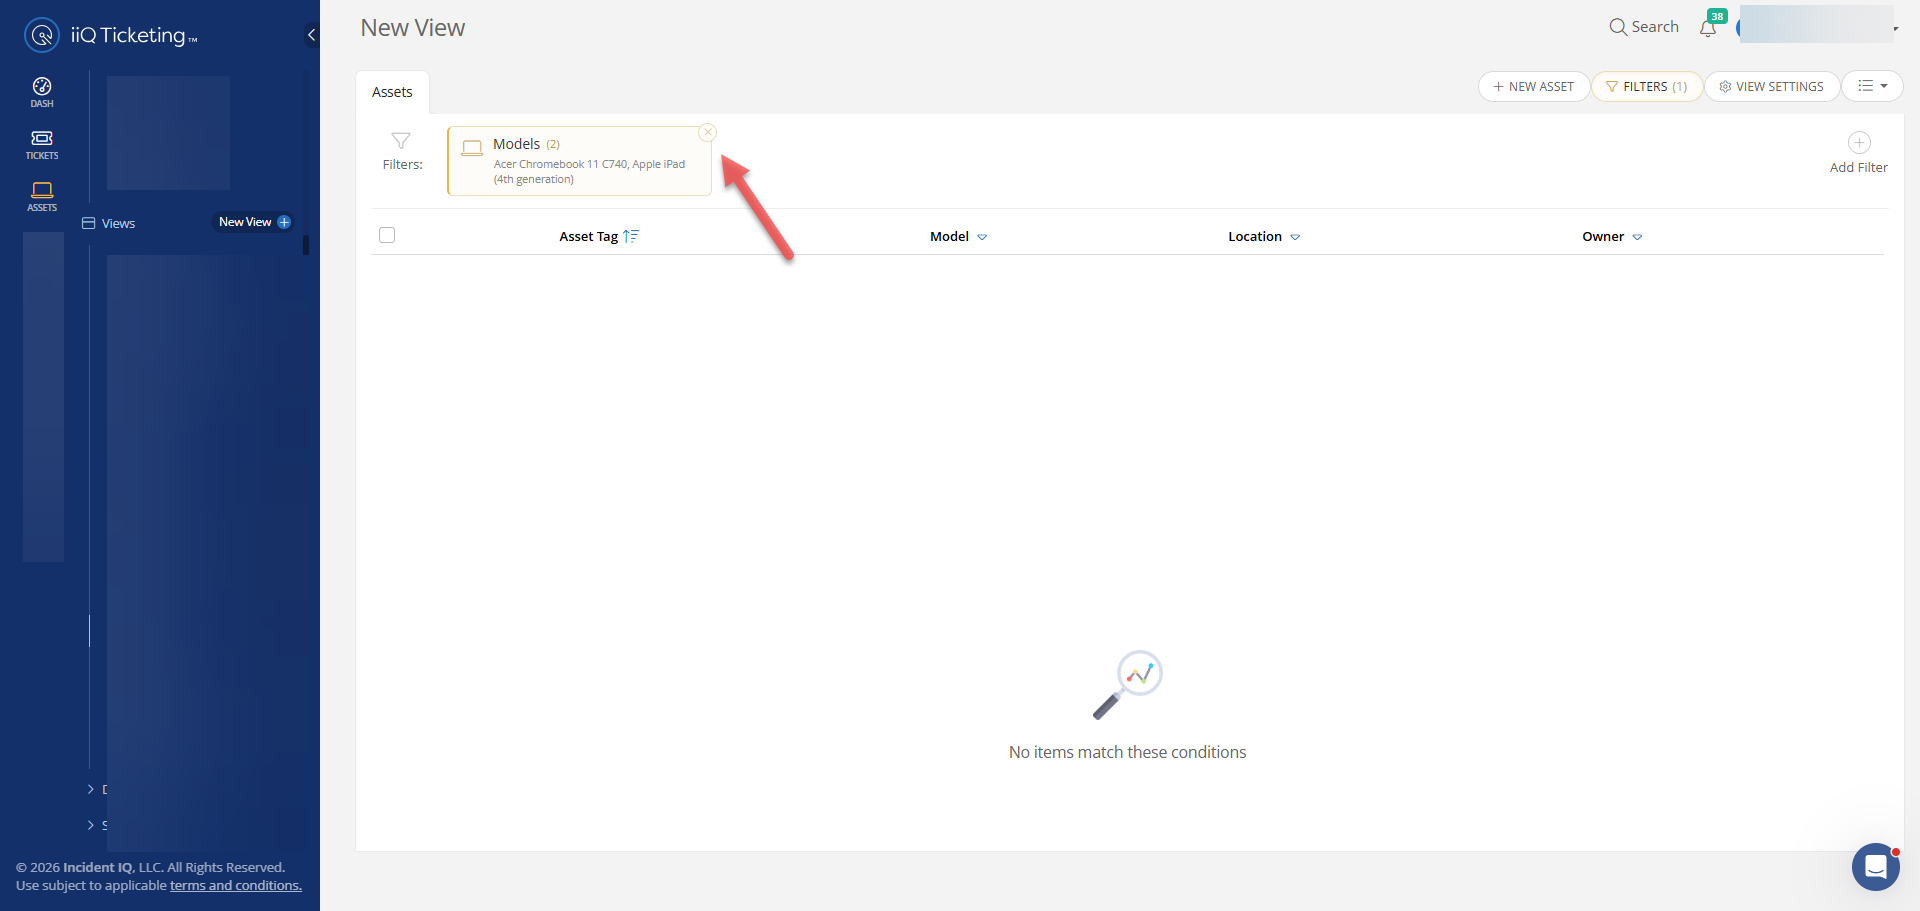
To revert, hover over the temporary filter and click X, or simply refresh the page and your saved view will remain unchanged.
Bulk Search: Pasting Lists from Excel
If you have a list of asset tags or other values in Excel, you can find them all at once instead of entering them individually.
-
Copy the list of values from your Excel spreadsheet (do not copy the column header).
-
In Incident IQ, open the matching filter box (e.g., Asset Tag).
-
Click into the search field and paste (Ctrl+V or Cmd+V).
-
Review the selections and apply the filter.
You can paste a maximum of 100 values at a time. Divide larger lists into smaller batches.
Exporting Data
Download your view for reporting or working in spreadsheet applications:
-
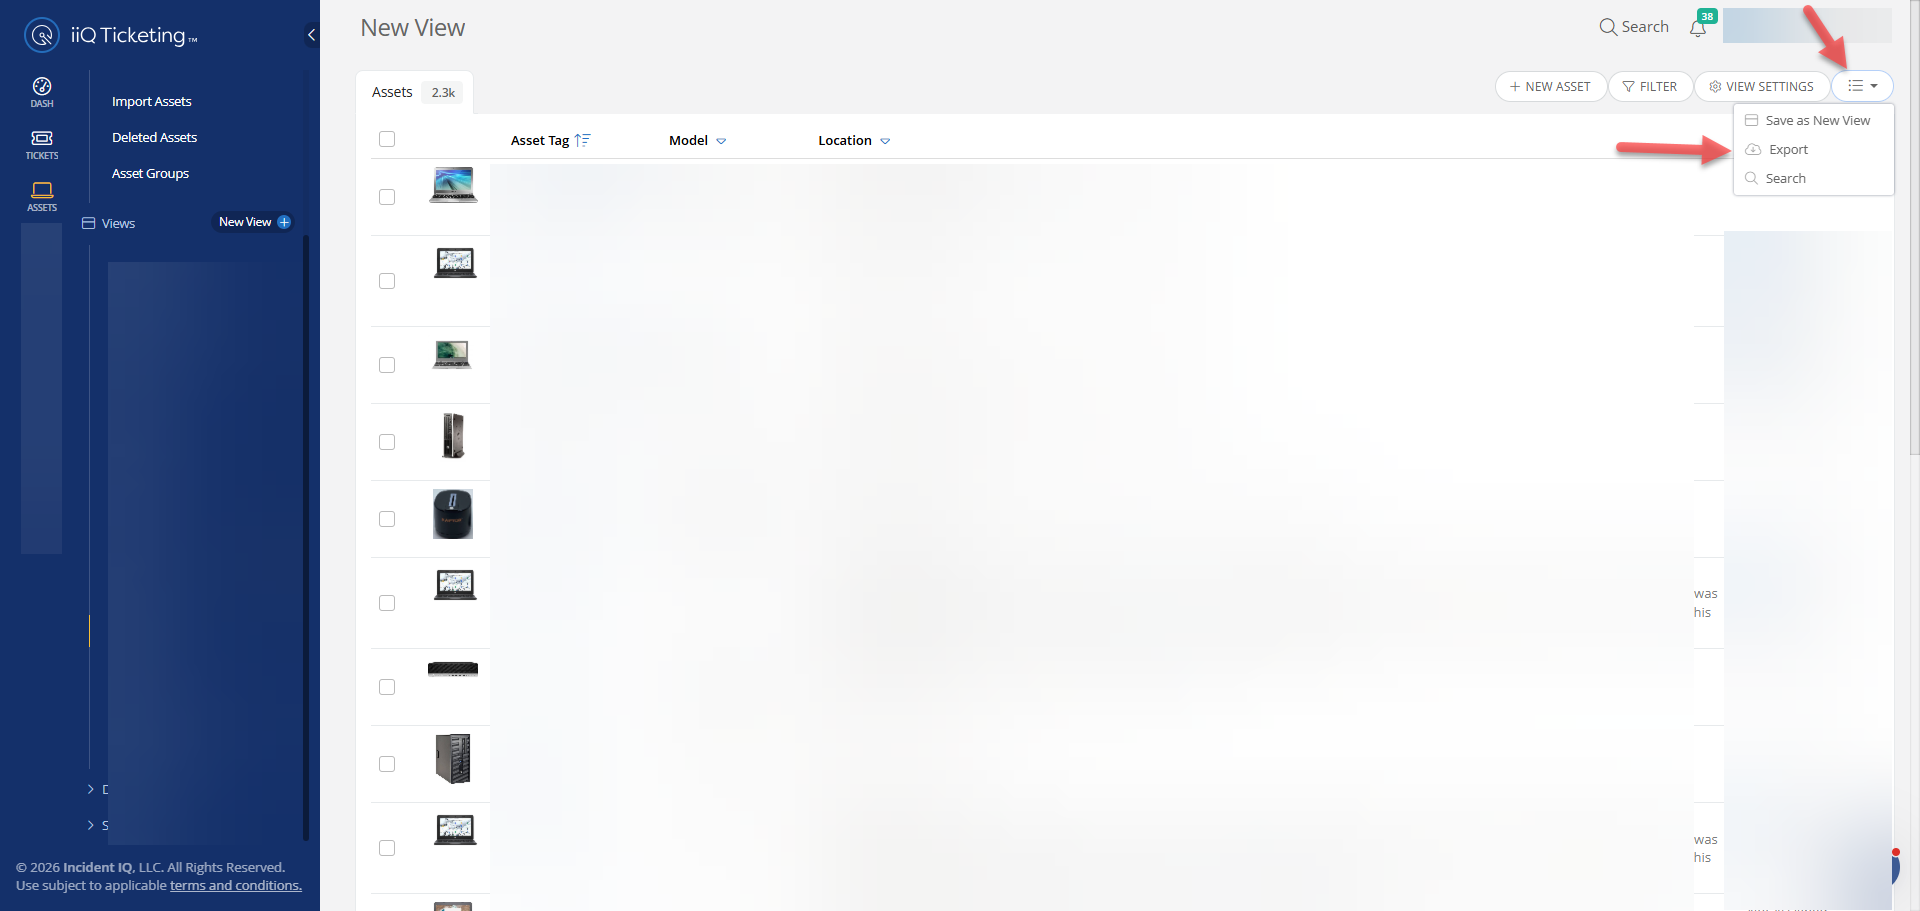
Click the three dots (...) menu on the right side of the view and select Export.
-
Enter a clear file name and select your preferred file format (CSV, Excel, or Tab-Separated).
-
Apply temporary filters if you only want specific items in the file.
-
Click Column Selection to customize which columns are included in your download.
-
Select Export. The file will automatically save to your downloads folder.
Export settings and temporary filters do not alter your permanent saved view.
Saving a Temporary Setup as a New View
If you find yourself using the same temporary filters frequently, save them as a permanent new view.
-
Open an existing view and adjust the filters, columns, page size, or sort order.
-
Click the three dots (...) menu on the right.
-
Select Save as New View.
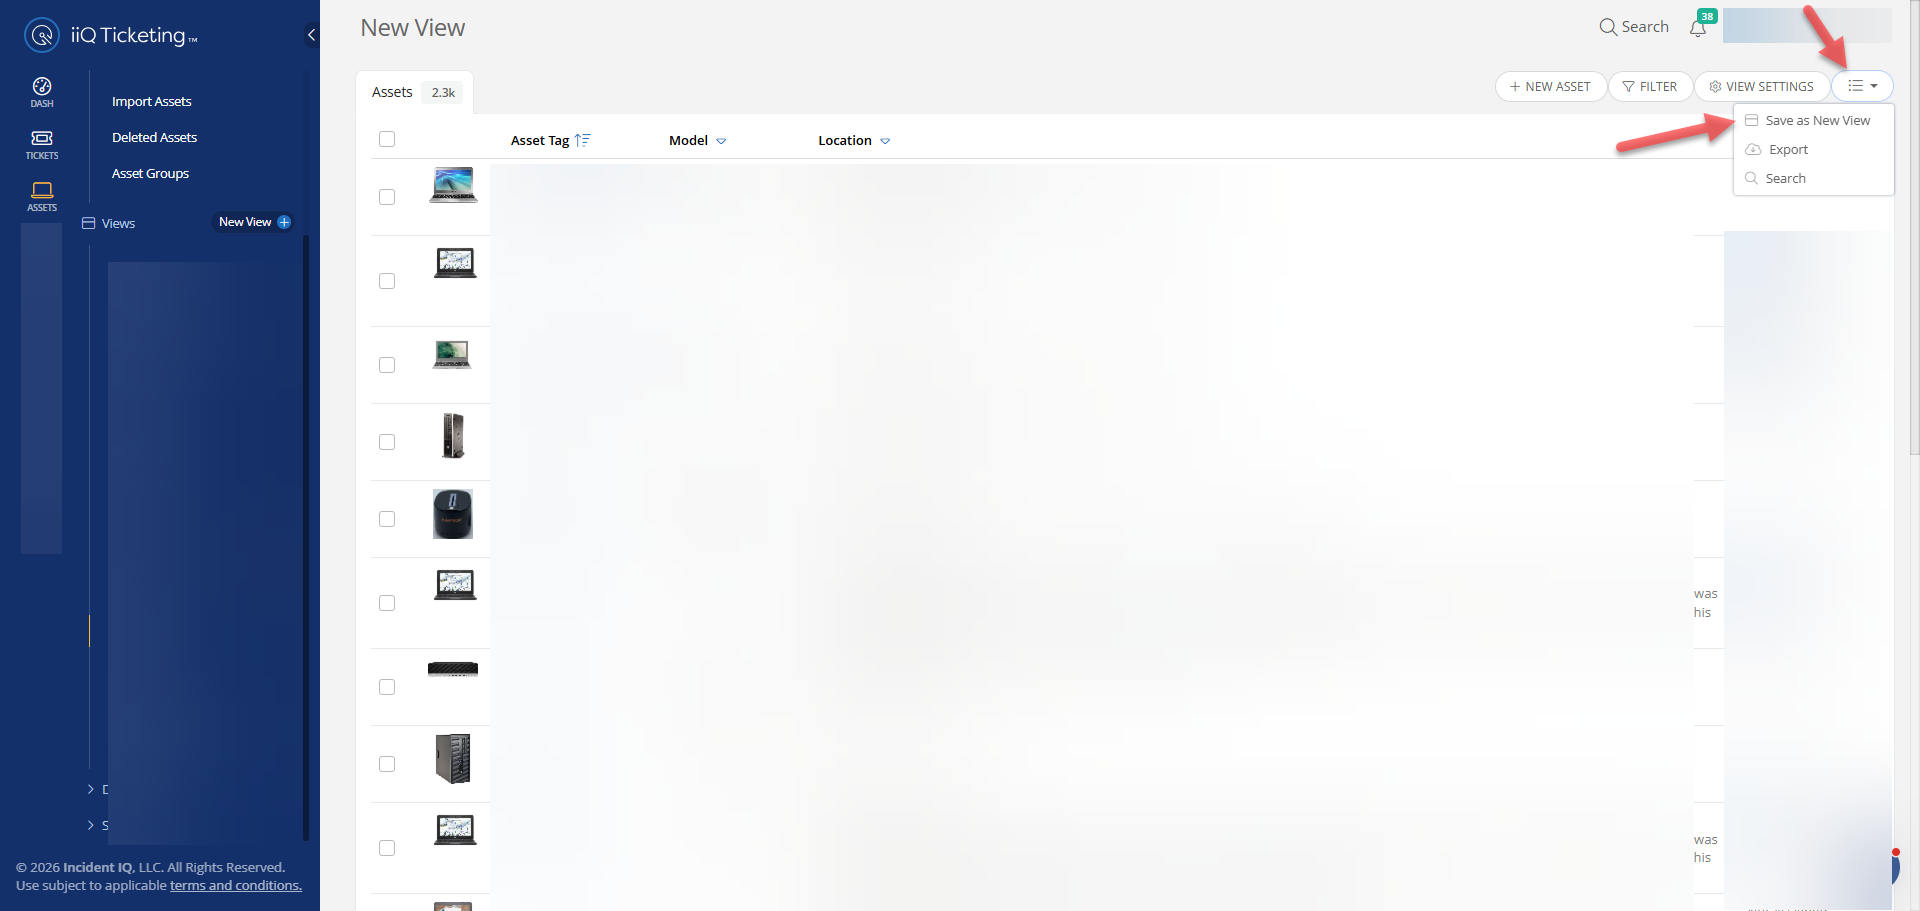
-
Enter a name and click Save. (Your original view remains unchanged.)
Common Use Cases
Use these scenarios as a starting point for any module (Users, Assets, Tickets, etc.).
|
Scenario |
What to Do |
Why Use It |
|---|---|---|
|
Find missing assets |
In Assets, filter by Location and Status = Missing. Add Asset Tag and Room columns. |
Quickly see what is missing and where it belongs. |
|
Track repairs |
Add a filter for Status = In Repair. Add Ticket # and Assignee columns. |
Monitor the progress of devices currently being serviced. |
|
One-time room check |
Open your Assets view, click the Filter icon, and select a specific Room. |
Perfect for a quick inventory check without changing your main view. |
|
Bulk tag search |
Copy tags from Excel and paste them into the Asset Tag filter search box. |
Find a specific group of items instantly without manual entry. |
|
Review recent activity |
Add a date filter (e.g., Updated Date) and choose a specific time period. |
See what has changed over the last day, week, or month. |
|
Create a shared report |
Apply temporary filters/columns and select Export as an Excel file. |
Share specific data with others without giving them access to your view. |
Still have questions? Visit the Additional Help section for further assistance.