
The Bulk Actions Verify Assets tool allows you to quickly verify multiple assets at once using the Incident IQ website on your desktop PC, laptop, or Chromebook. Follow this guide to learn how to efficiently verify a batch of assets during your audit.
Prerequisite: To use this process, you will need a barcode scanner connected to your device. Please reach out to your Campus Tech if you need to borrow a barcode scanner for this purpose.
Important Note: If you scan an asset in your room and it is not showing up in Incident IQ, please contact the campus tech at your location. Your campus tech will reach out to the District Asset team to get the asset added to the system.
How to Bulk Verify Assets
Step 1: Log In
Log into Incident IQ via your SSO on your Desktop PC, Laptop, or Chromebook.
Step 2: Rapid Scan and Select All
-
Using your connected barcode scanner, perform a Rapid Scan of the assets you are verifying.
-
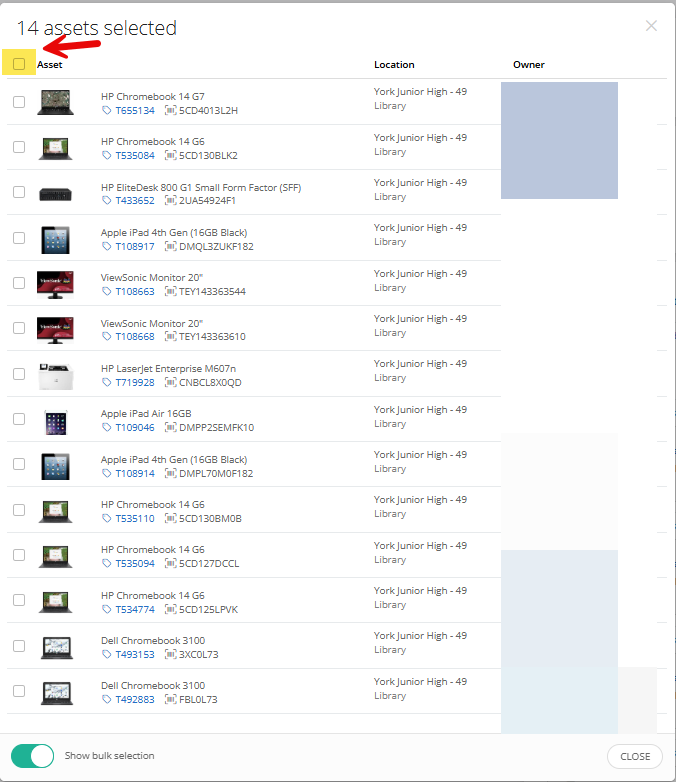
Once your list populates, click the Select All Checkbox located in the top right corner (just below the asset count) to select all the devices you have scanned.
Need help with scanning? See our guide on Performing an Audit: Rapid Scan.
Step 3: Select 'Verify Assets'
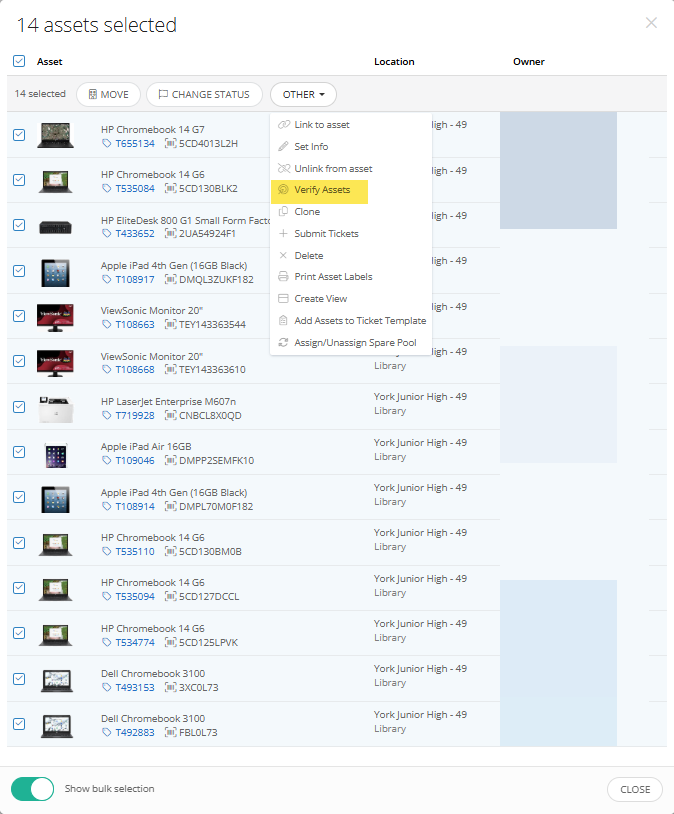
Click the Other drop-down arrow at the top of the list, and then select Verify Assets.
Step 4: Update the Status
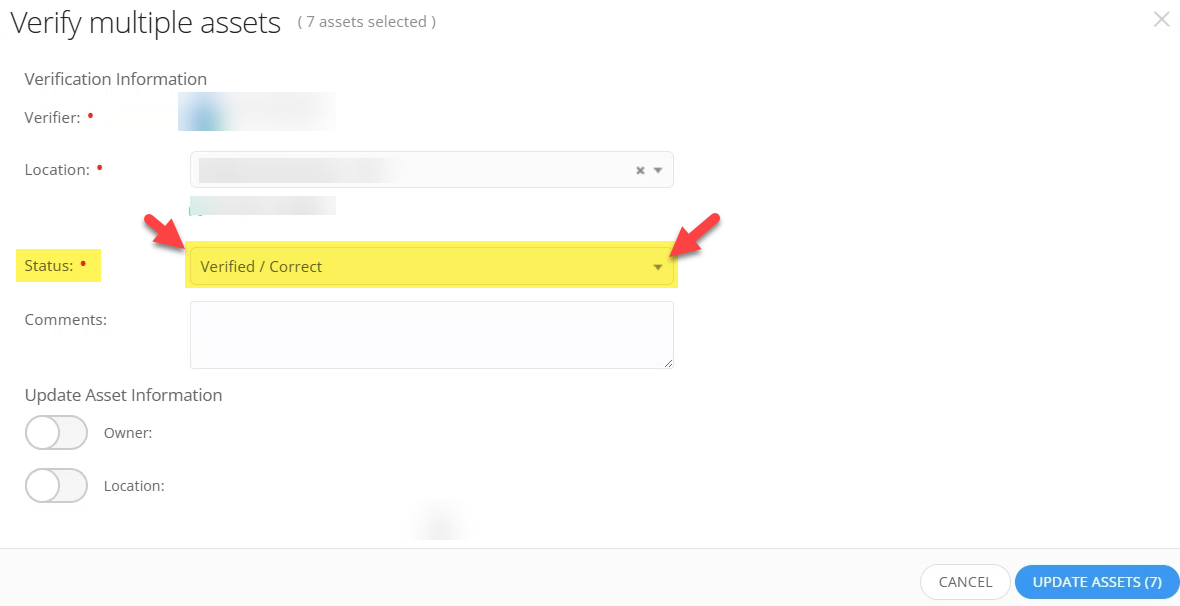
In the verification window, click the drop-down menu next to Status and choose Verified/Correct.
Step 5: Confirm Location
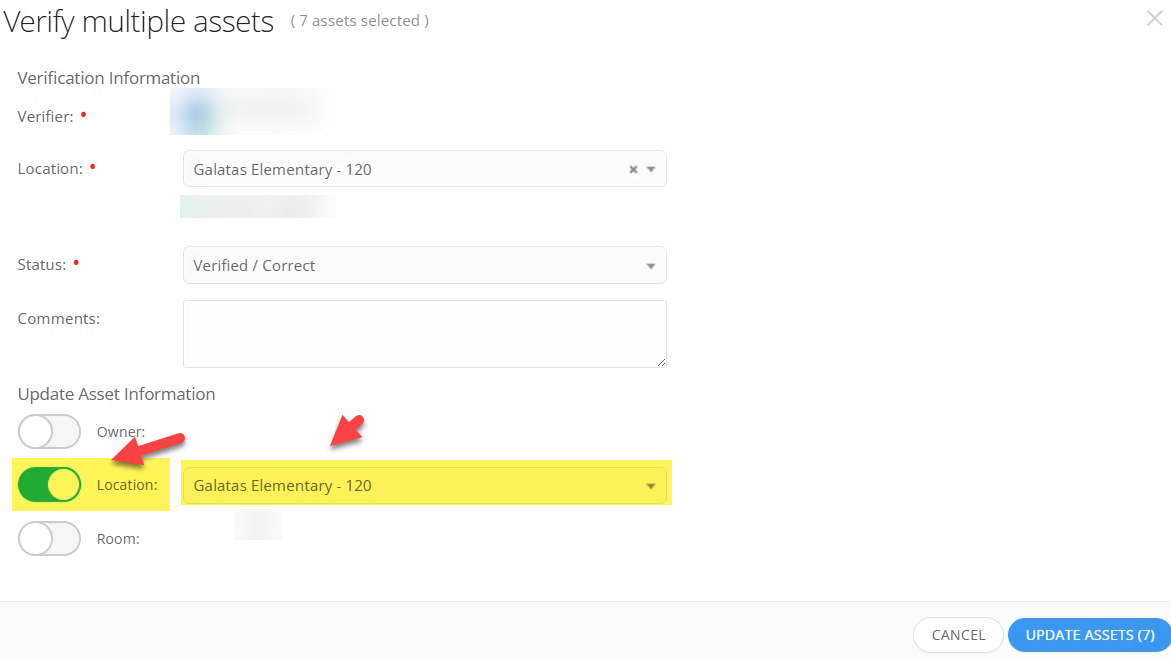
Toggle on the Location switch and ensure that your specific campus is the location shown.
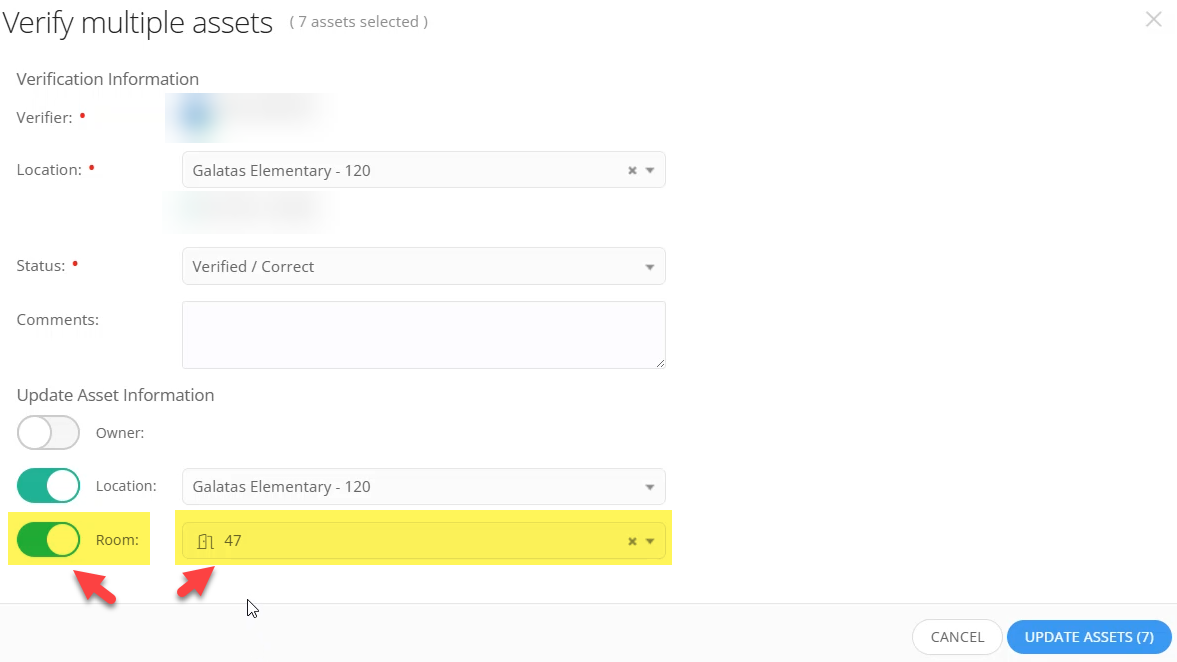
Step 6: Confirm Room
Toggle on the Room switch, and then select your room from the drop-down menu.
-
If you do not see your room listed immediately, you can type it into the search bar and select it.
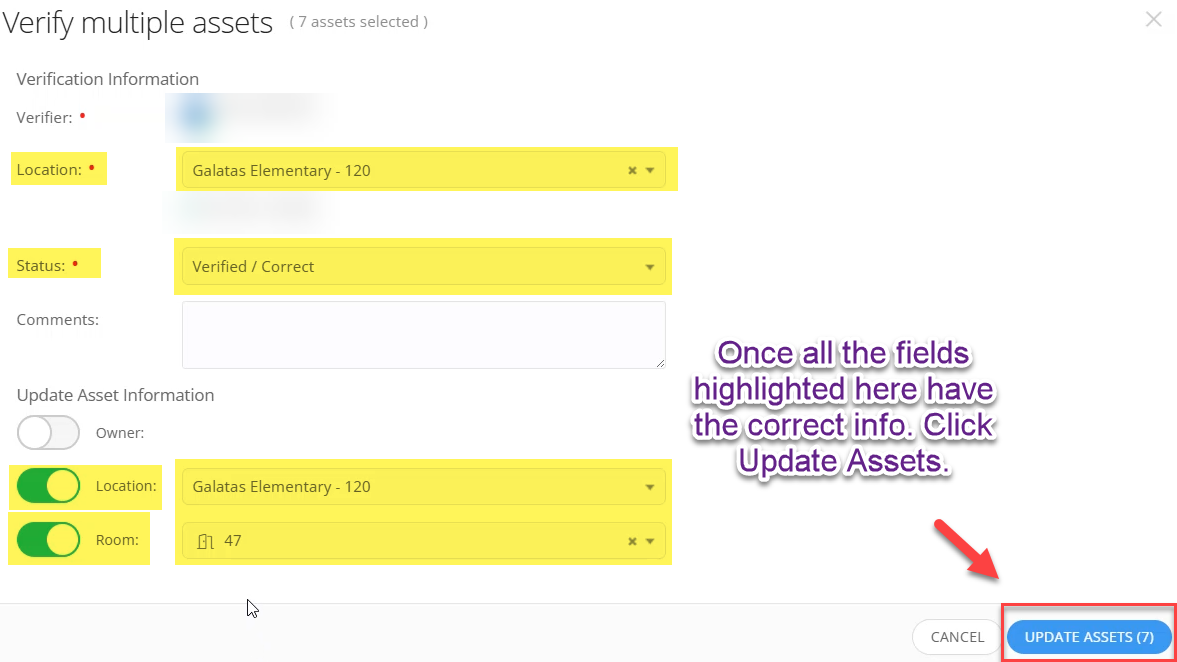
Step 7: Update Assets
Once the Status, Location, and Room are all accurately selected, click the Update Assets button.
Success & Video Guide
Congratulations! You have successfully verified the assets in your room or non-classroom area using the Rapid Scan and Bulk Verify process in IIQ.
For a visual walkthrough, please watch this quick Video Guide: Bulk Verifying Assets from Start to Finish.
Troubleshooting & Support
-
Missing Assets: As a reminder, if you scan an asset in your room and it is not in Incident IQ, do not ignore it. Please contact your campus tech so they can request the District Asset team to add and verify the asset.
Still have questions? Visit the Additional Help section for further assistance.