
This guide walks you through the start-to-finish process of working a ticket in Incident IQ. Use this workflow anytime you’re assigned a ticket. Each step includes what to check, what action to take, and what to avoid.
Step 1 – Start the Ticket
-
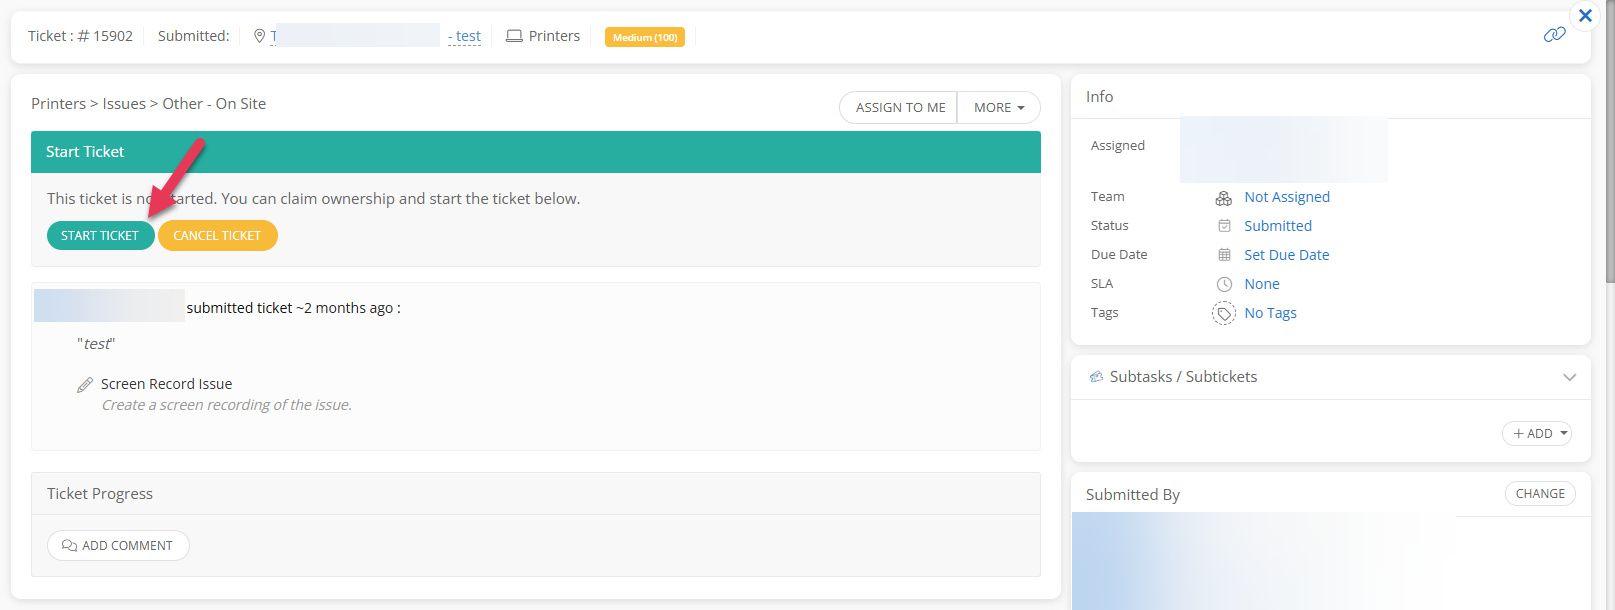
Open the ticket assigned to you.
-
Click Start Ticket → this automatically changes status from Submitted to In Progress.
Starting a ticket means you’re taking responsibility. If you cannot work it, reassign instead.
🔗 See detailed guide: Starting a Ticket
Step 2 – Verify “Submitted By” and Location
-
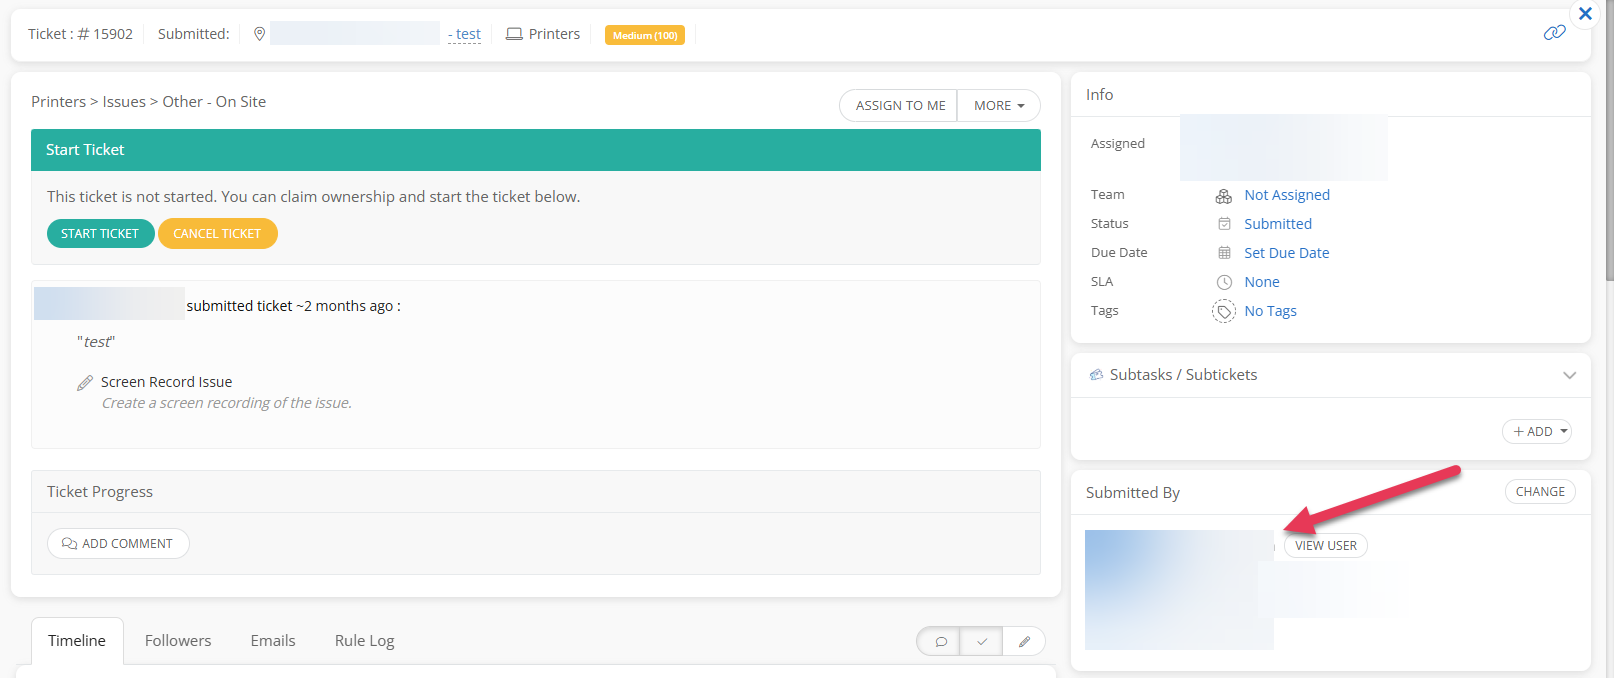
Check the Submitted By field.
-
If the submitter reported the issue for someone else, update the ticket to show On Behalf Of that staff member.
-
Example: “Jane Doe submitted this ticket on behalf of John Smith.”
-
-
Verify the Location field matches the staff member’s actual work location or the place needing support.
Correcting these fields ensures the right person receives updates and support.
🔗 See detailed guide: Updating Submitted By & Location
Step 3 – Confirm or Update Issue Category
-
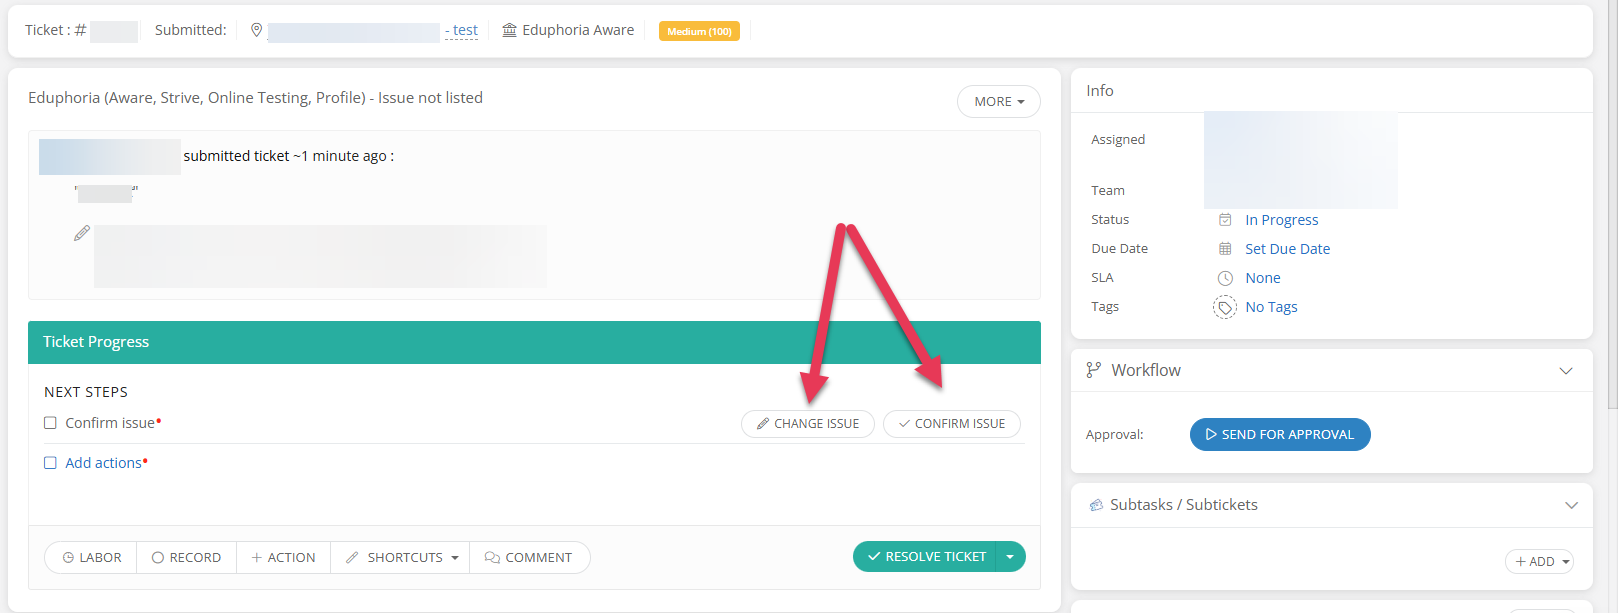
Review the issue category chosen when the ticket was submitted.
-
If it matches, click Confirm Issue.
-
If not, click More → Change Issue to update it to the correct category.
-
If unclear, add a comment to the ticket and request clarification from the submitter before confirming.
Correct issue categories improve reporting accuracy and faster routing.
🔗 See detailed guide: Confirming & Changing Issues
Step 4 – Communicate with Comments (If needed)
-
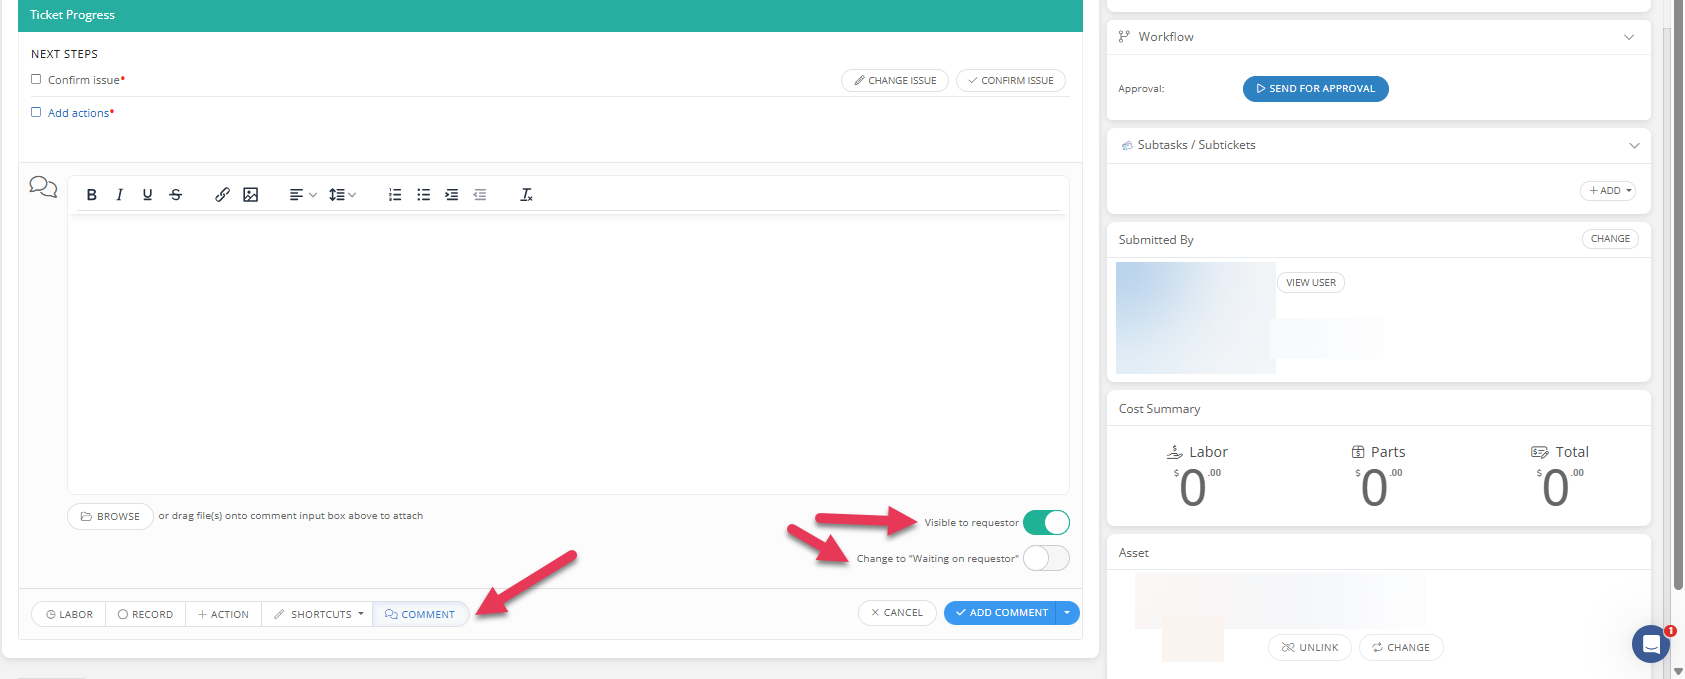
Use the Comment option to talk directly with the ticket requestor.
-
If you want the requestor to see the comment, keep the Visible to Requestor option toggled on.
-
If you keep it toggled off, only internal users who work the ticket can see the comment.
-
-
You can also have the status change to “Waiting on Requetor”, which means if the requestor never replies the ticket will close automatically.
📌 Tip: Every ticket should have at least one comment — even if just confirming the action taken.
🔗 See detailed guide: Adding Comments
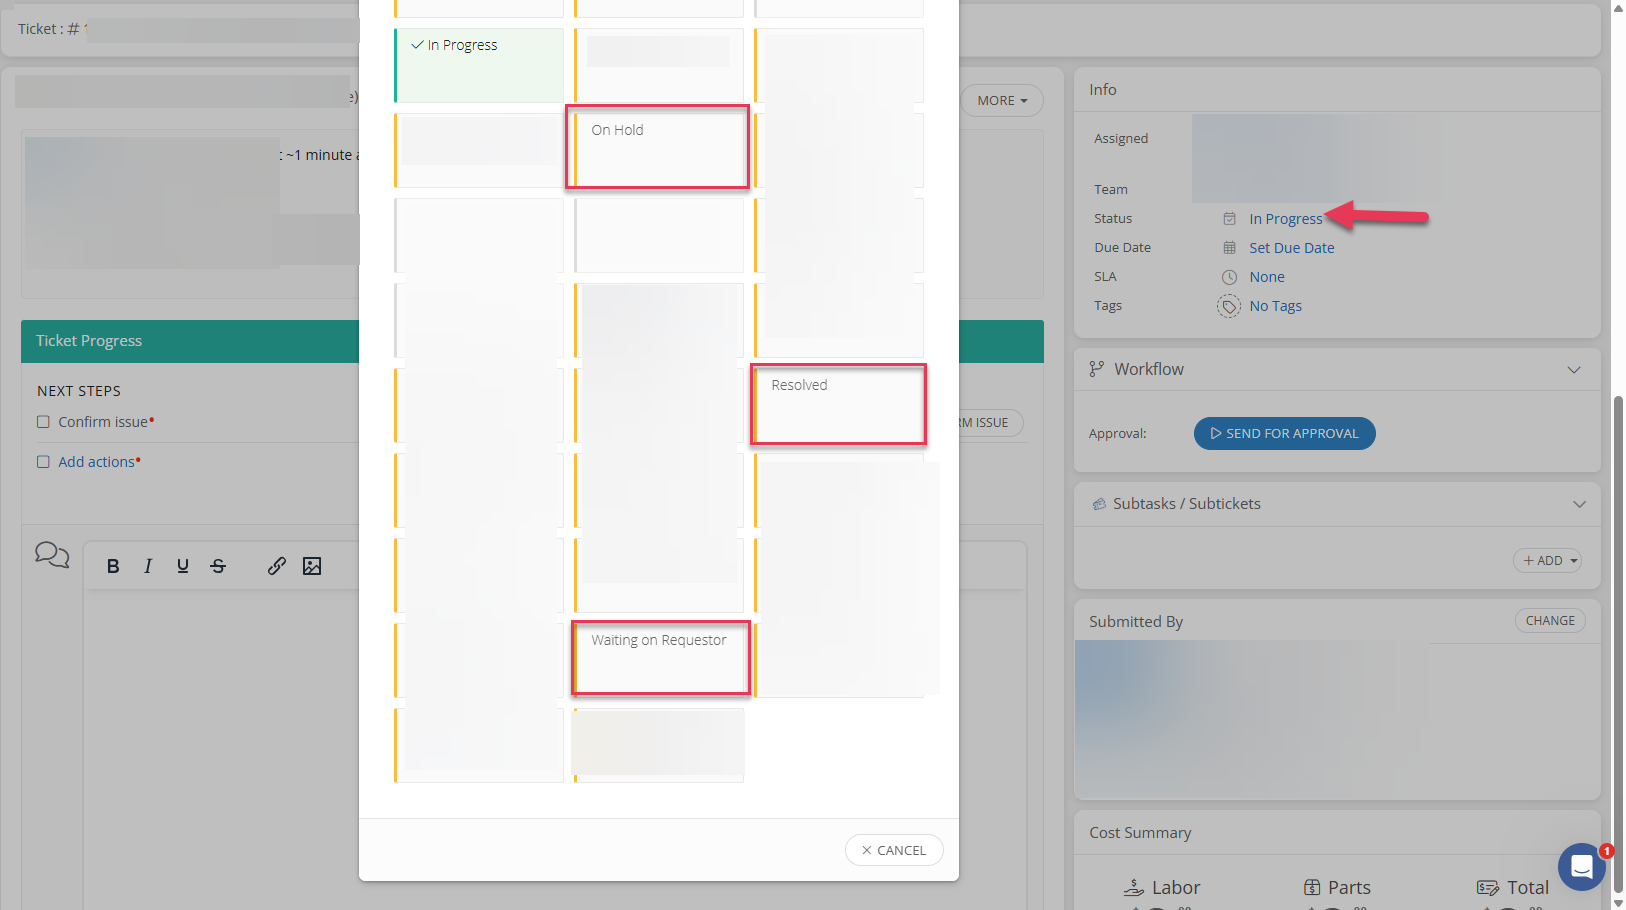
Step 5 – Update Ticket Status
-
Do not leave a ticket in In Progress once you’ve taken an action.
-
Mostly Commonly used statuses to use:
-
Waiting on Requestor → you’re waiting for more info or confirmation from submitter.
-
Resolved → issue has been fixed. (Issue Type, Assets, and Actions will need to be completed first, before you can resolve the ticket)
-
On Hold → paused due to outside factors (e.g., vendor support needed etc).
-
If you leave the ticket in the “Waiting on Requestor” status follow ups will be sent automatically and if no response is received the ticket will close.
🔗 See detailed guide: Managing Ticket Status
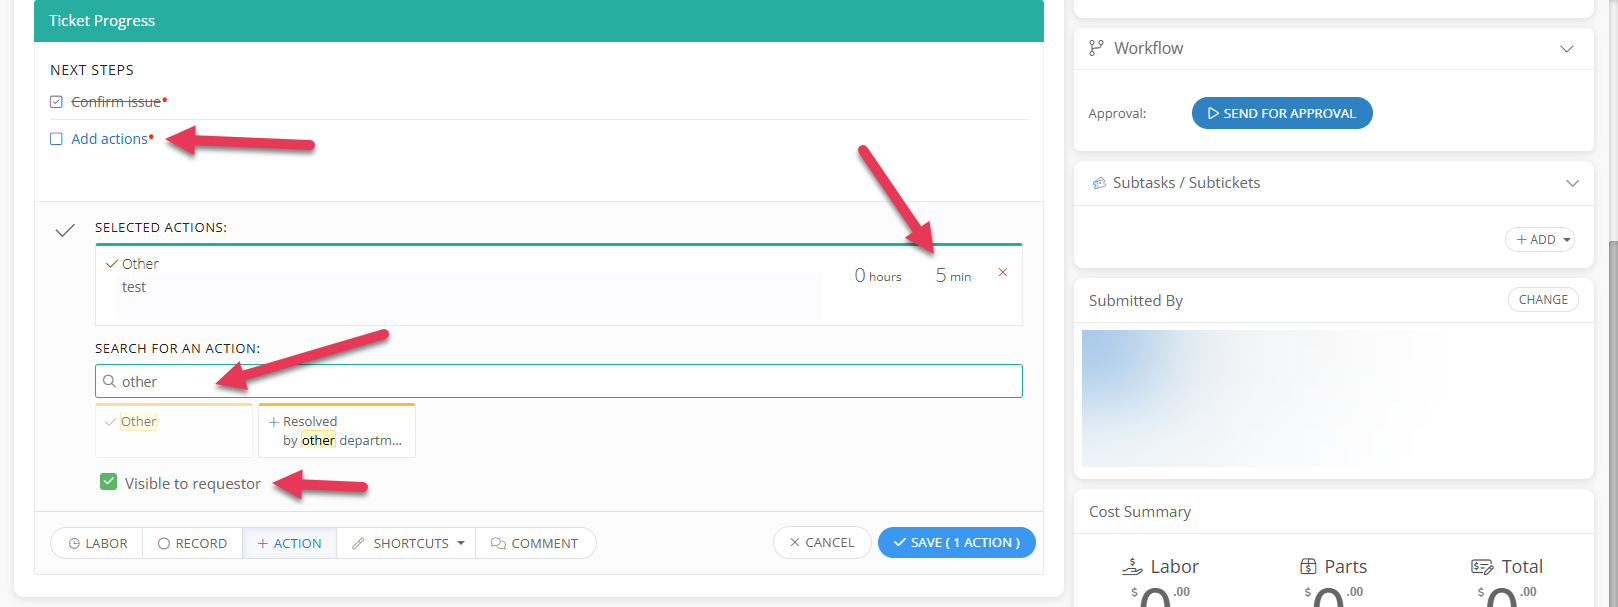
Step 6 – Add Action Items
-
Before resolving, you must add Action items to document what you did.
-
Example: “Other - Reinstalled printer driver – – 15 minutes.”
-
-
You can search for an action to see if it is available or there are suggest actions that will populate.
-
If you’re not able to find a specific action you can use the “Other” action or “Provided Training & Support” and notate what was done.
-
-
Always include the time spent on the task.
You can alter the visibility of the action items by selecting or deselecting Visible to Requestor.
🔗 See detailed guide: Adding Action Items
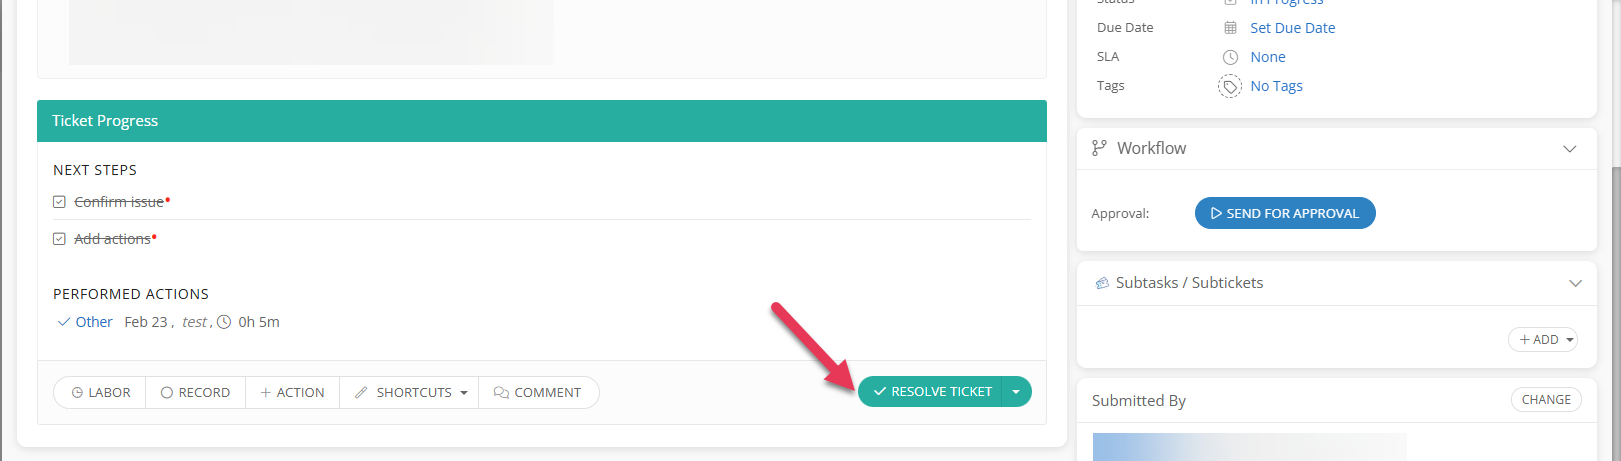
Step 7 – Resolve the Ticket
-
Double-check:
-
Correct Submitted By or On behalf of Users and Location.
-
Issue type has been confirmed or updated.
-
Comments and action items are logged.
-
-
Change the status to Resolved.
-
The requestor will be notified and the system will close the loop.
As you can see the required actions (indicated with a red asterisk) were completed so now we’re able to mark the ticket Resolved.
🔗 See detailed guide: Resolving a Ticket
Still have questions? Visit the Additional Help section for further assistance.